
Orange Pi RK3399: HDMI recording on a budget // Review
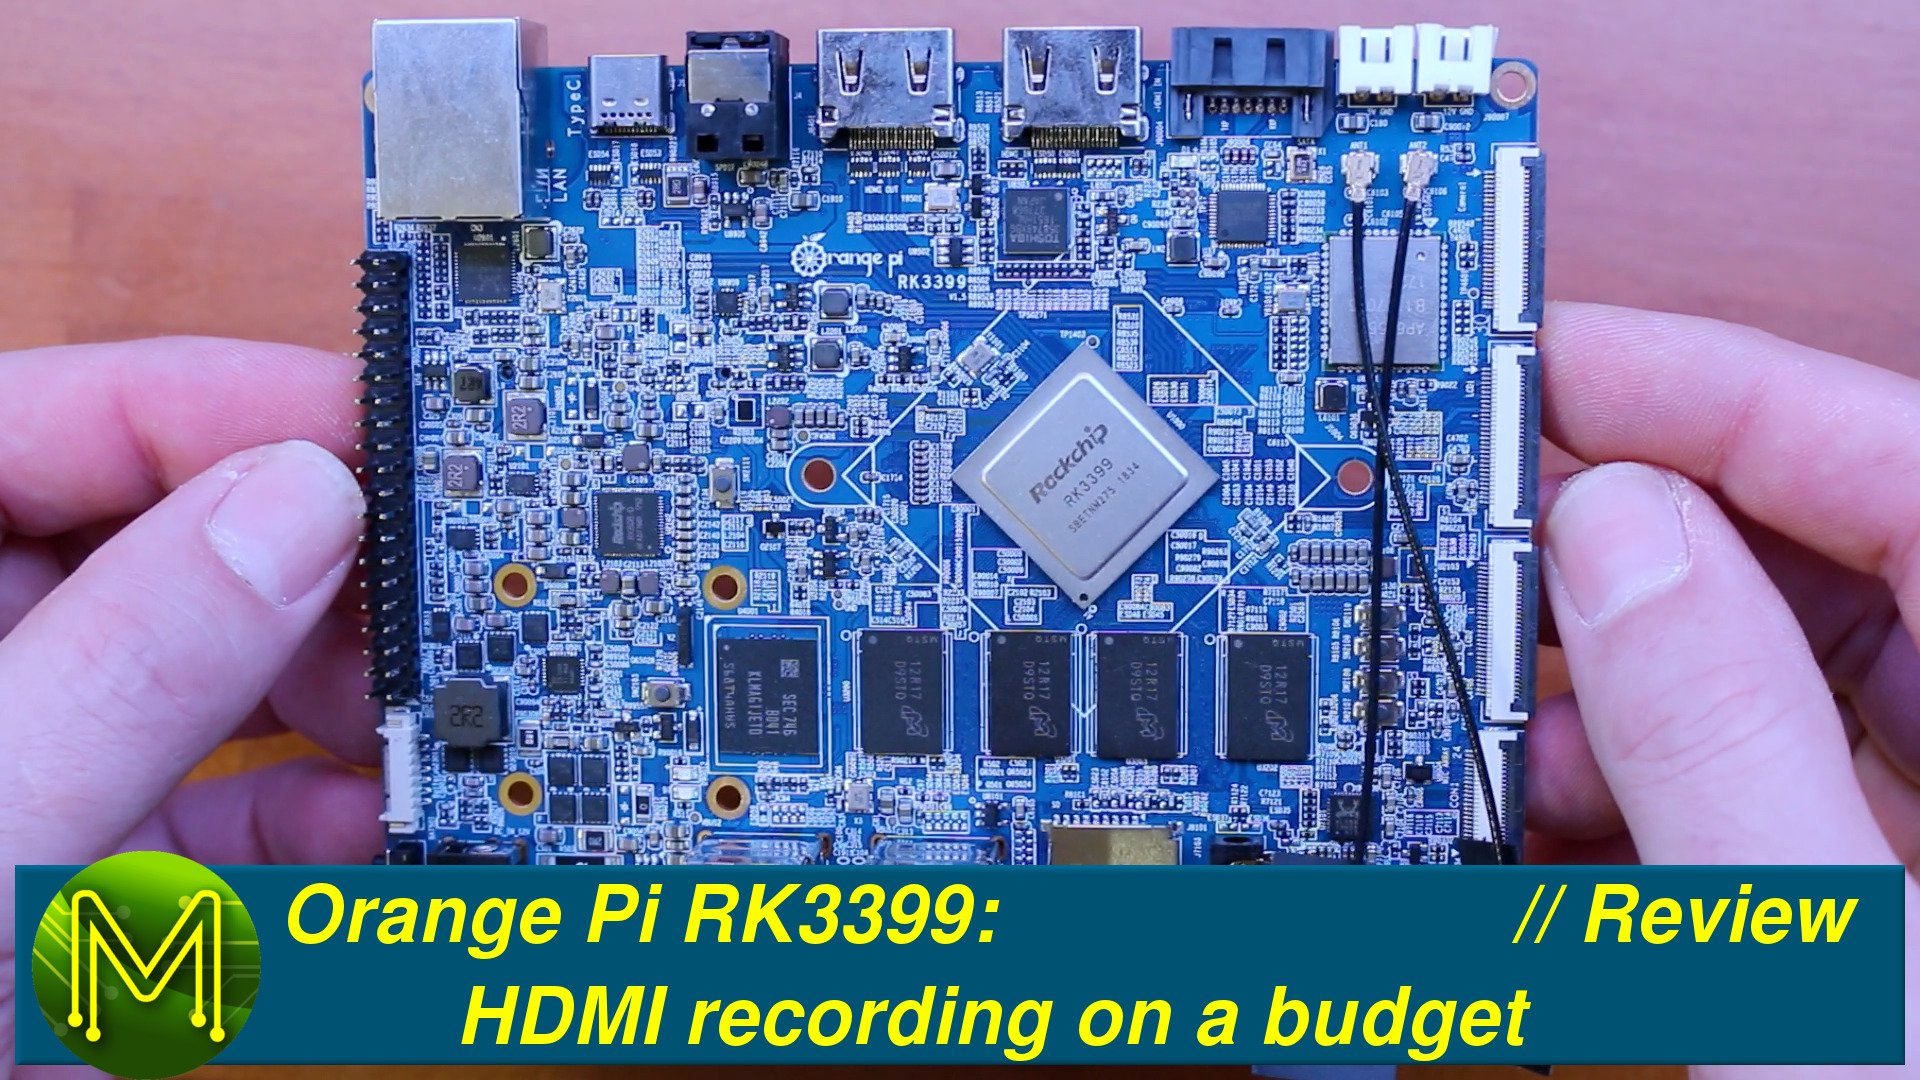
The Orange Pi RK3399 is yet another board to join the ranks of other RK3399 based SBCs. In true Orange Pi fashion, they give you everything, but is this SBC worth it?
Unboxing
Occasionally I’ll be given an SBC for review, but like most of my reviews I purchased this one. If you saw my previous mailbag video, you would have seen how Orange Pi shipped this board.
Even though it was securely wrapped, I would have expected a bit more effort into packaging, but anyway…You can see that a heck of a lot has been broken out from the RK3399 SoC, more than any other SBC on the market.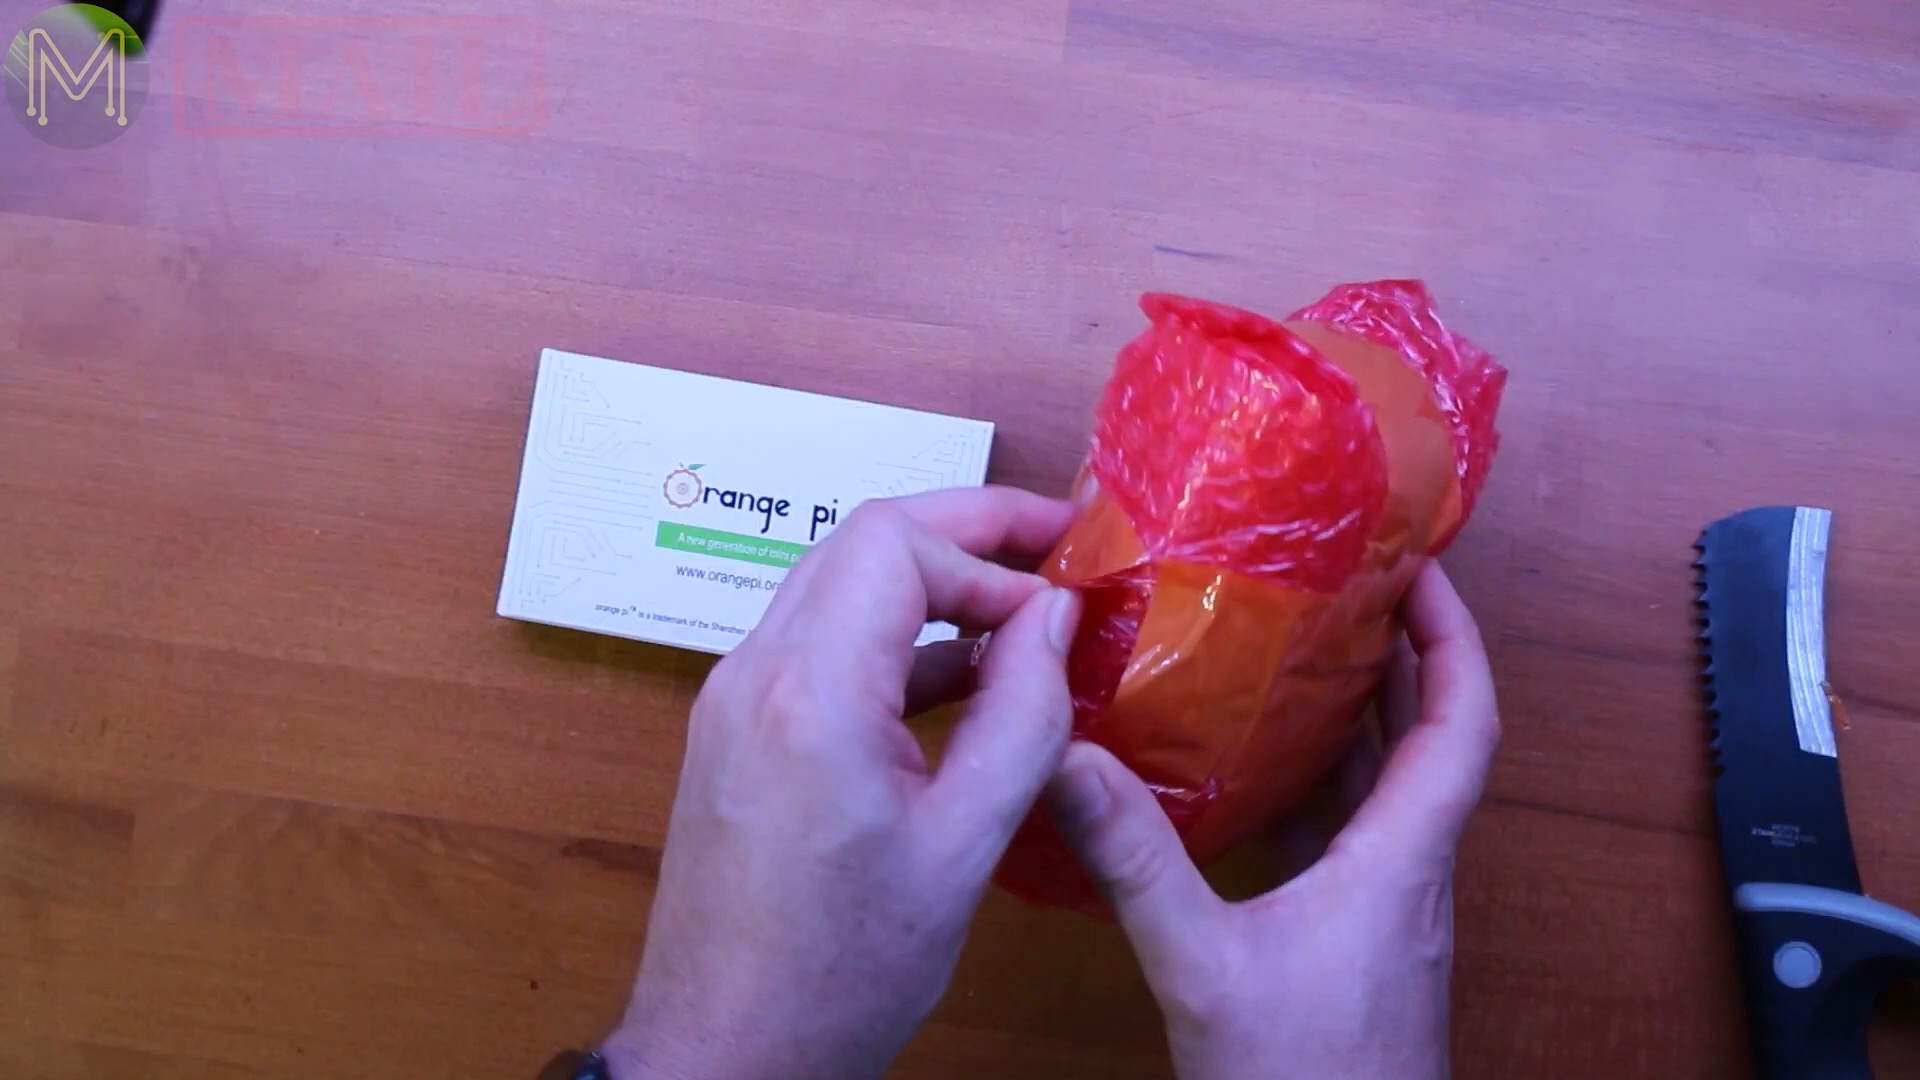
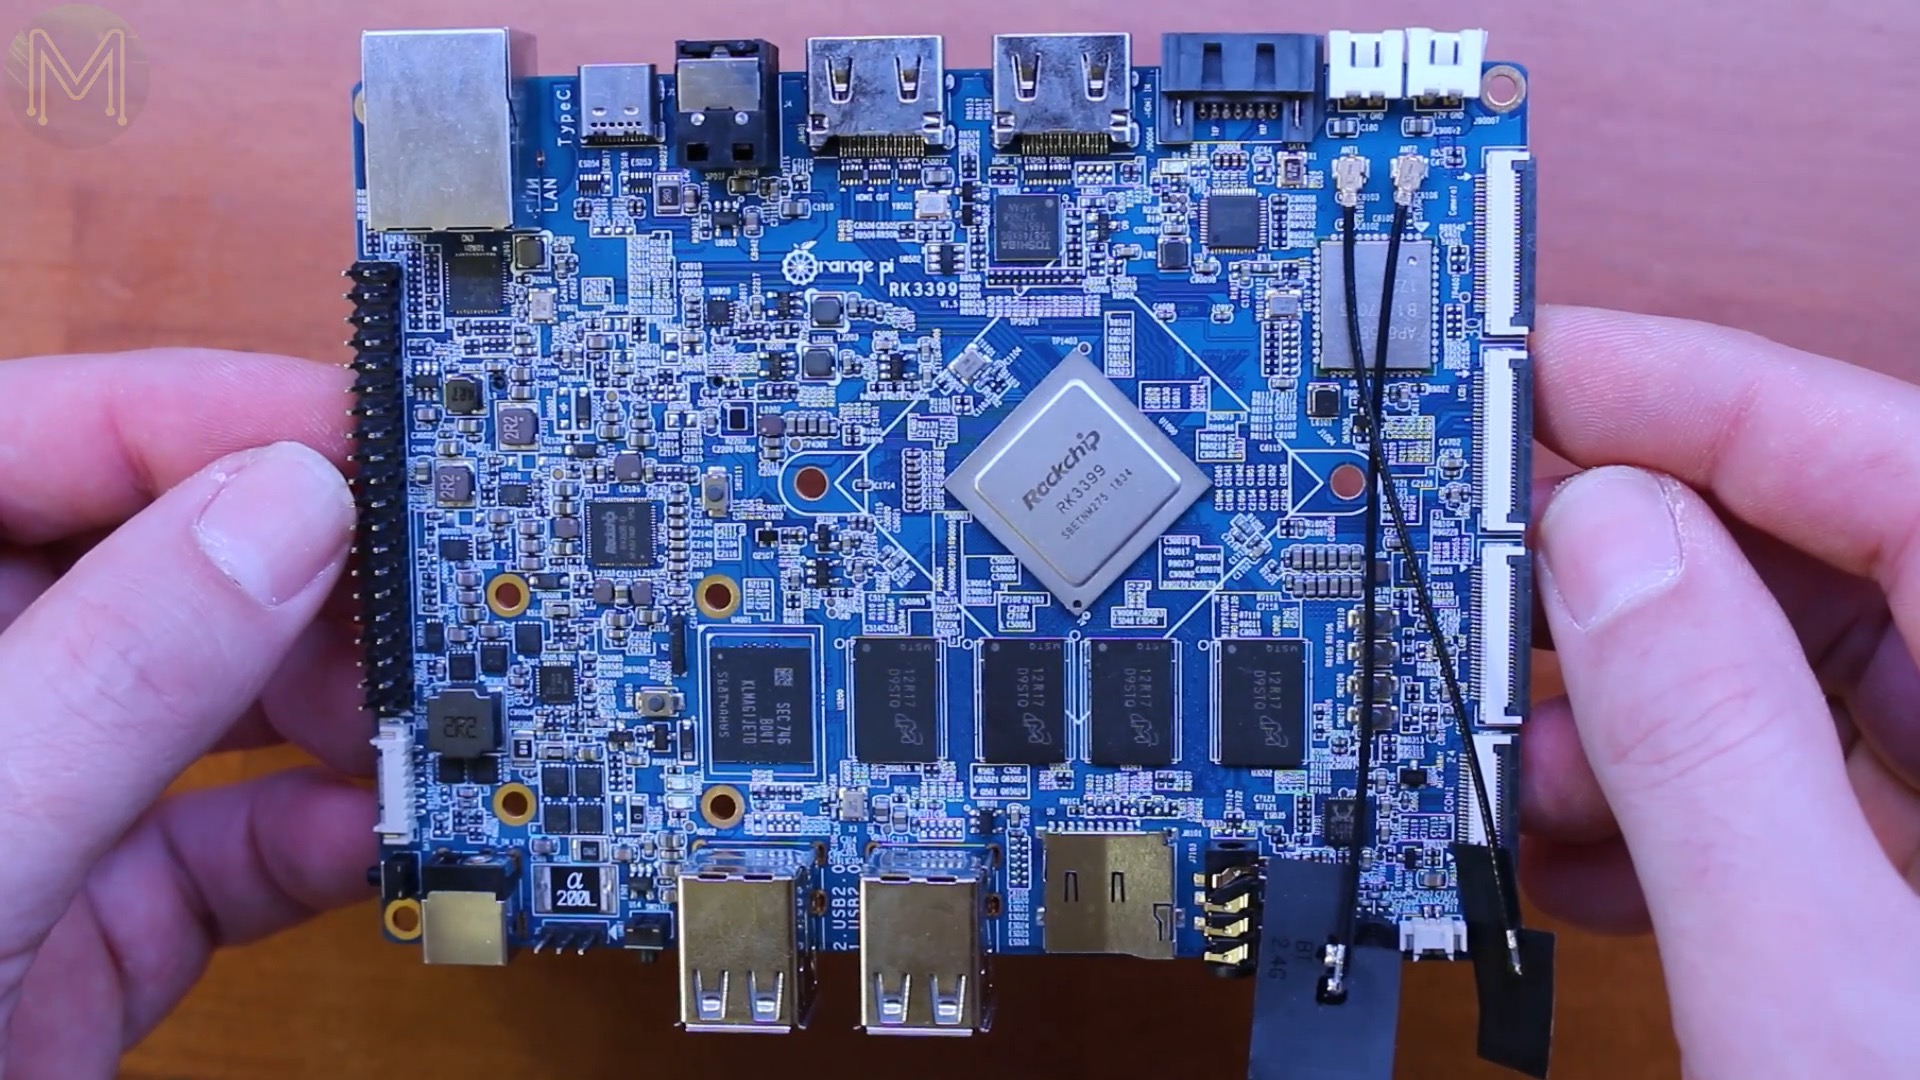
Topside
So, what does this little baby give you? Starting from the top right working clockwise.
- The first of two MIPI-CSI interfaces
- two MIPI-LCD interfaces
A couple of buttons to mash, which in the documentation have been assigned,
- Menu
- Return
- Volume down and
- Volume up
Then, there’s:
- Speaker output
- MIC
- IR receiver
- Audio in/out jack
- SD slot
- 4x USB2.0 ports
- Recovery button
- Debug serial
- 12v 2A DC jack… nice
- External battery connector
- Reset button
- Loosely compatible Pi header
- GbE
- USB Type-C, even better
- SPDIF out
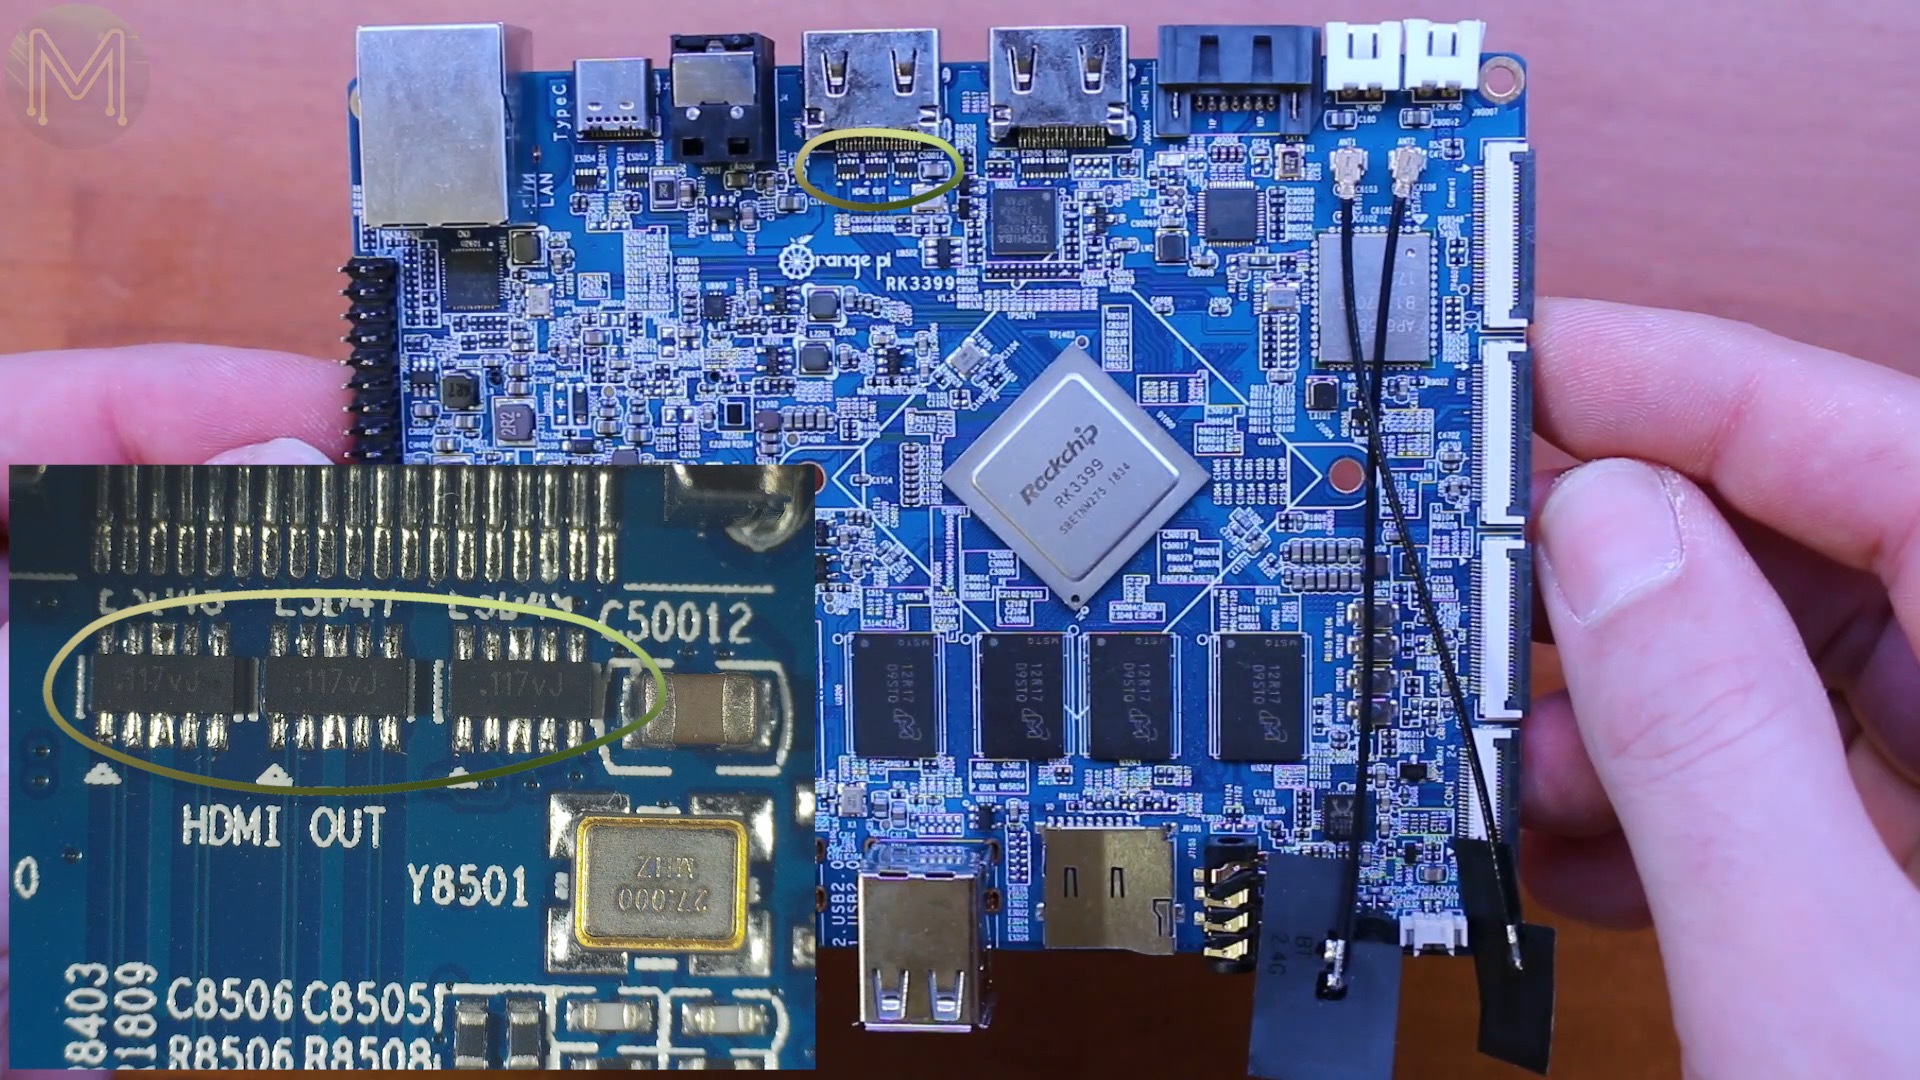
- HDMI out
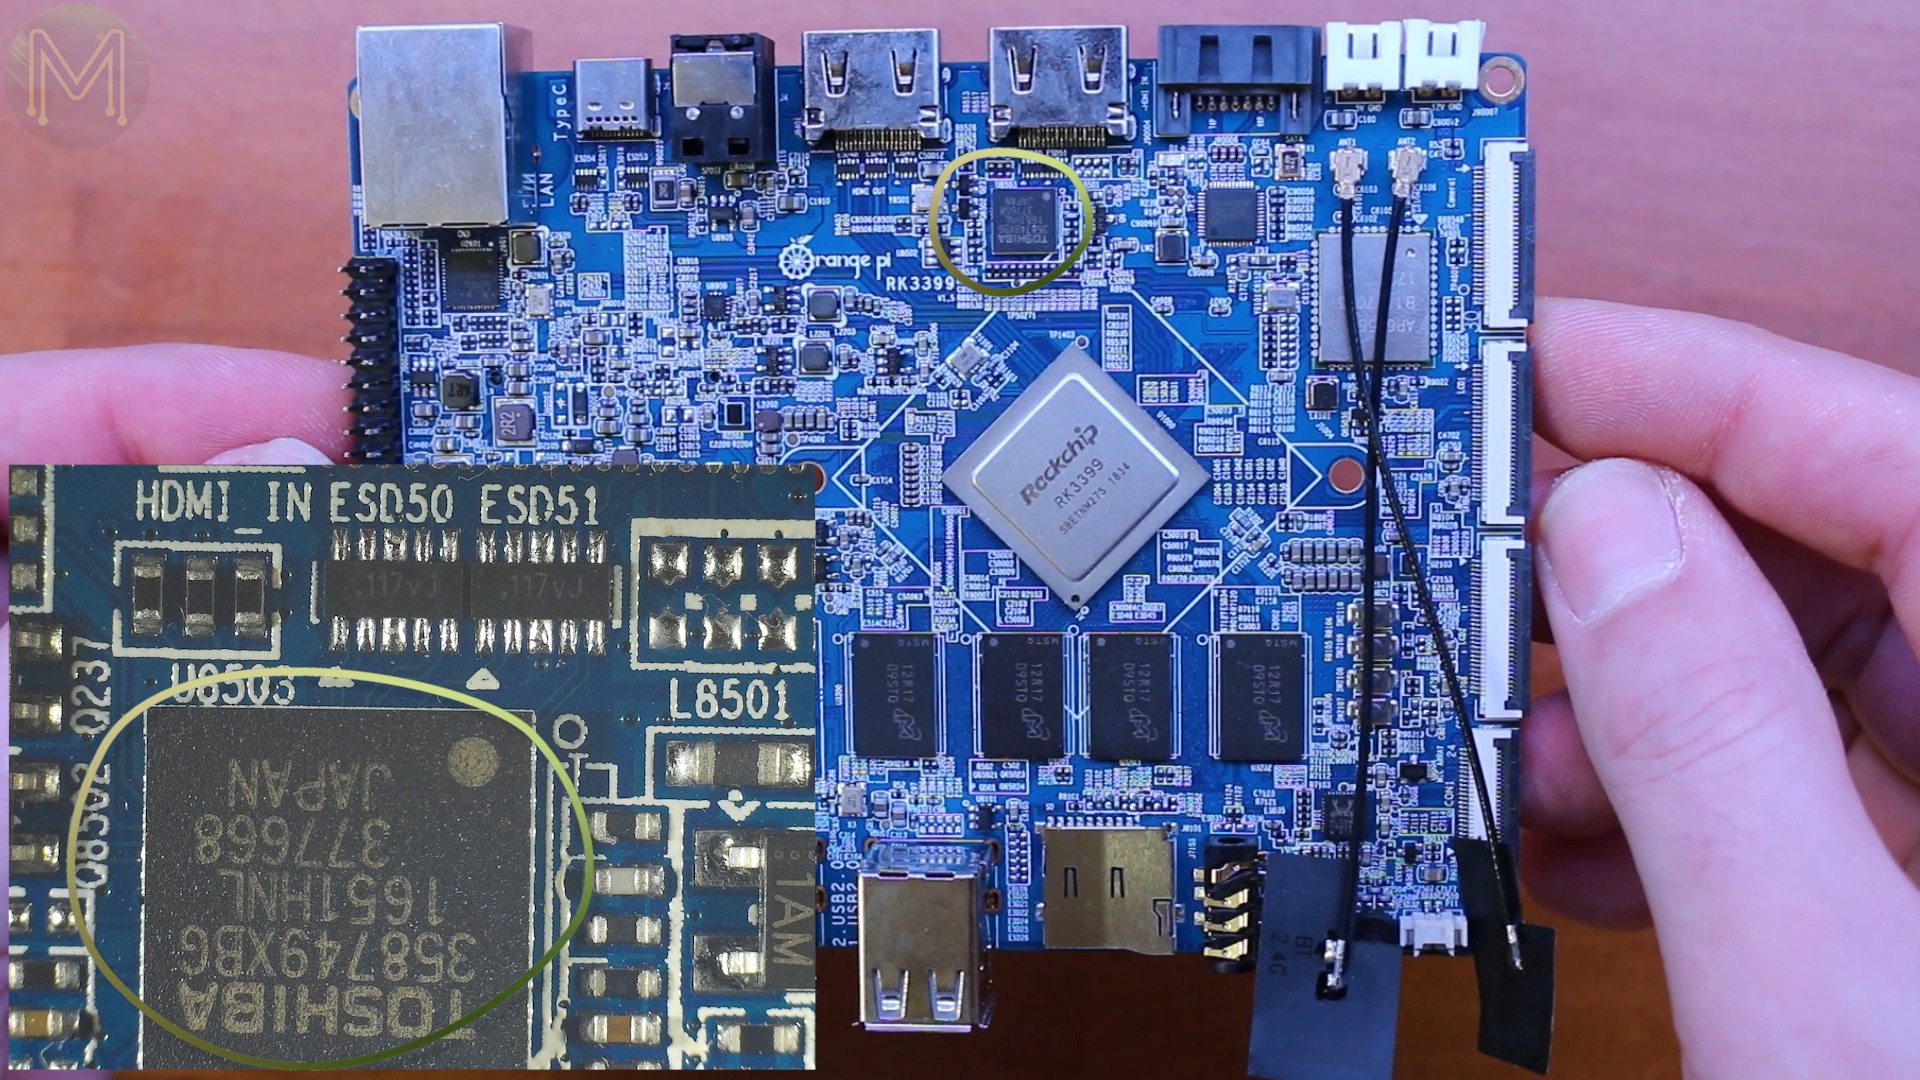
- and something that we’ve all been waiting for, HDMI in
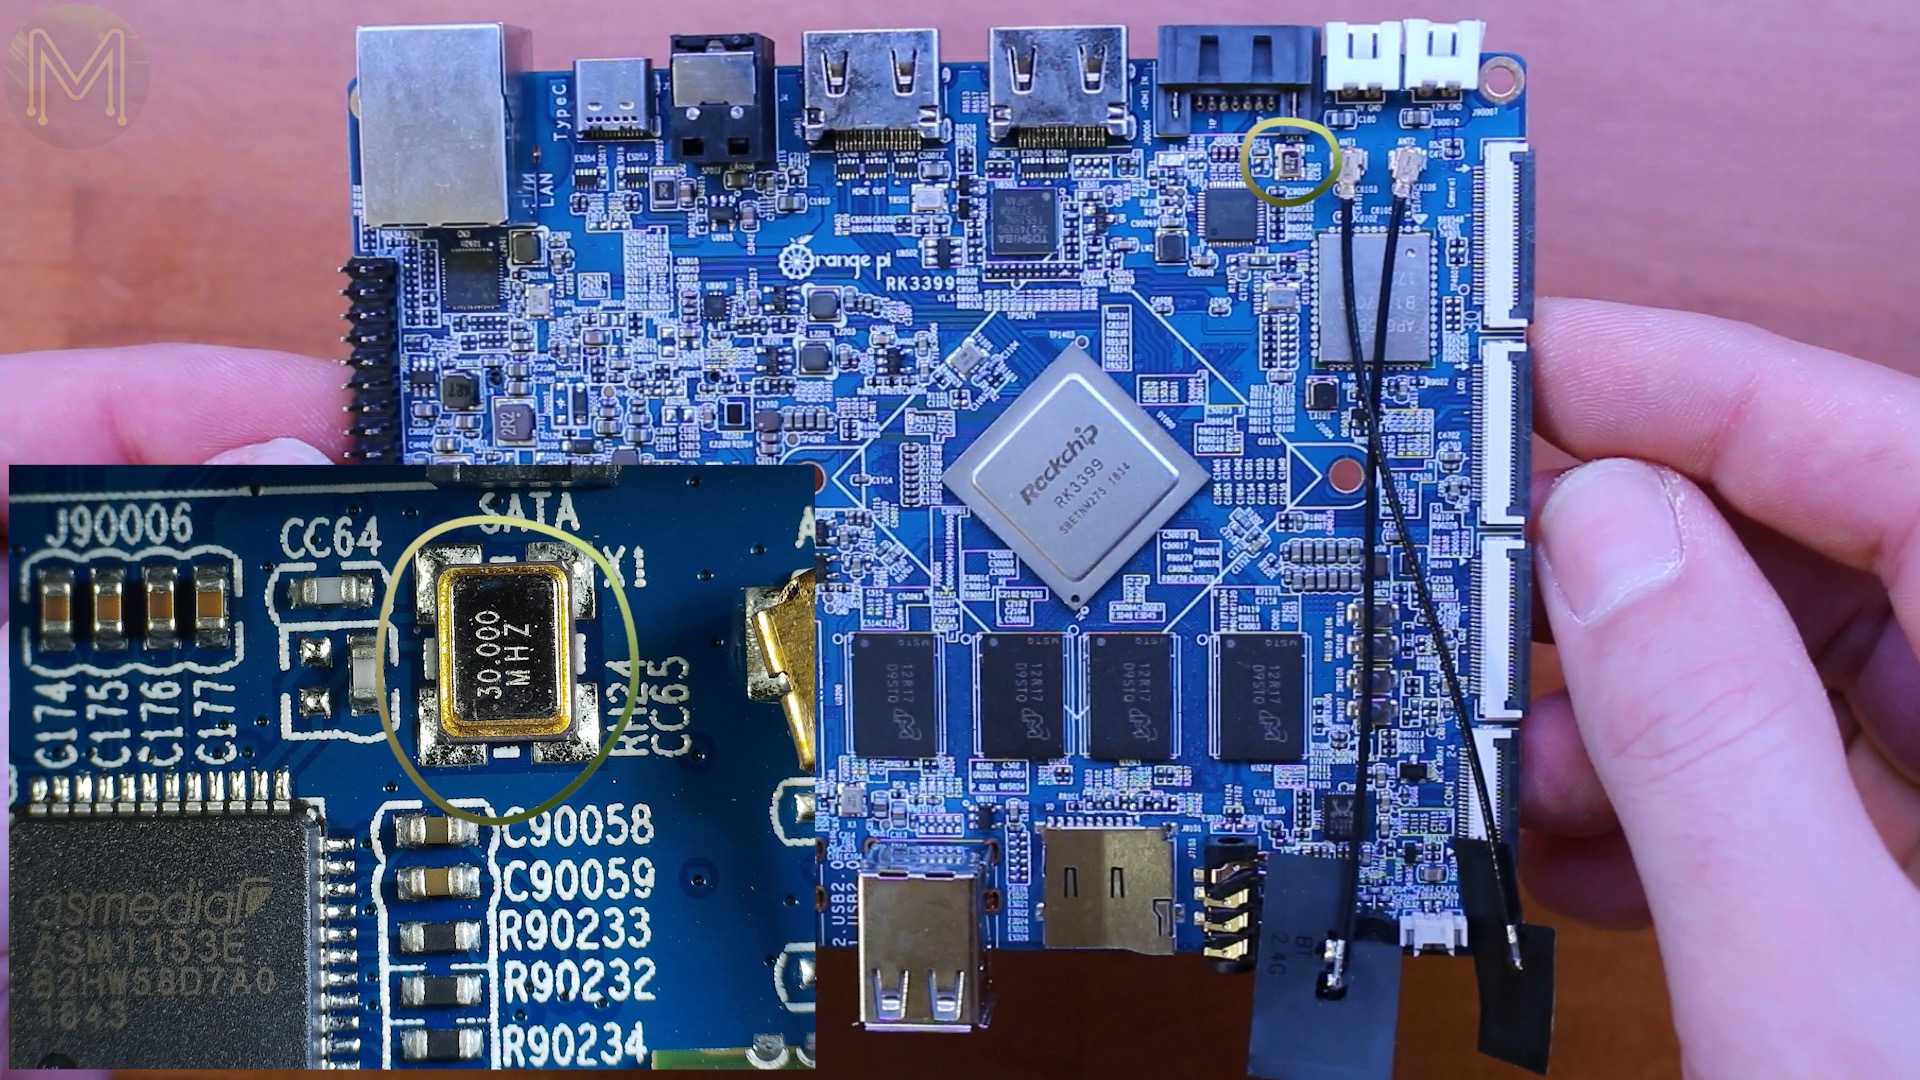
- Also mSATA
- WiFi and Bluetooth connectors
- 5v 2A power header
- and a 12v 2A one
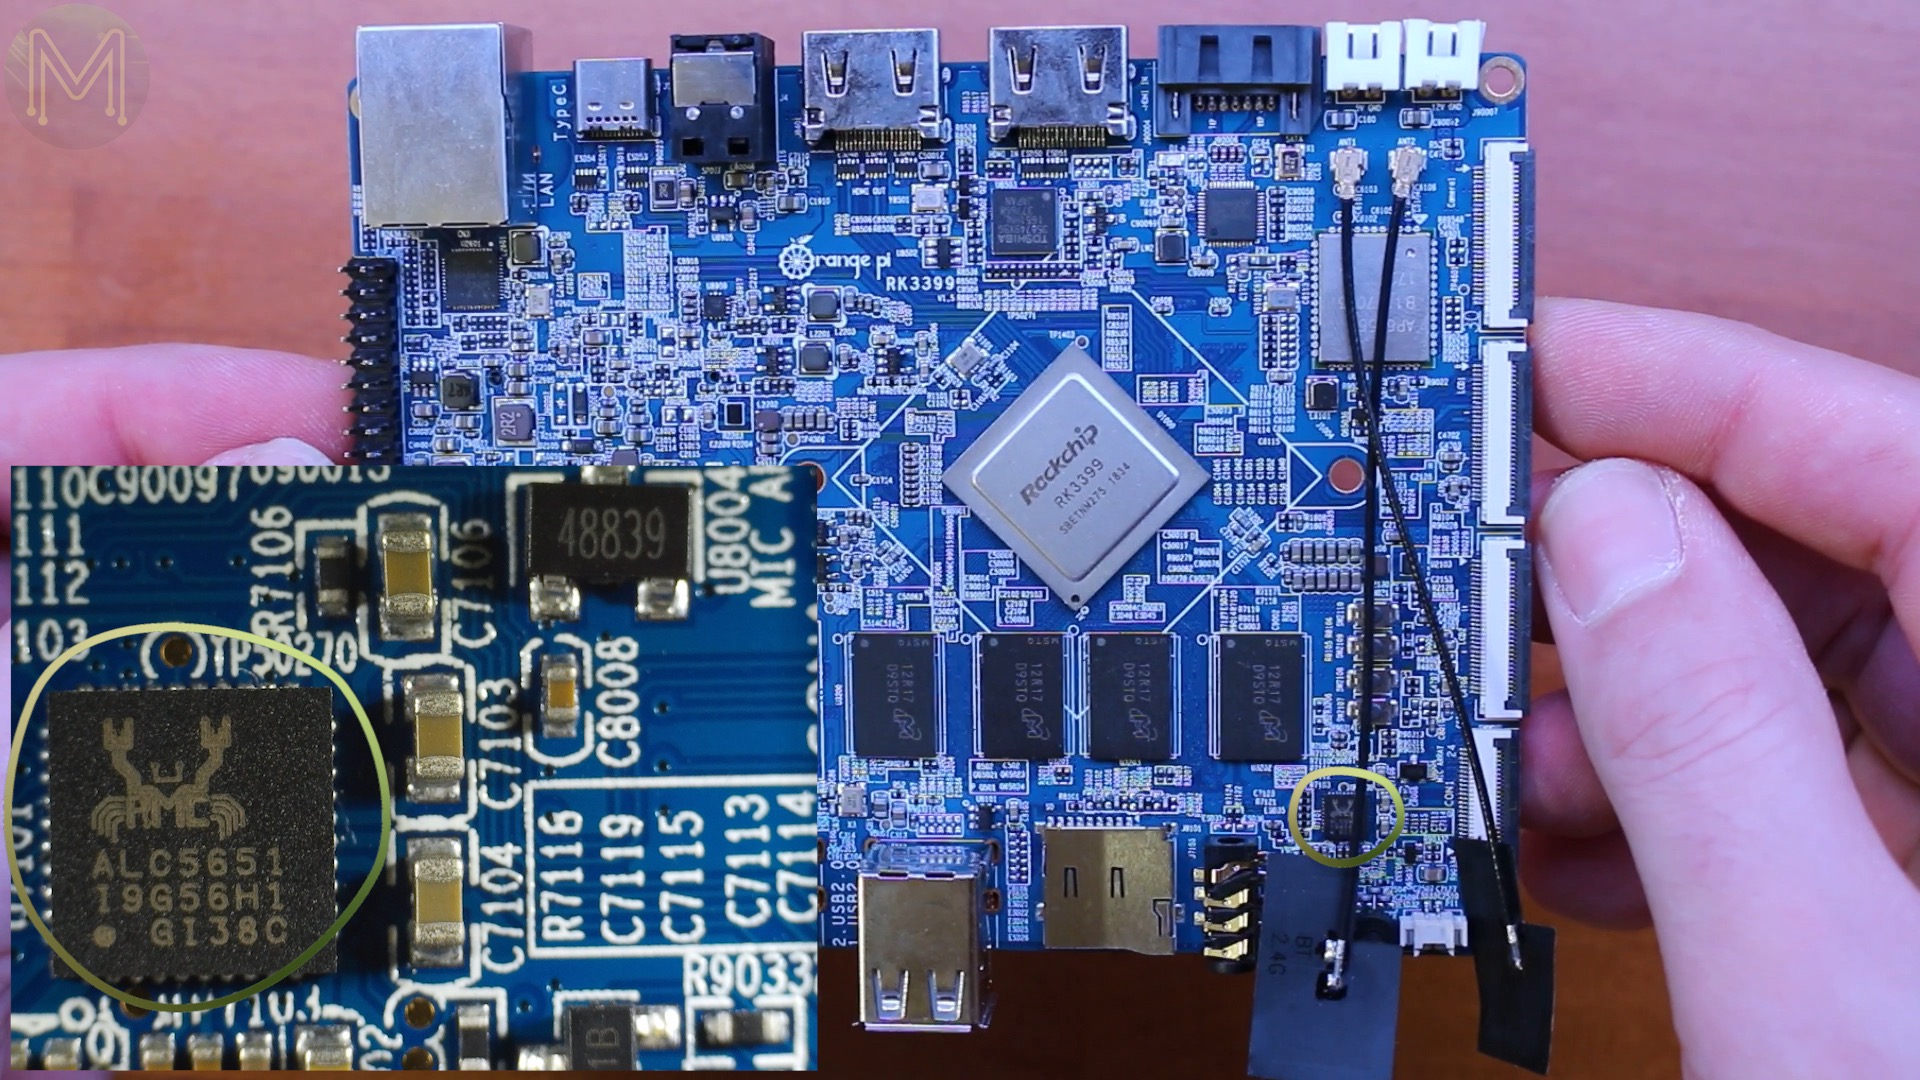
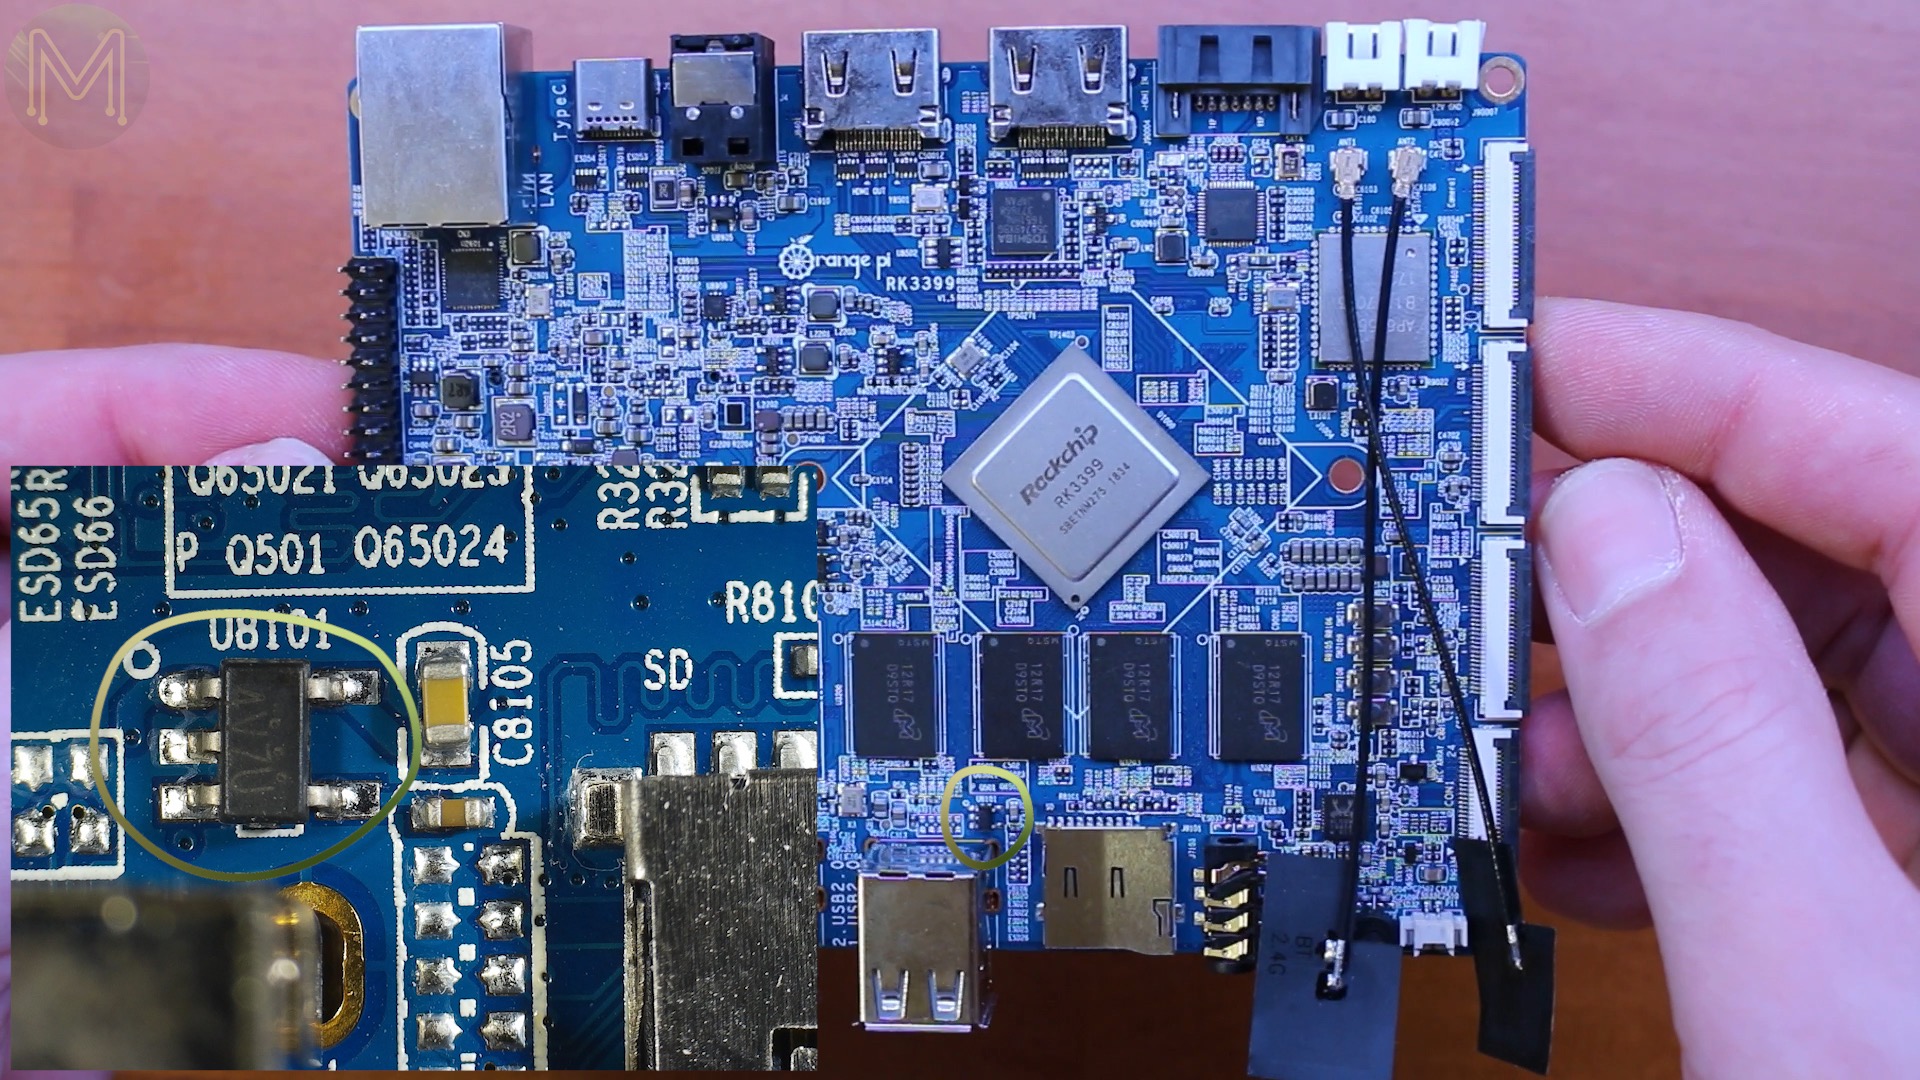
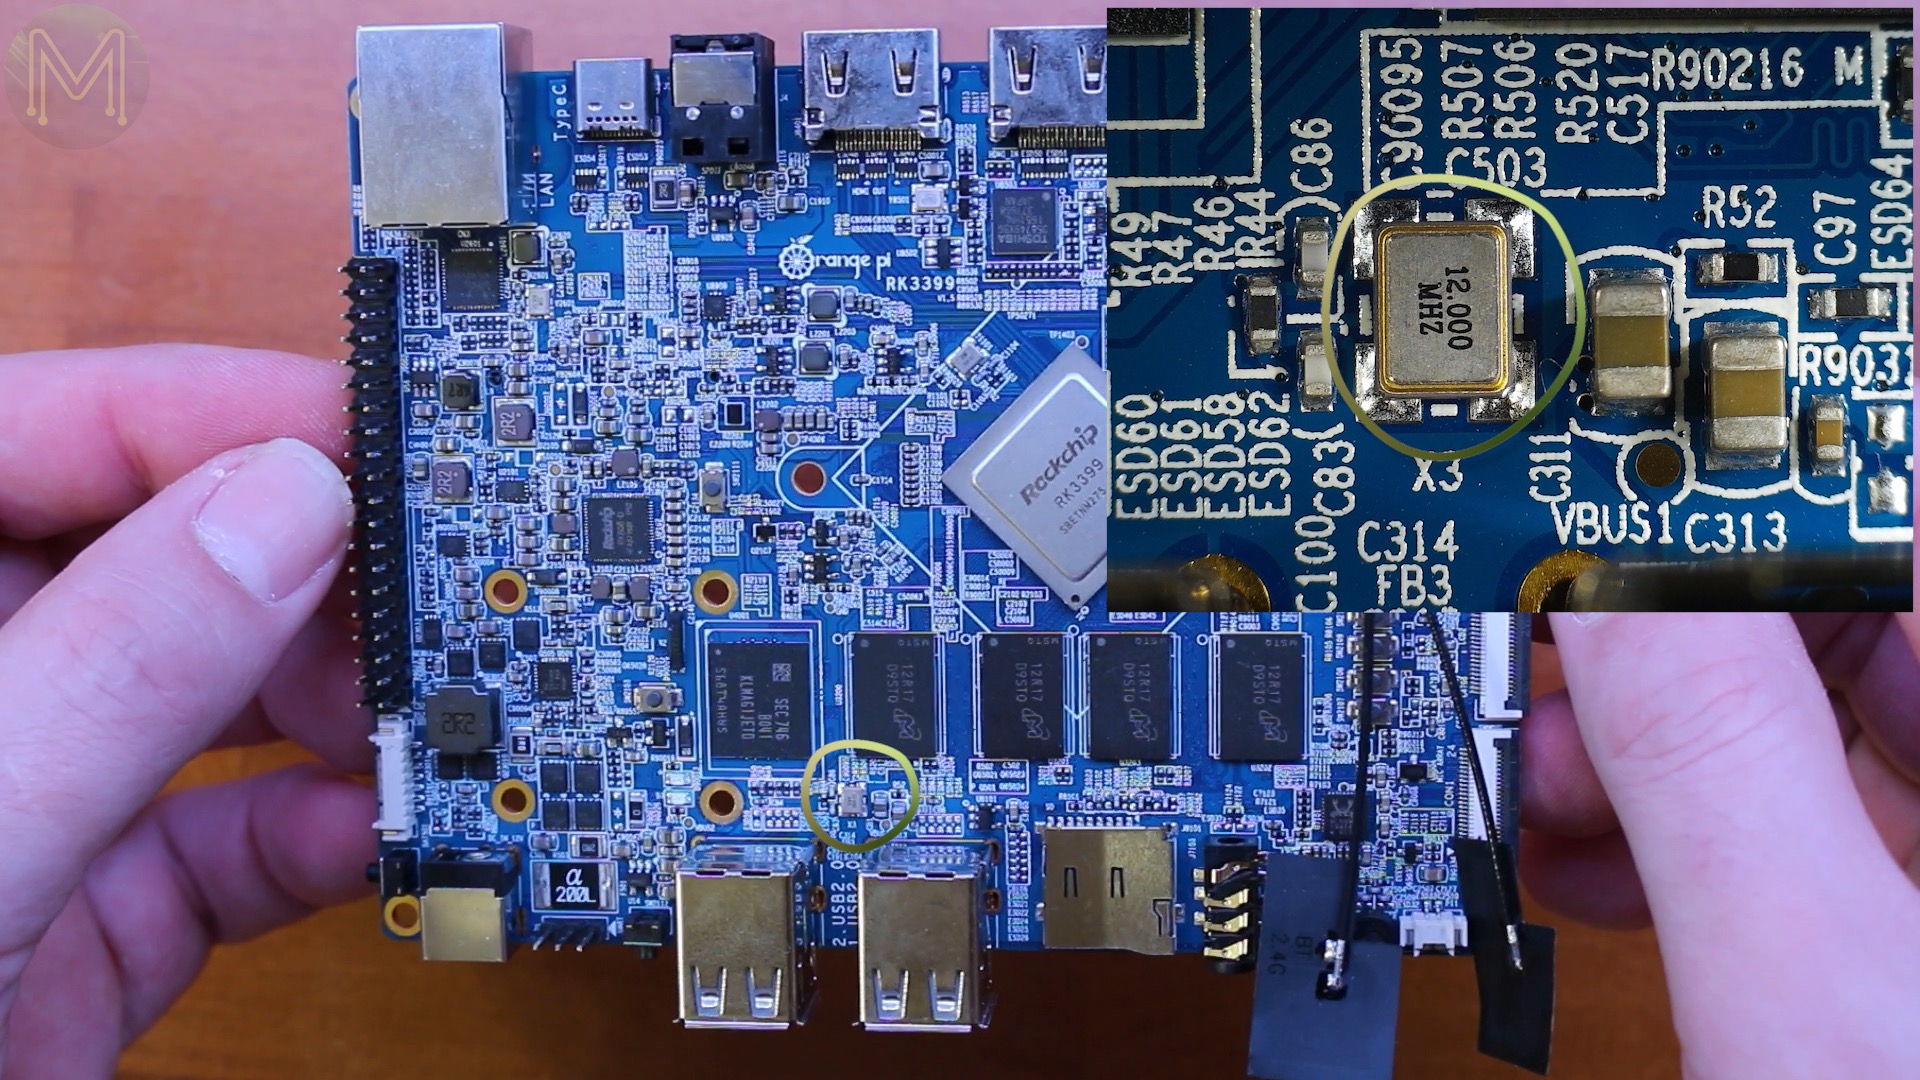
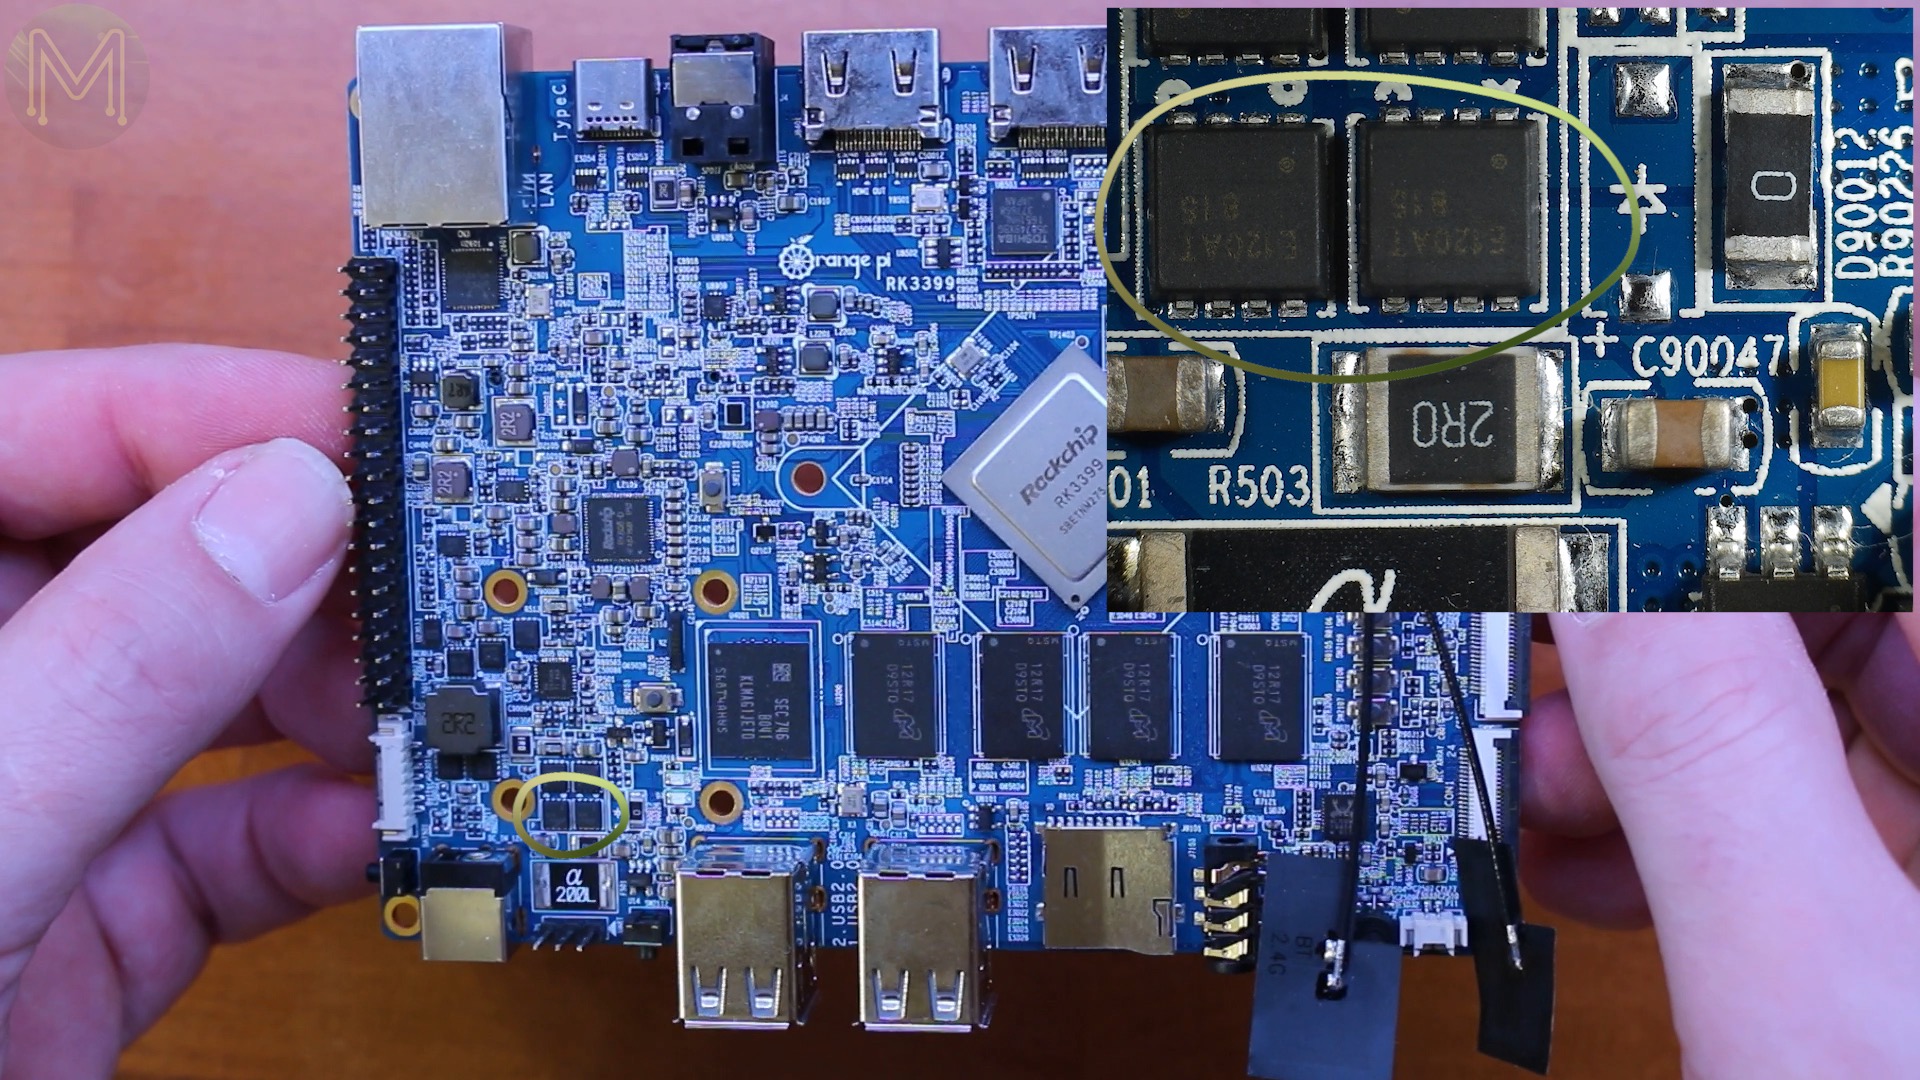
On the semi side, we have
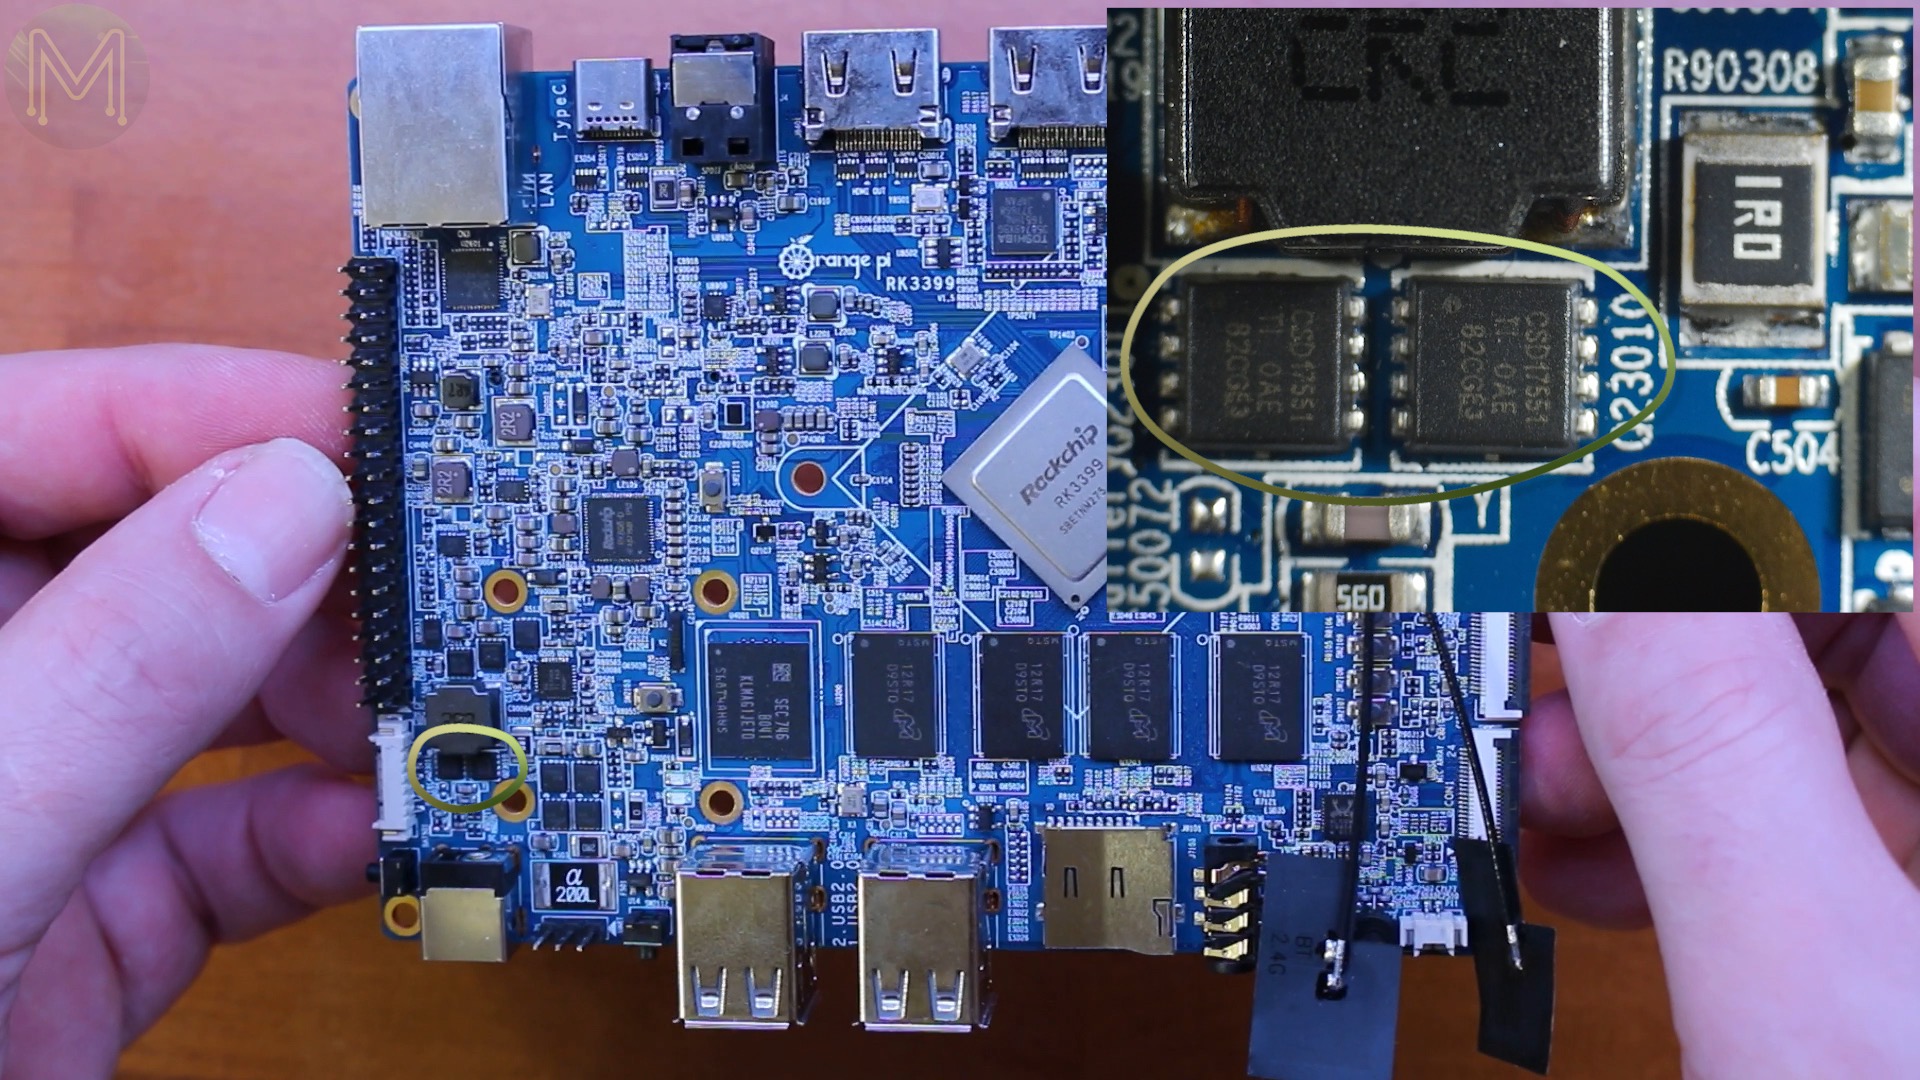
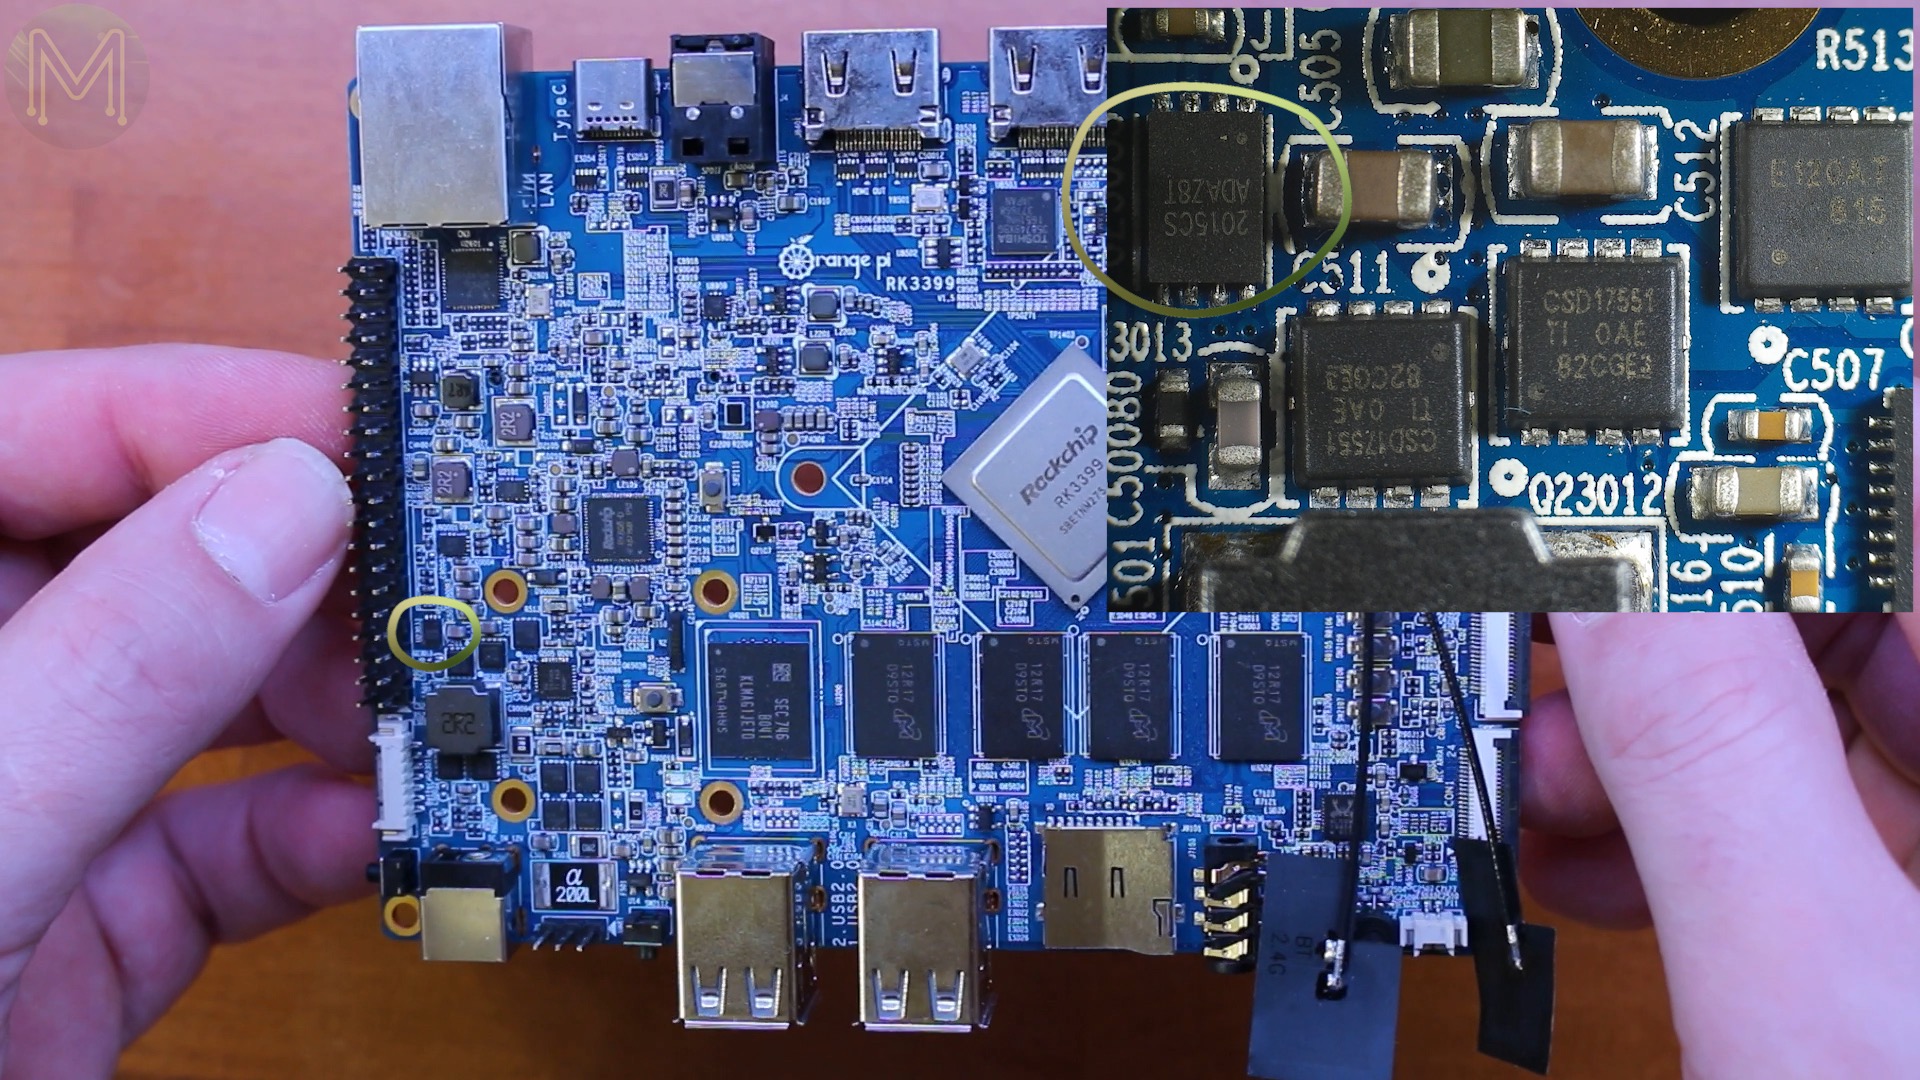
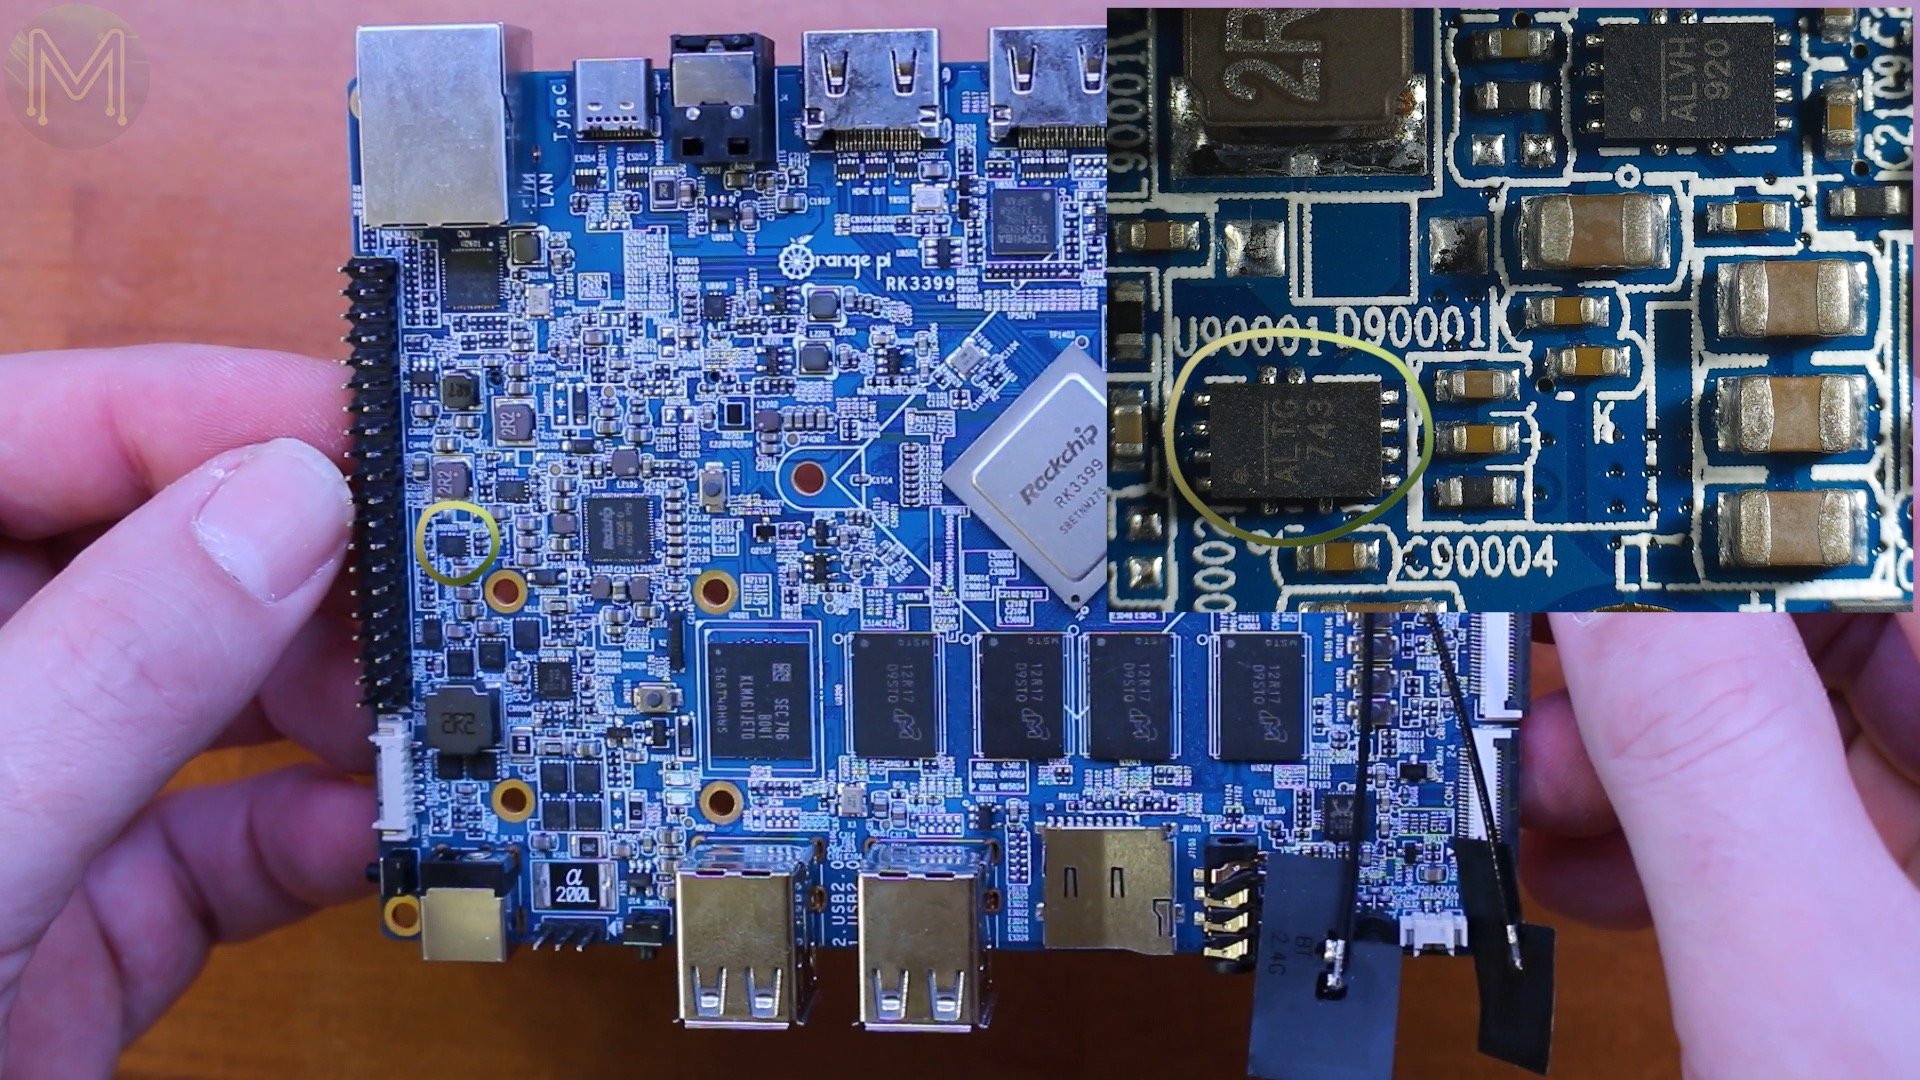
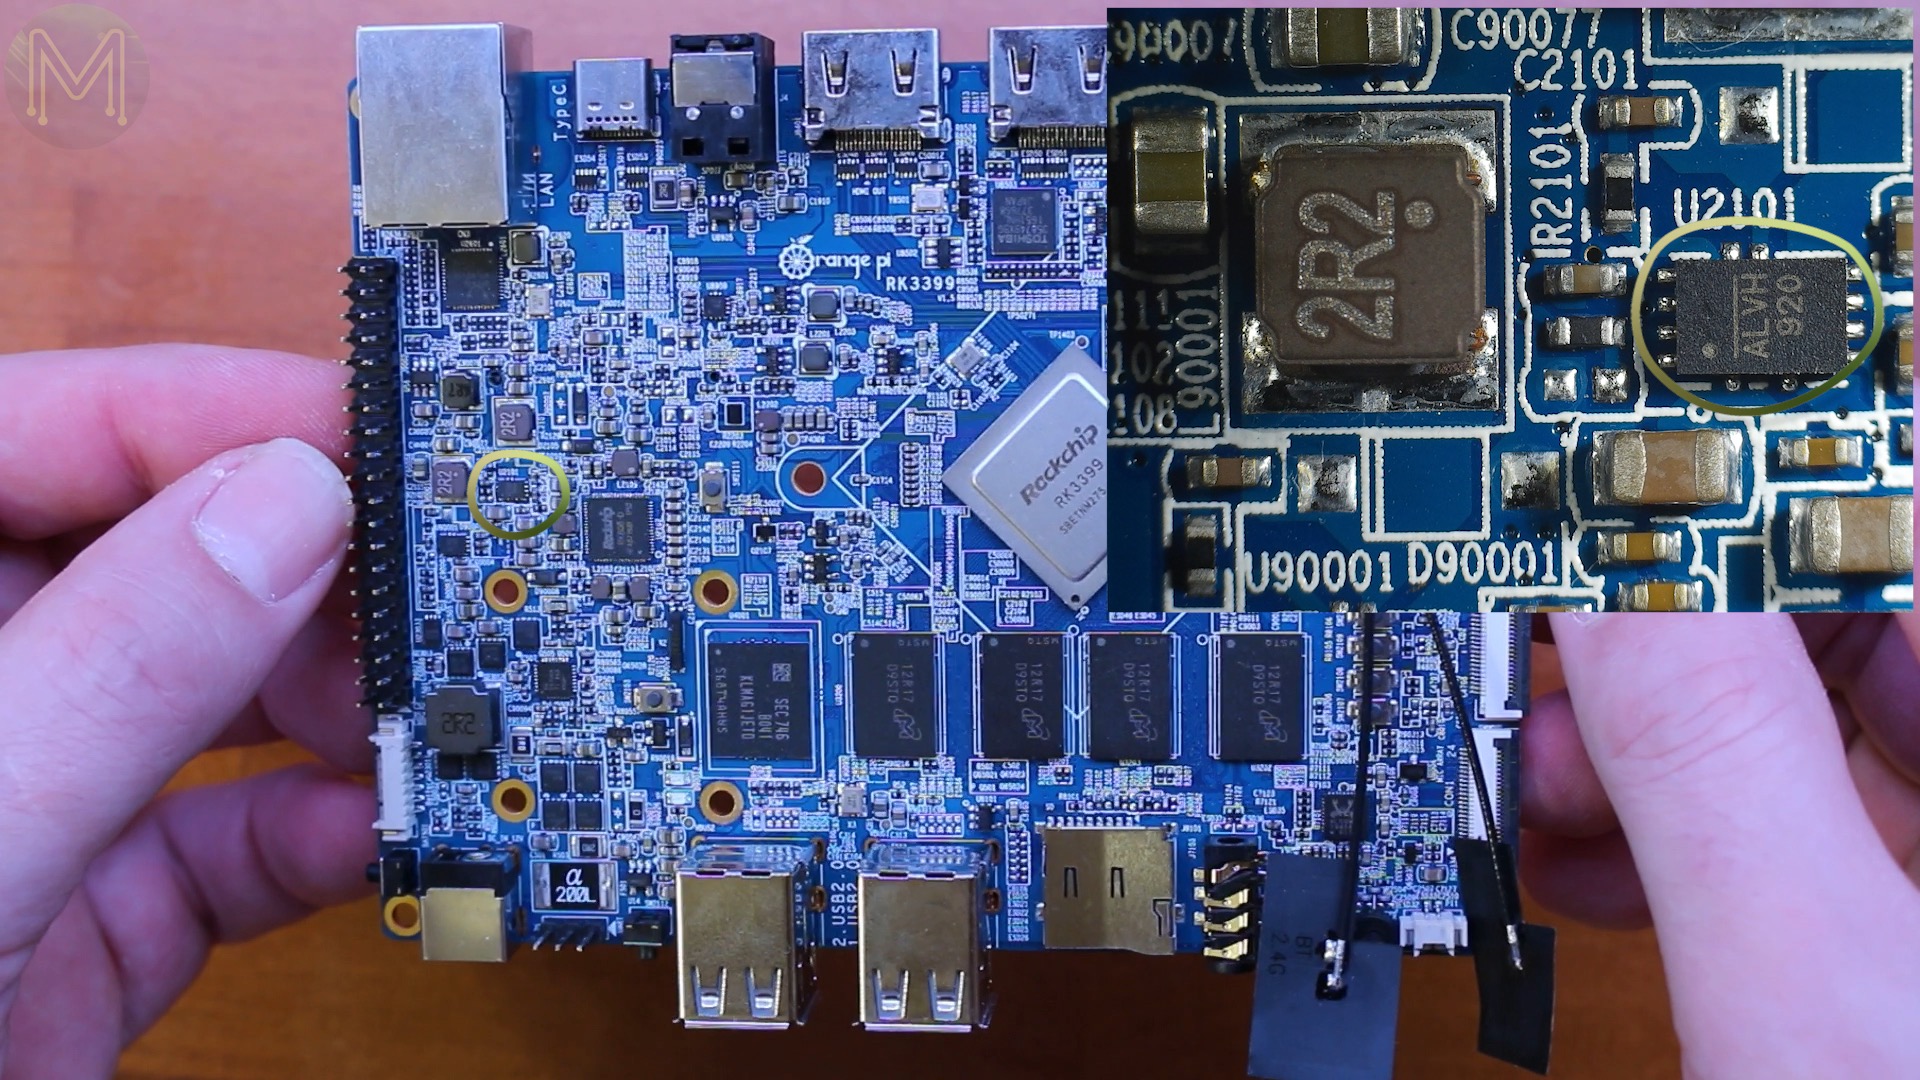
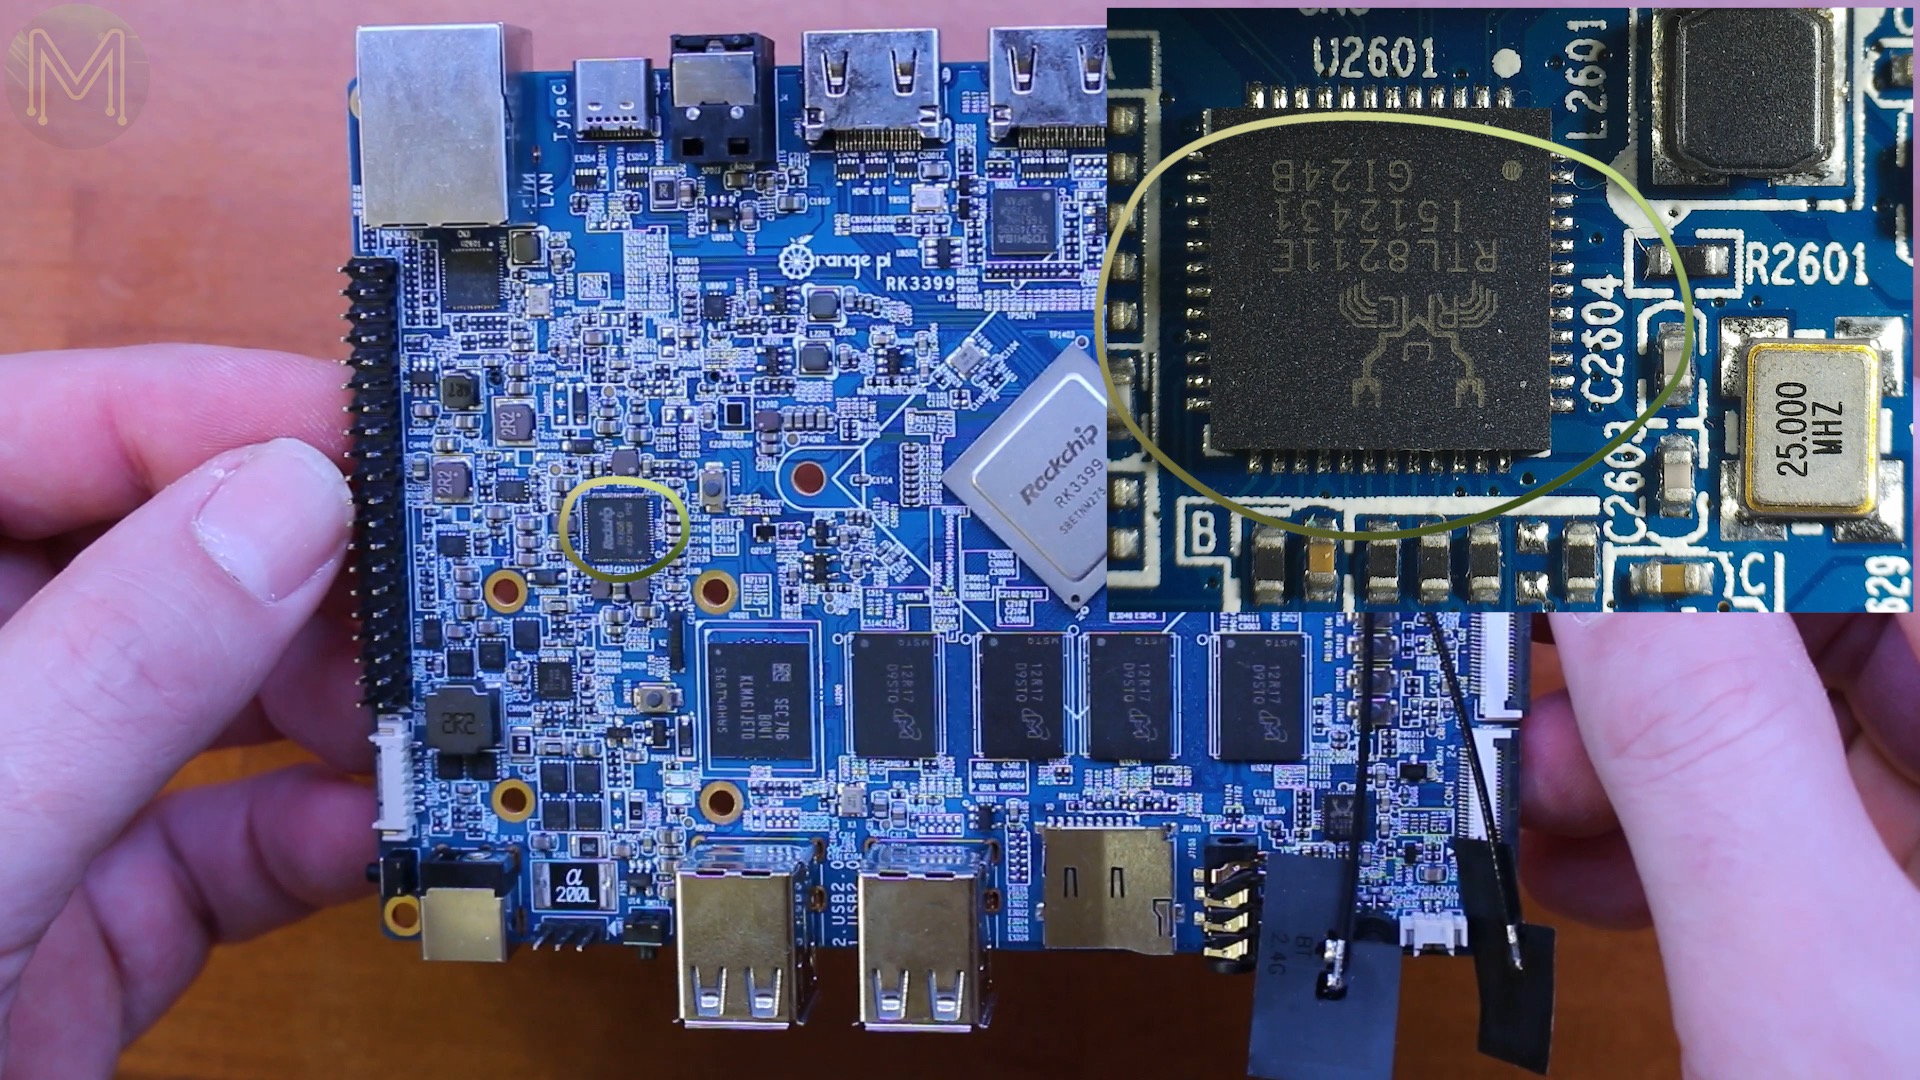
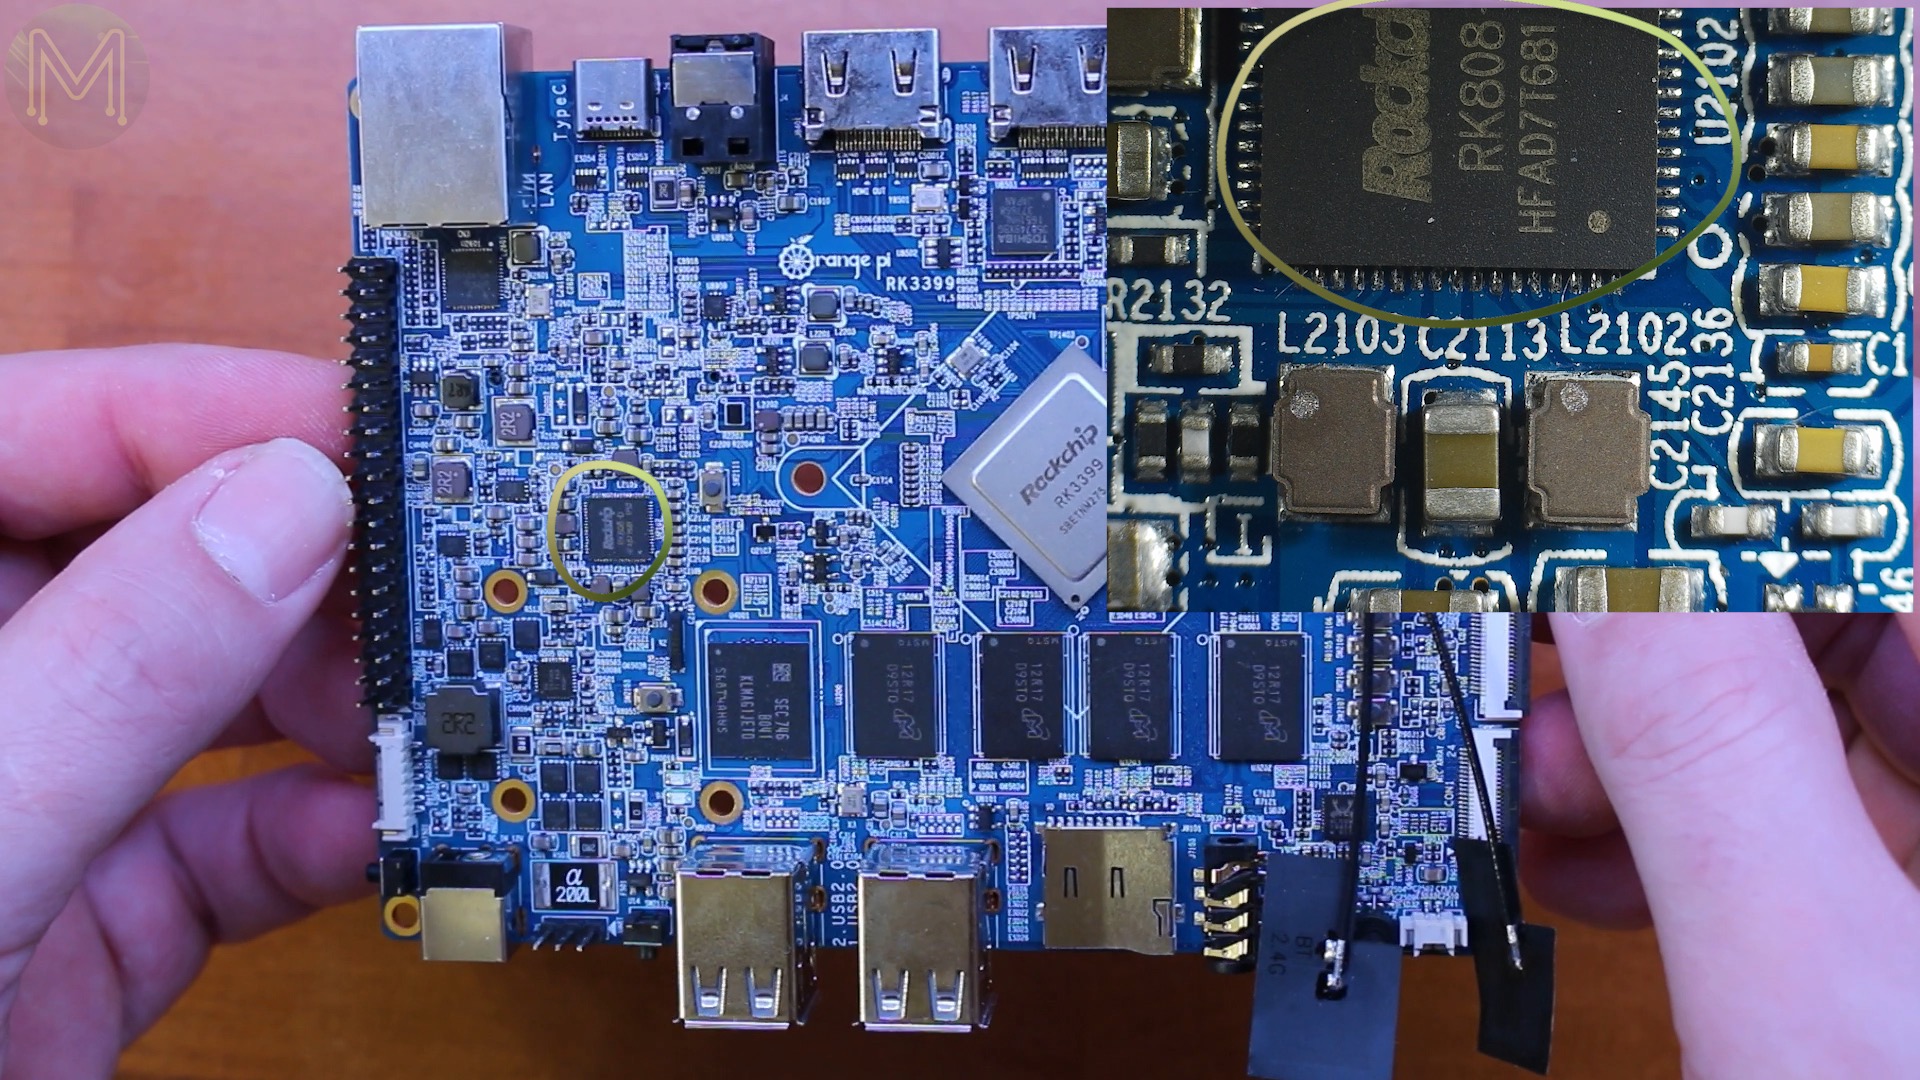
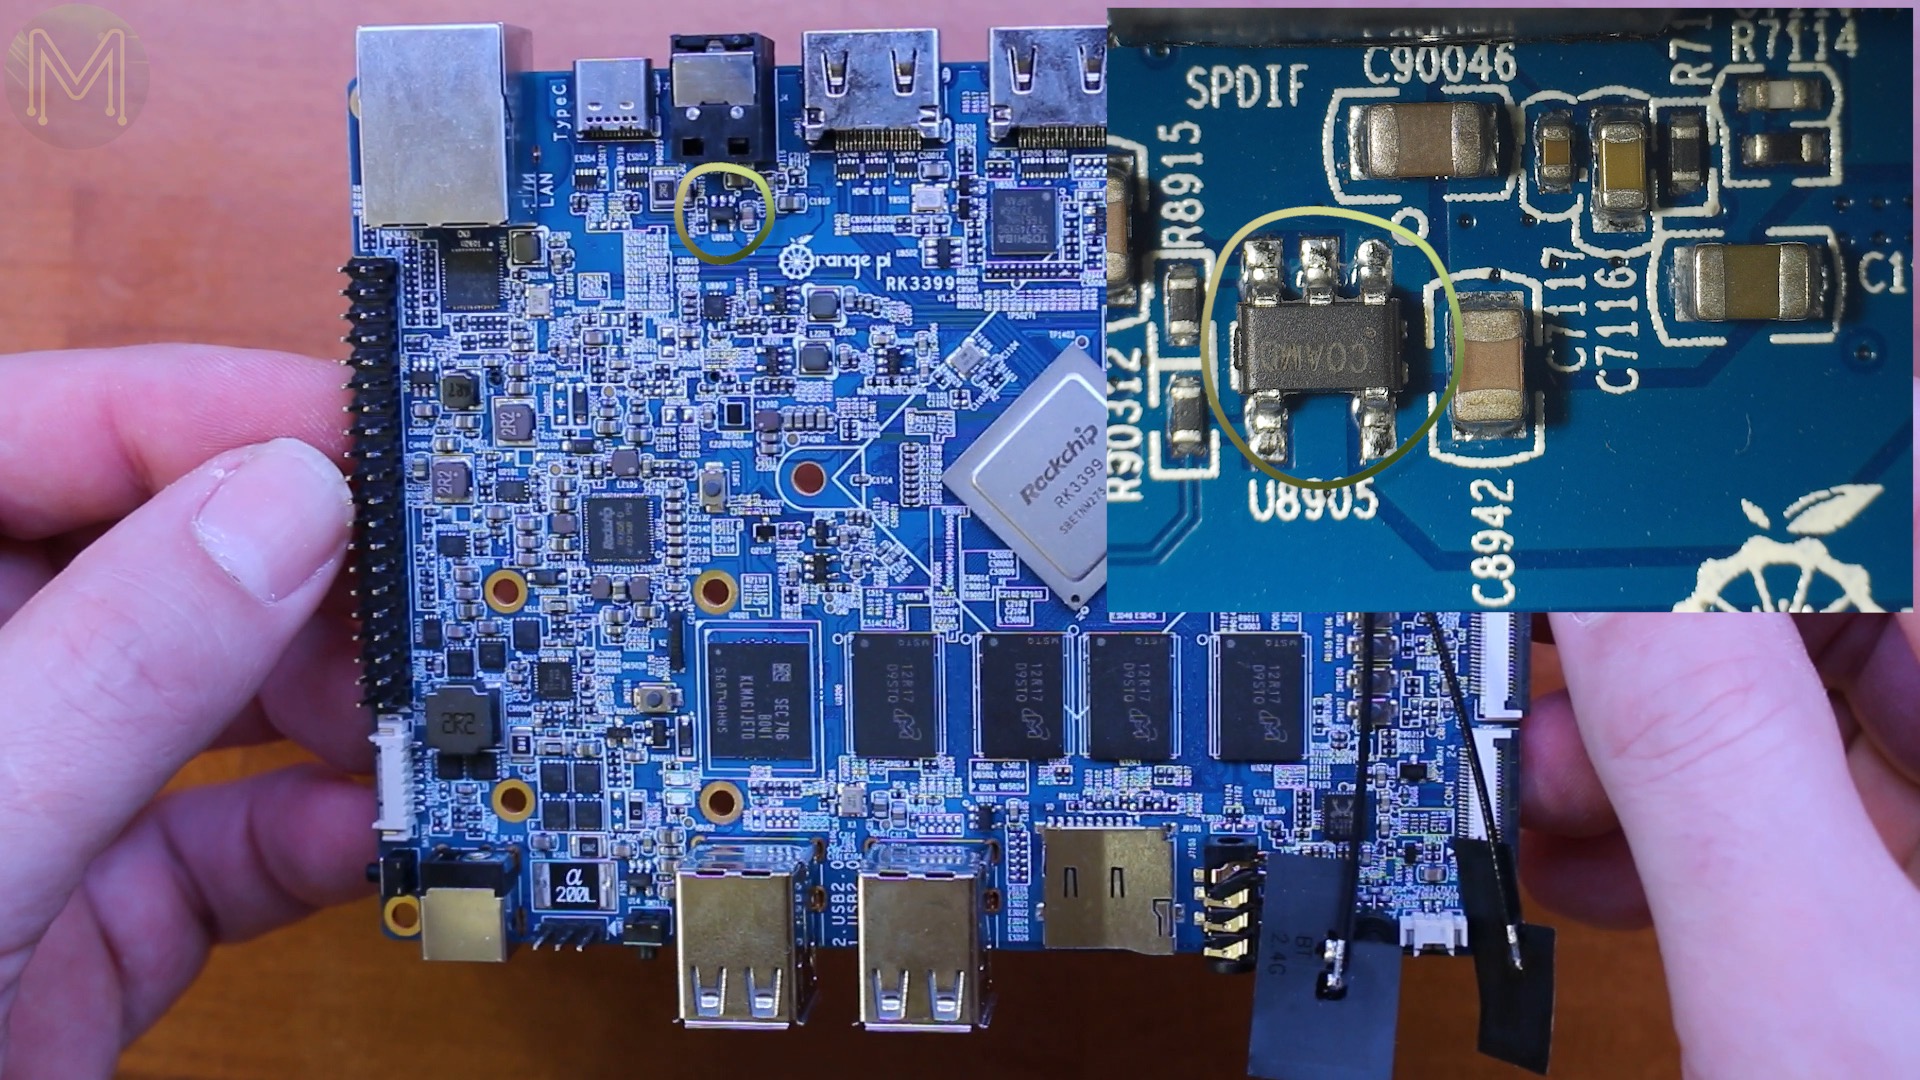
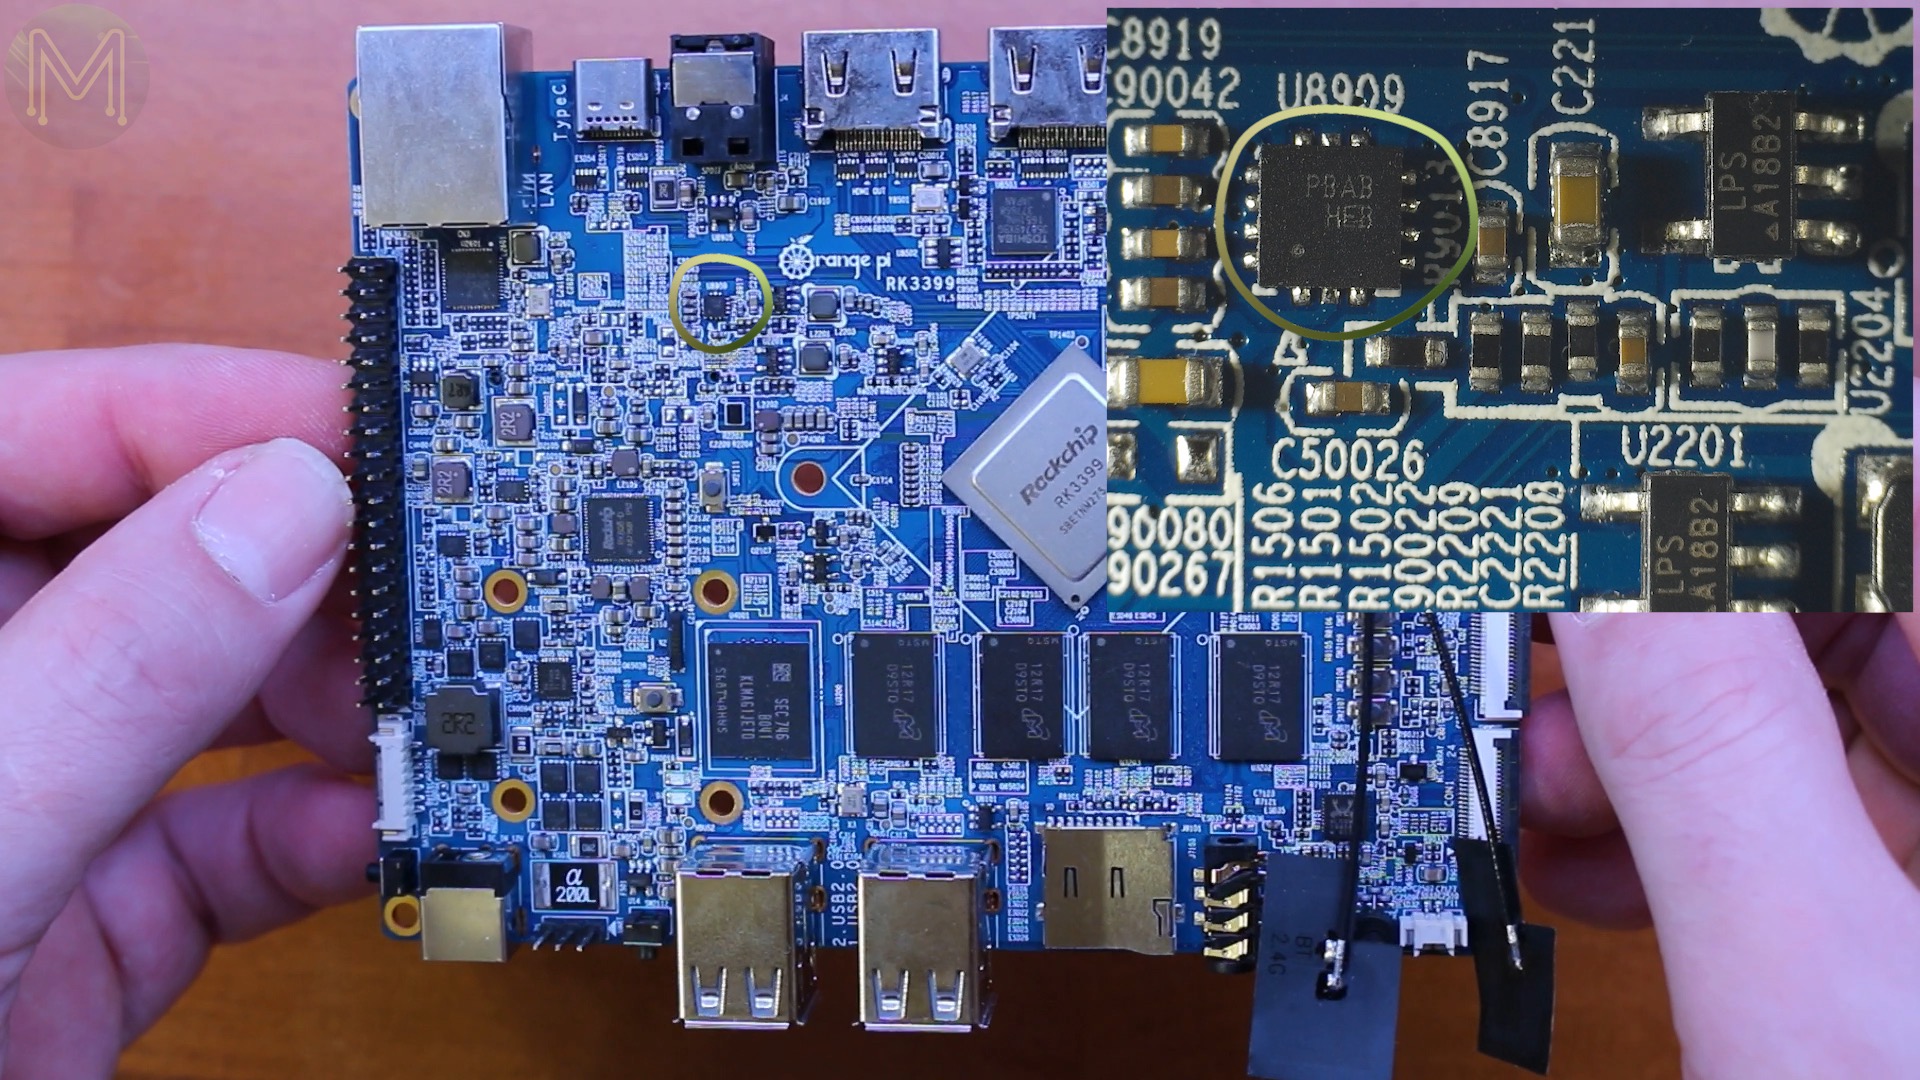
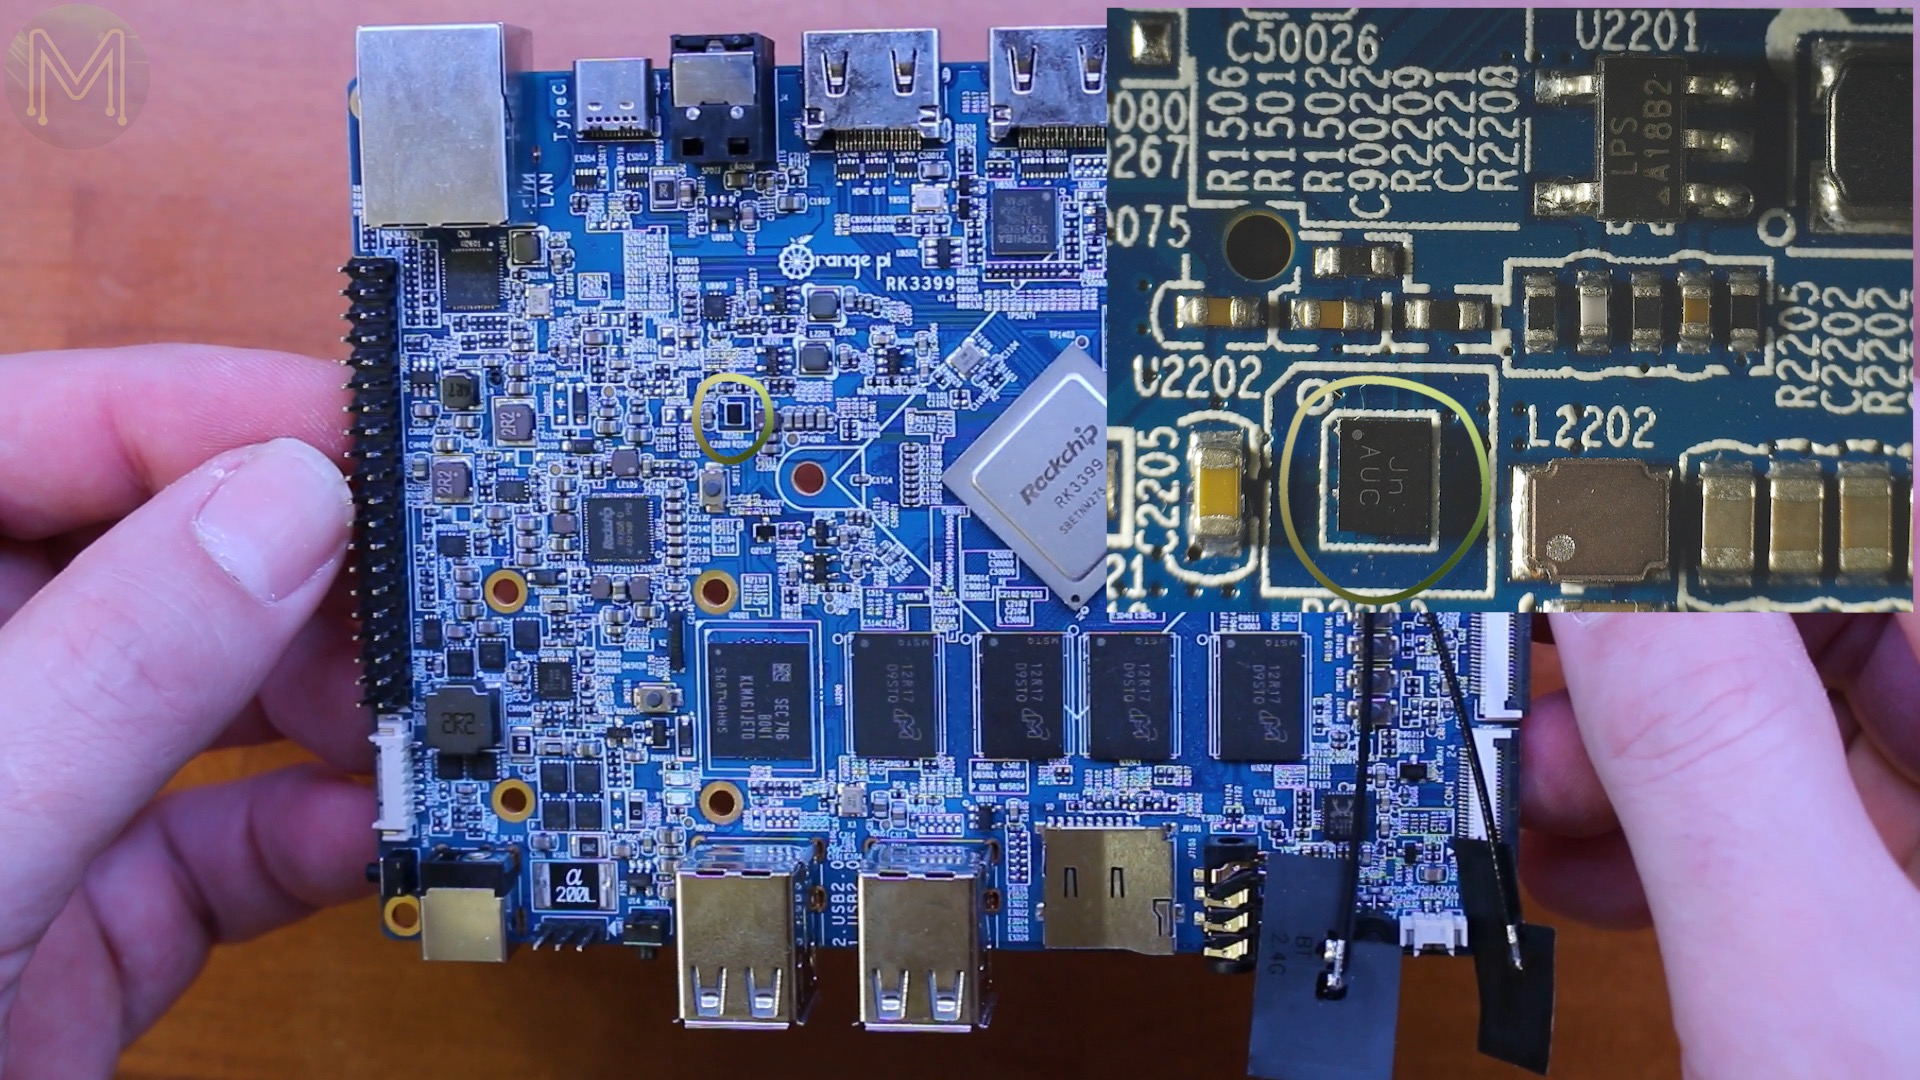
one of many logic level converters converting the SoCs 1.8v to 3v for the LCD interfaceDC boost converter providing power for the GPUHall effect sensorALC5651 audio codec500mA LDO regulator providing 3v from the 3.3v supply12MHz crystal for the USB Type C power control ICDC power fuse and low loss power distribution switchA bunch of MoSFETsand even moreBQ25700 multi-chemistry charge control ICMore MoSFETs and a CW2015 battery fuel gaugeMore DC buck converters providing 5vand 3.3vRTL8211E GbE controllerand the all important RK808 PMICESD protectionUSB power switchUSB Type C power management ICDC step down regulator for the CPUMore ESD protectionAnd this is the IC that handle all the HDMI in. It converts an HDMI signal to MIPI-CSI. So, as you’ll see later, to record HDMI I treat it like a camera interface.USB3.0 and SATA controllerRunning off a 30MHz crystal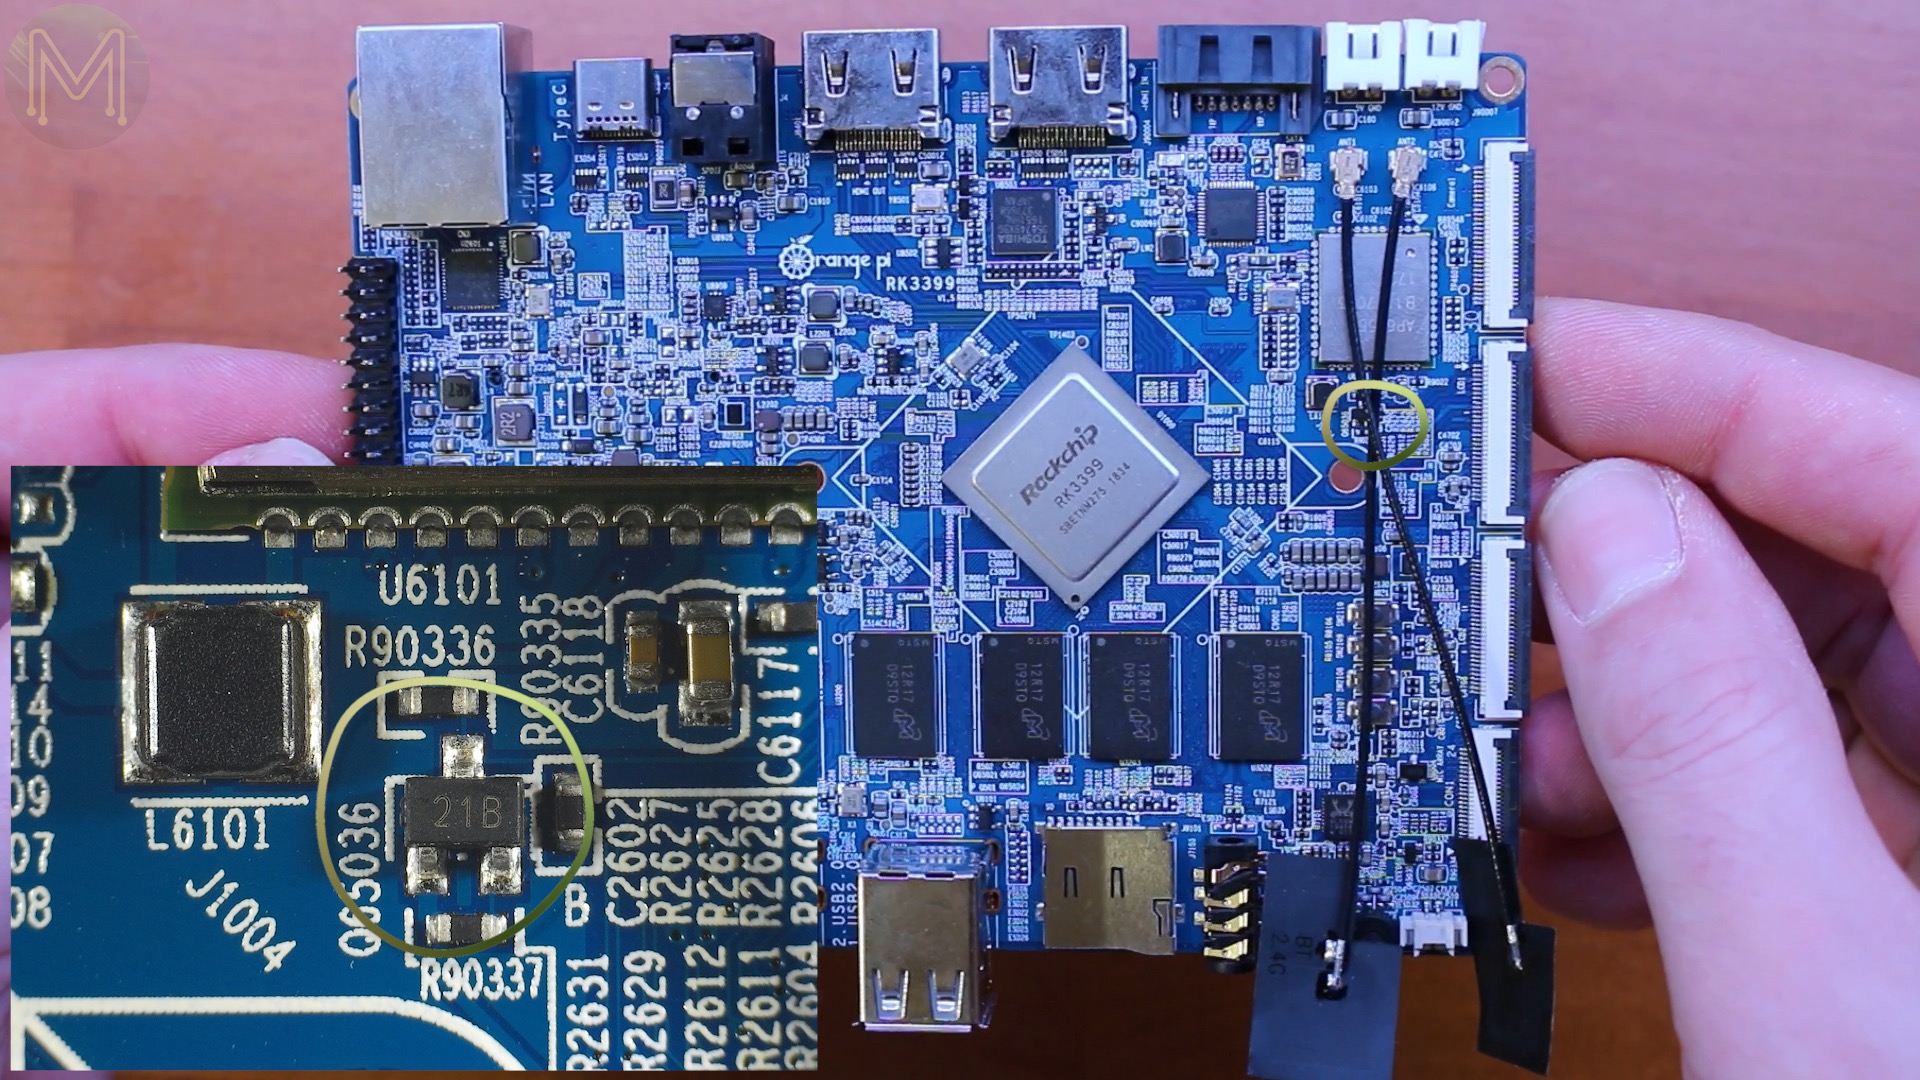


Underneath
On the flip side, we have:
- The second MIPI-CSI
- and eDP interfaces
- There’s also a mPCIe slot
- and a SIM card.
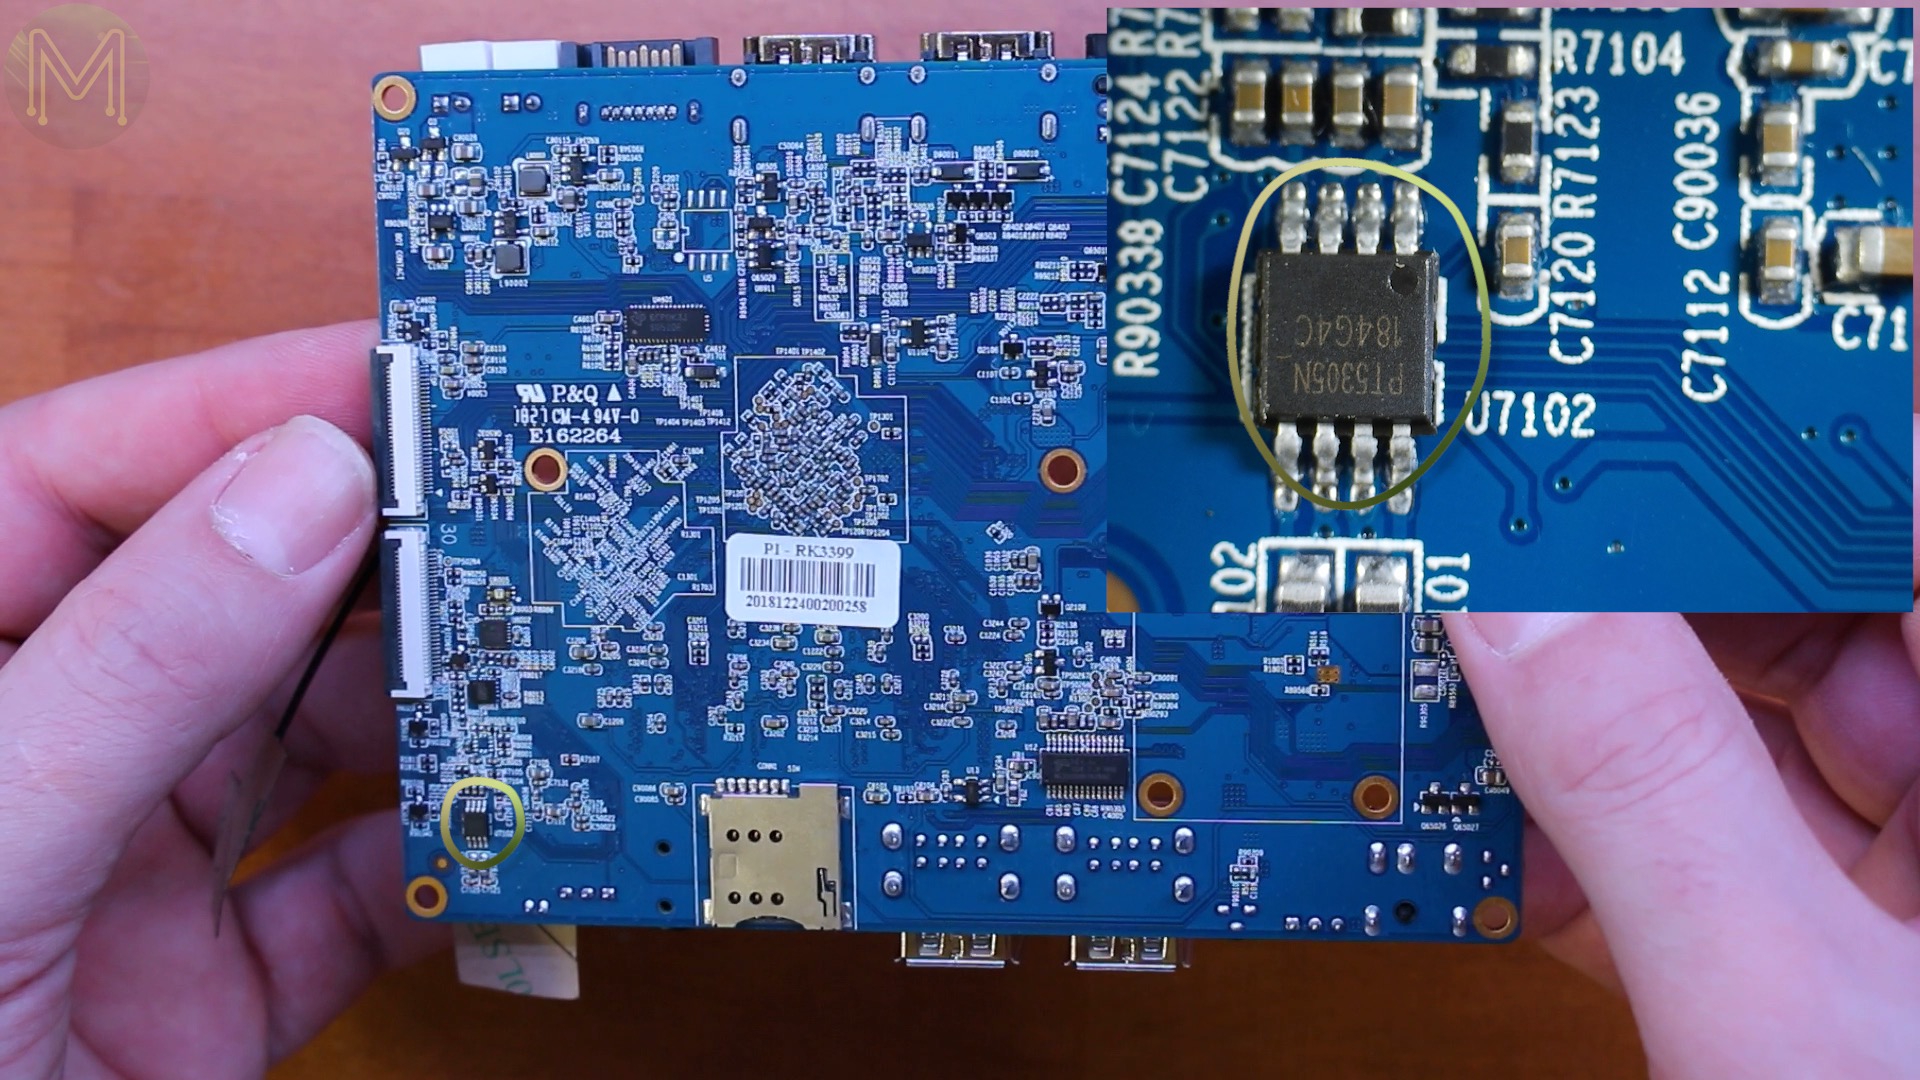
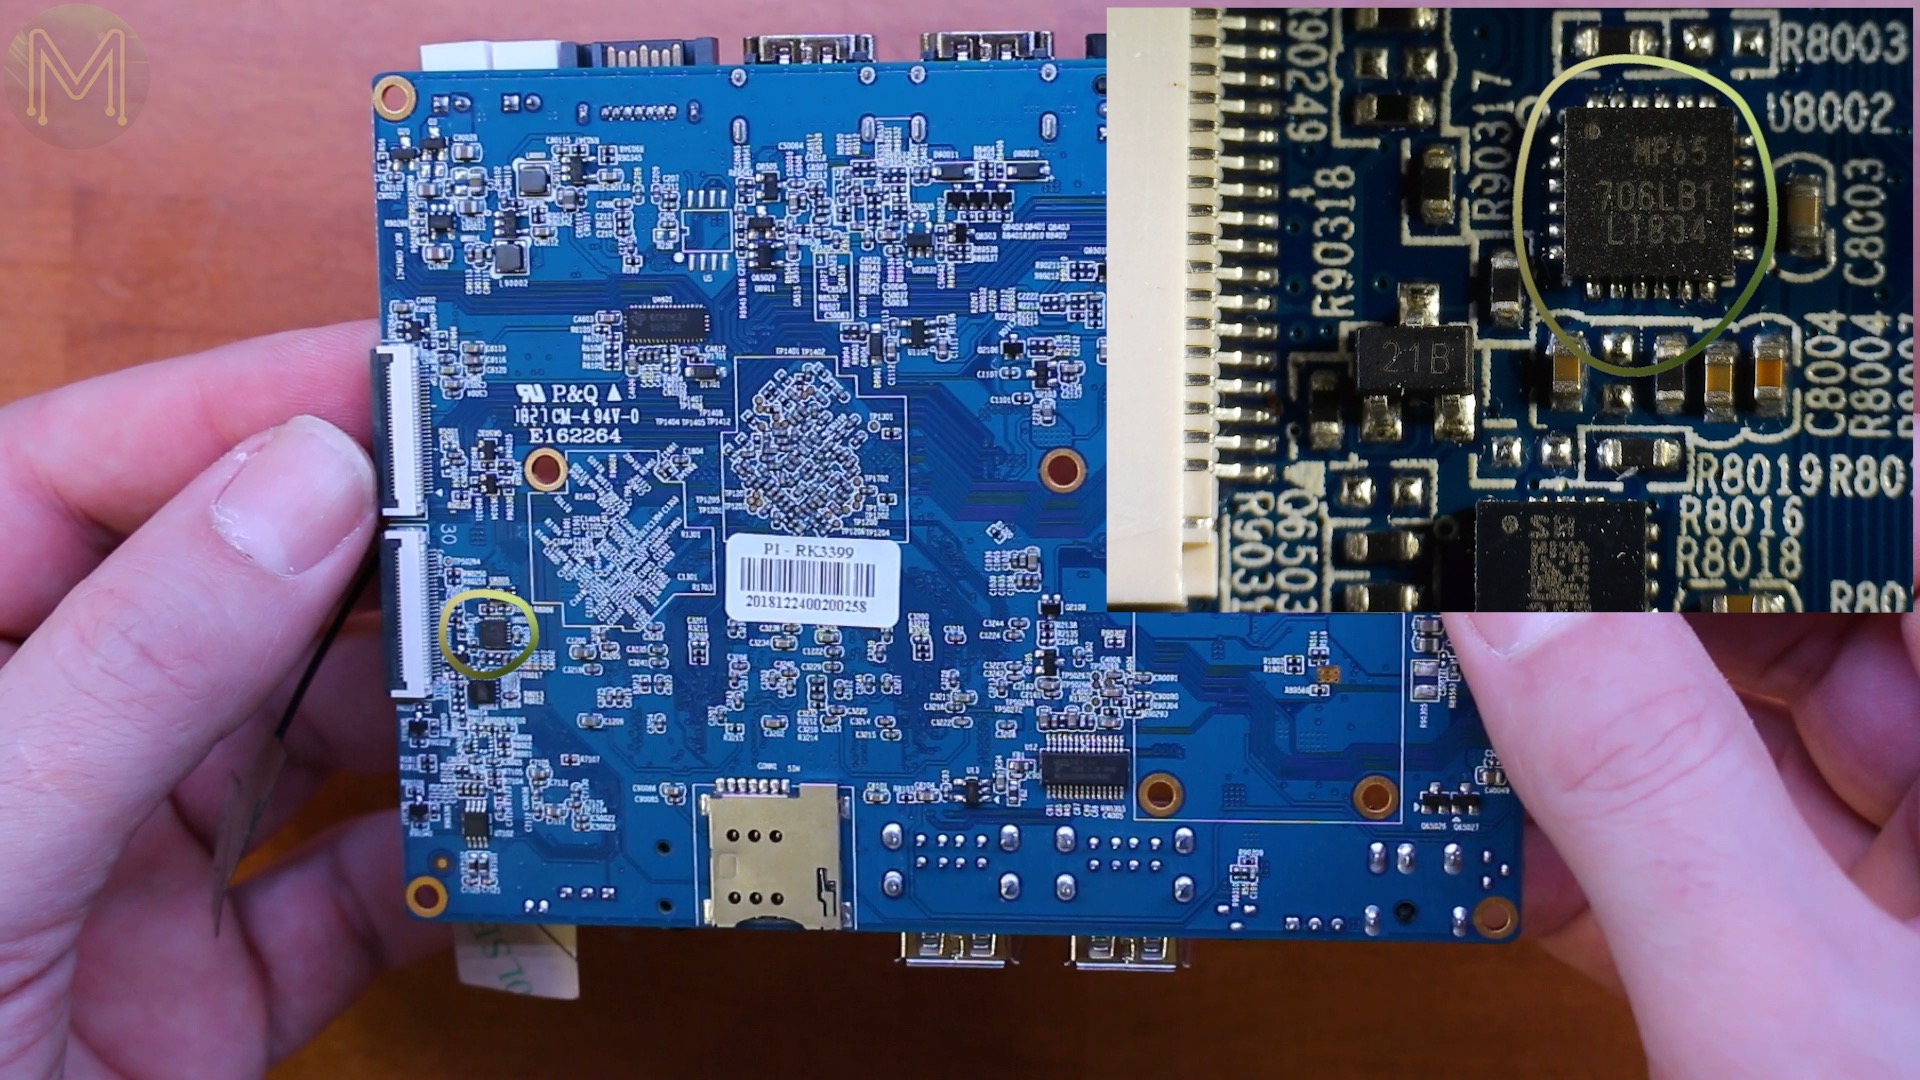
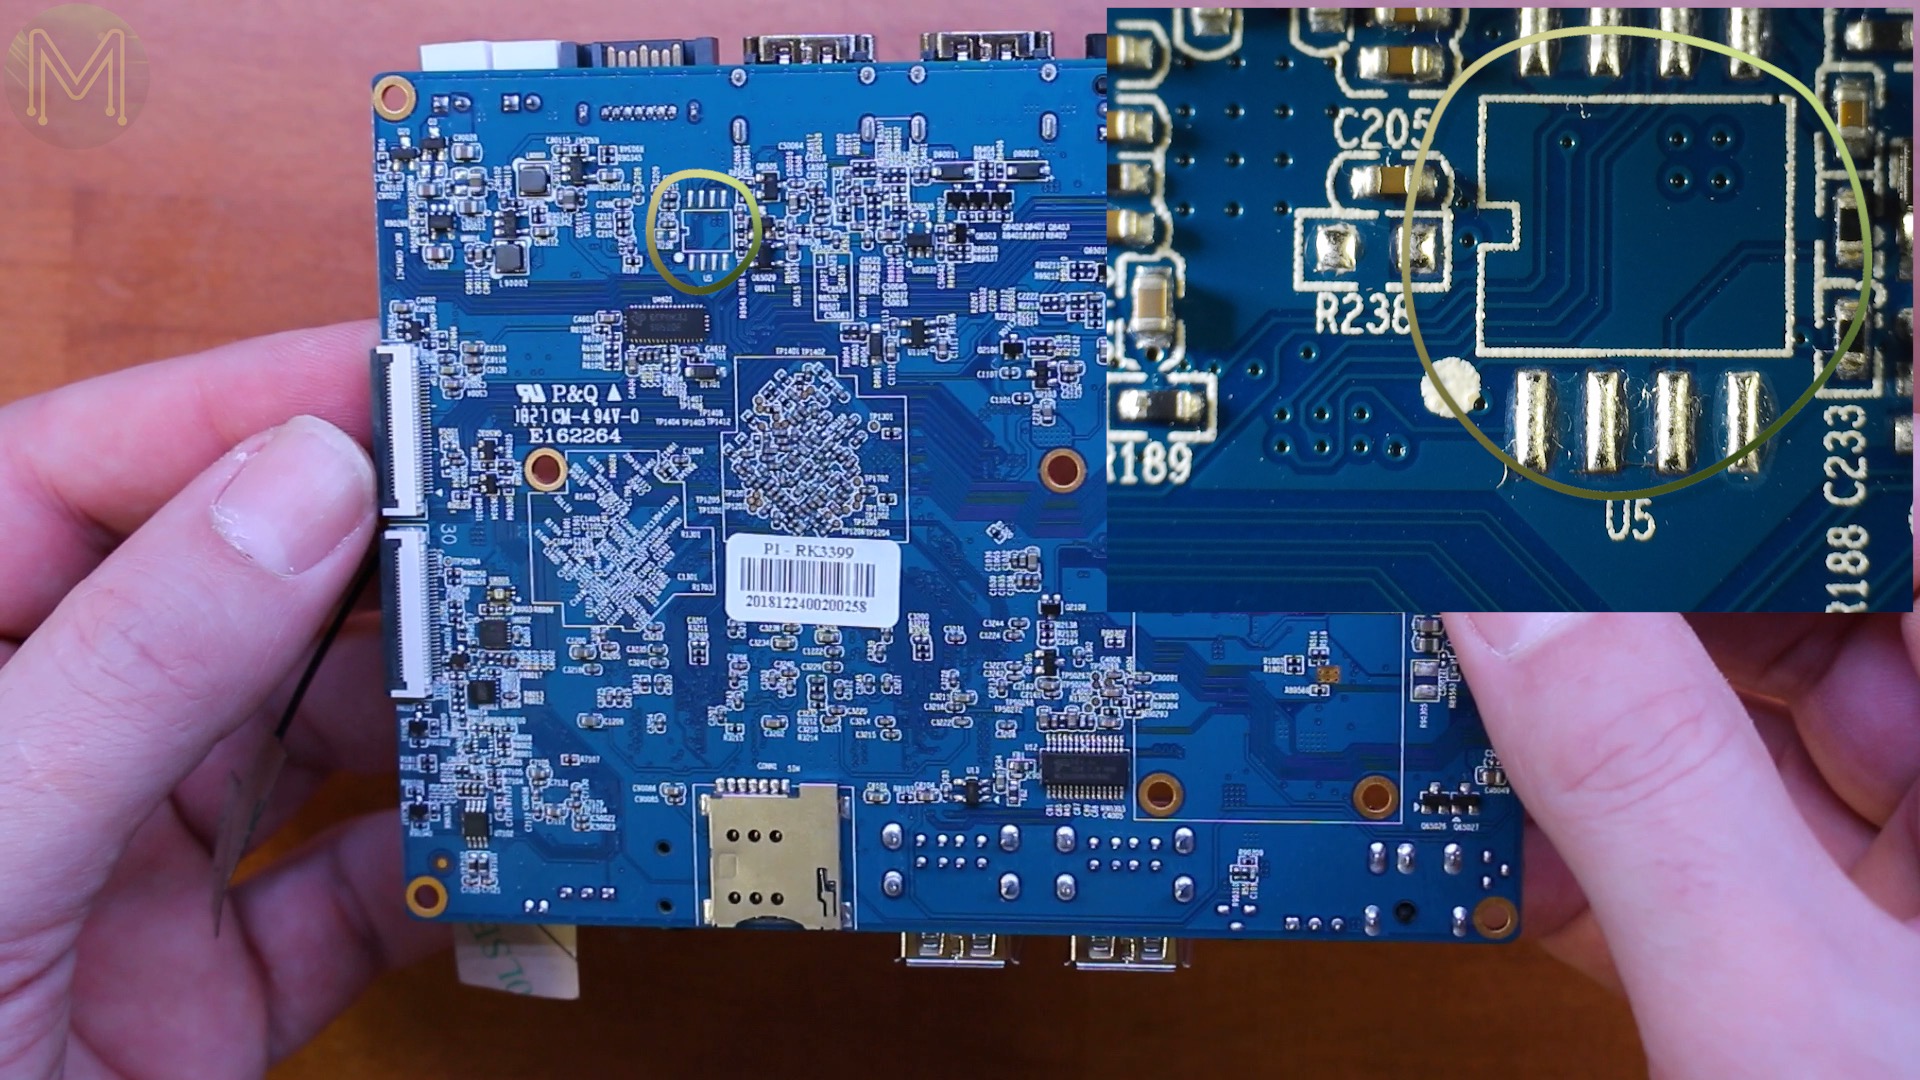
As for ICs, we have
a USB2.0 hubA PT5305N, which I suspect is an op ampLSM6DS3 gyroscopeand an MPU6500 gyro and accelerometer, why not?light sensorand a 5 channel differential multiplexer switch from TIand SMD pads for a 512kb SPI flash and then there’s a bunch more MoSFETs and power switches.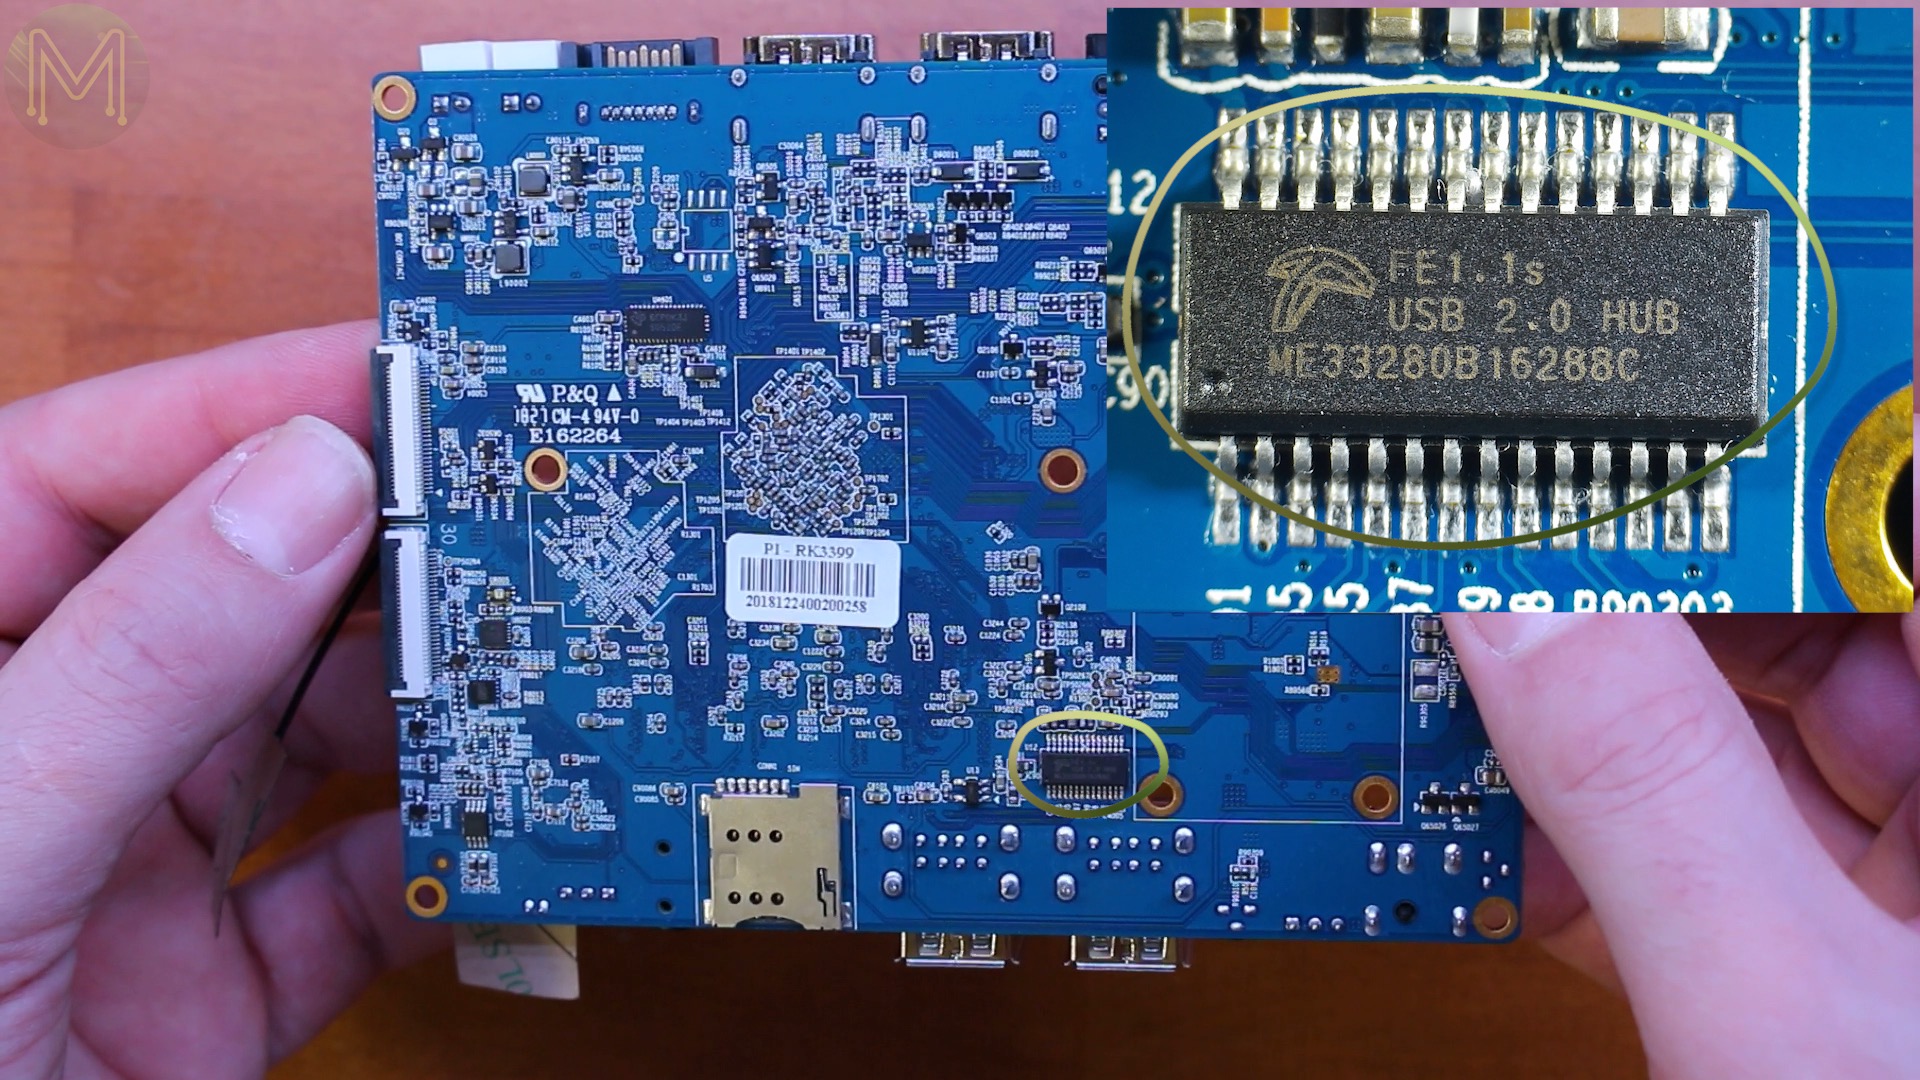


The Orange Pi user guide tells me that I can power this thing from either the 12v DC jack, 12v header, 5v header, USB Type C, or batteries. I would have liked to have tested out running this thing on batteries, but they didn’t arrive in time.
Android Tests
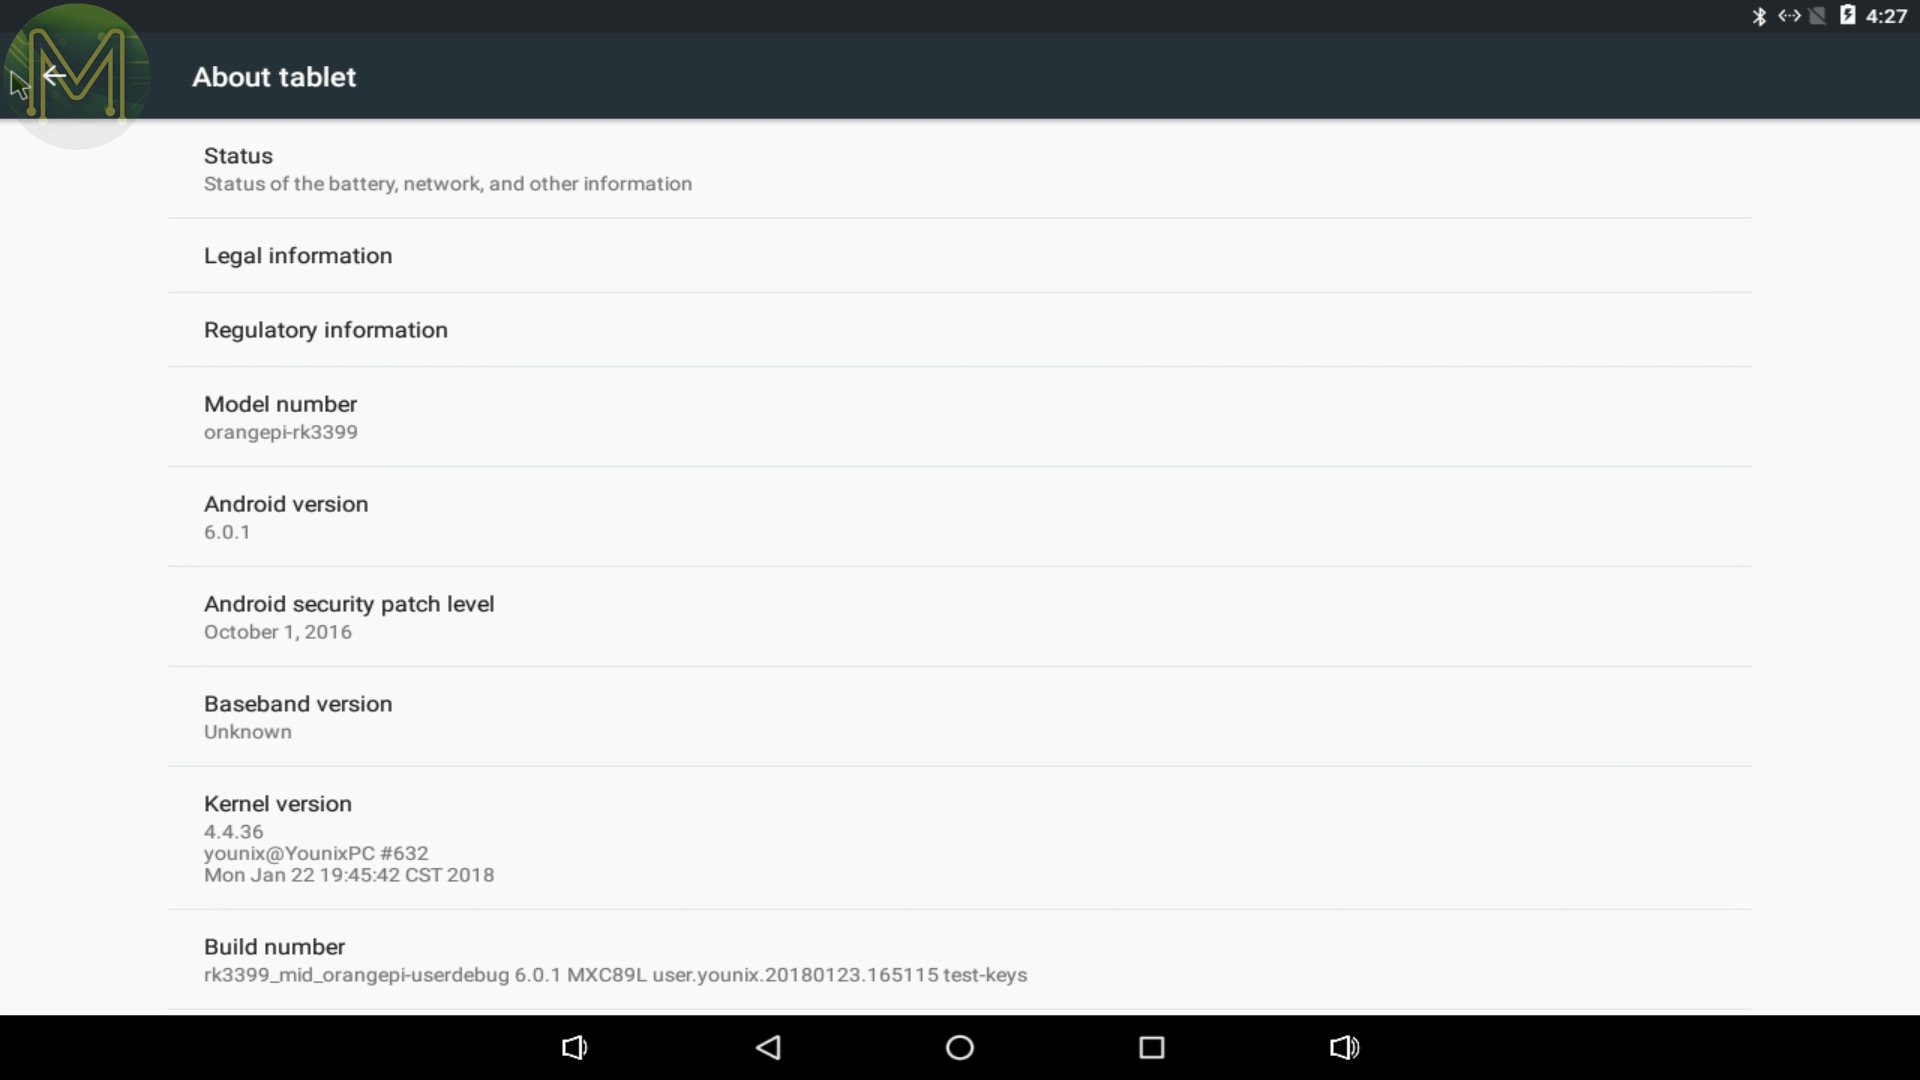
The SBC comes preinstalled with Android 6 on the eMMC. So I thought I’d check that out first.
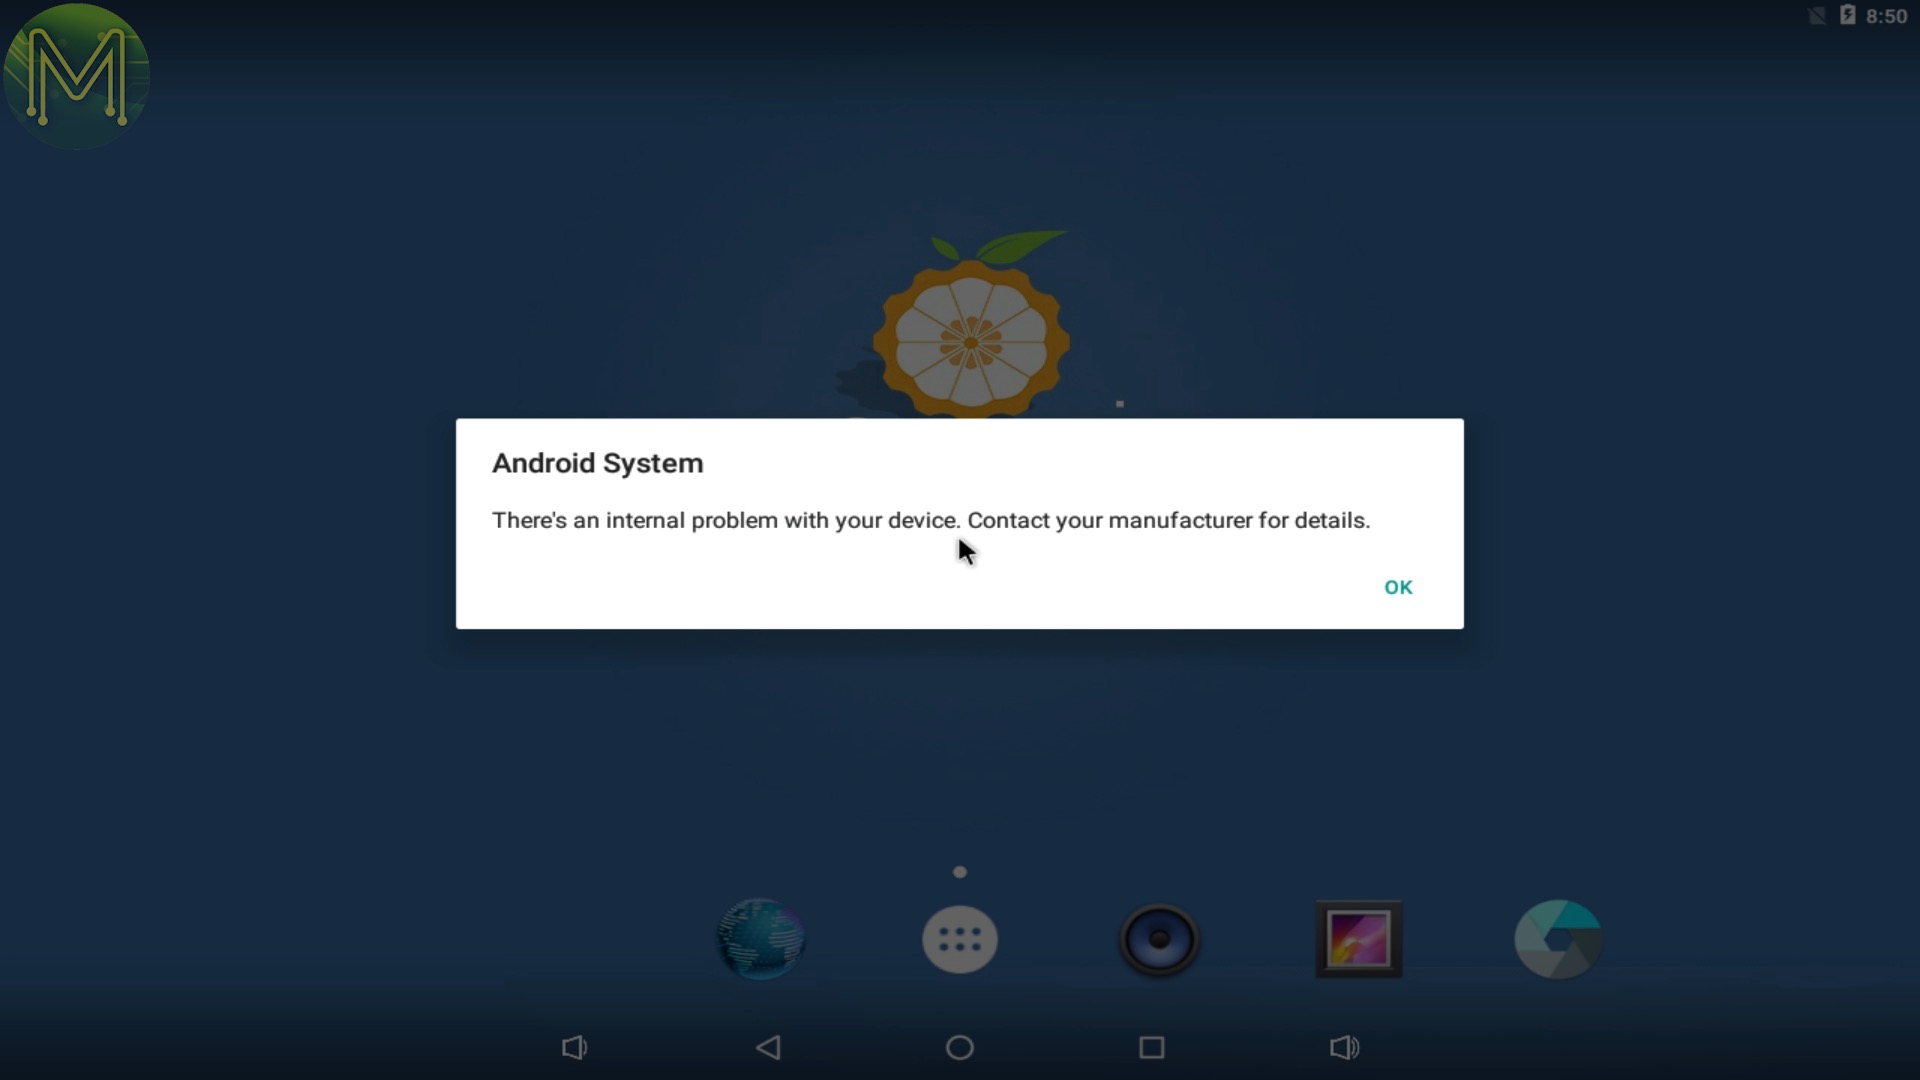
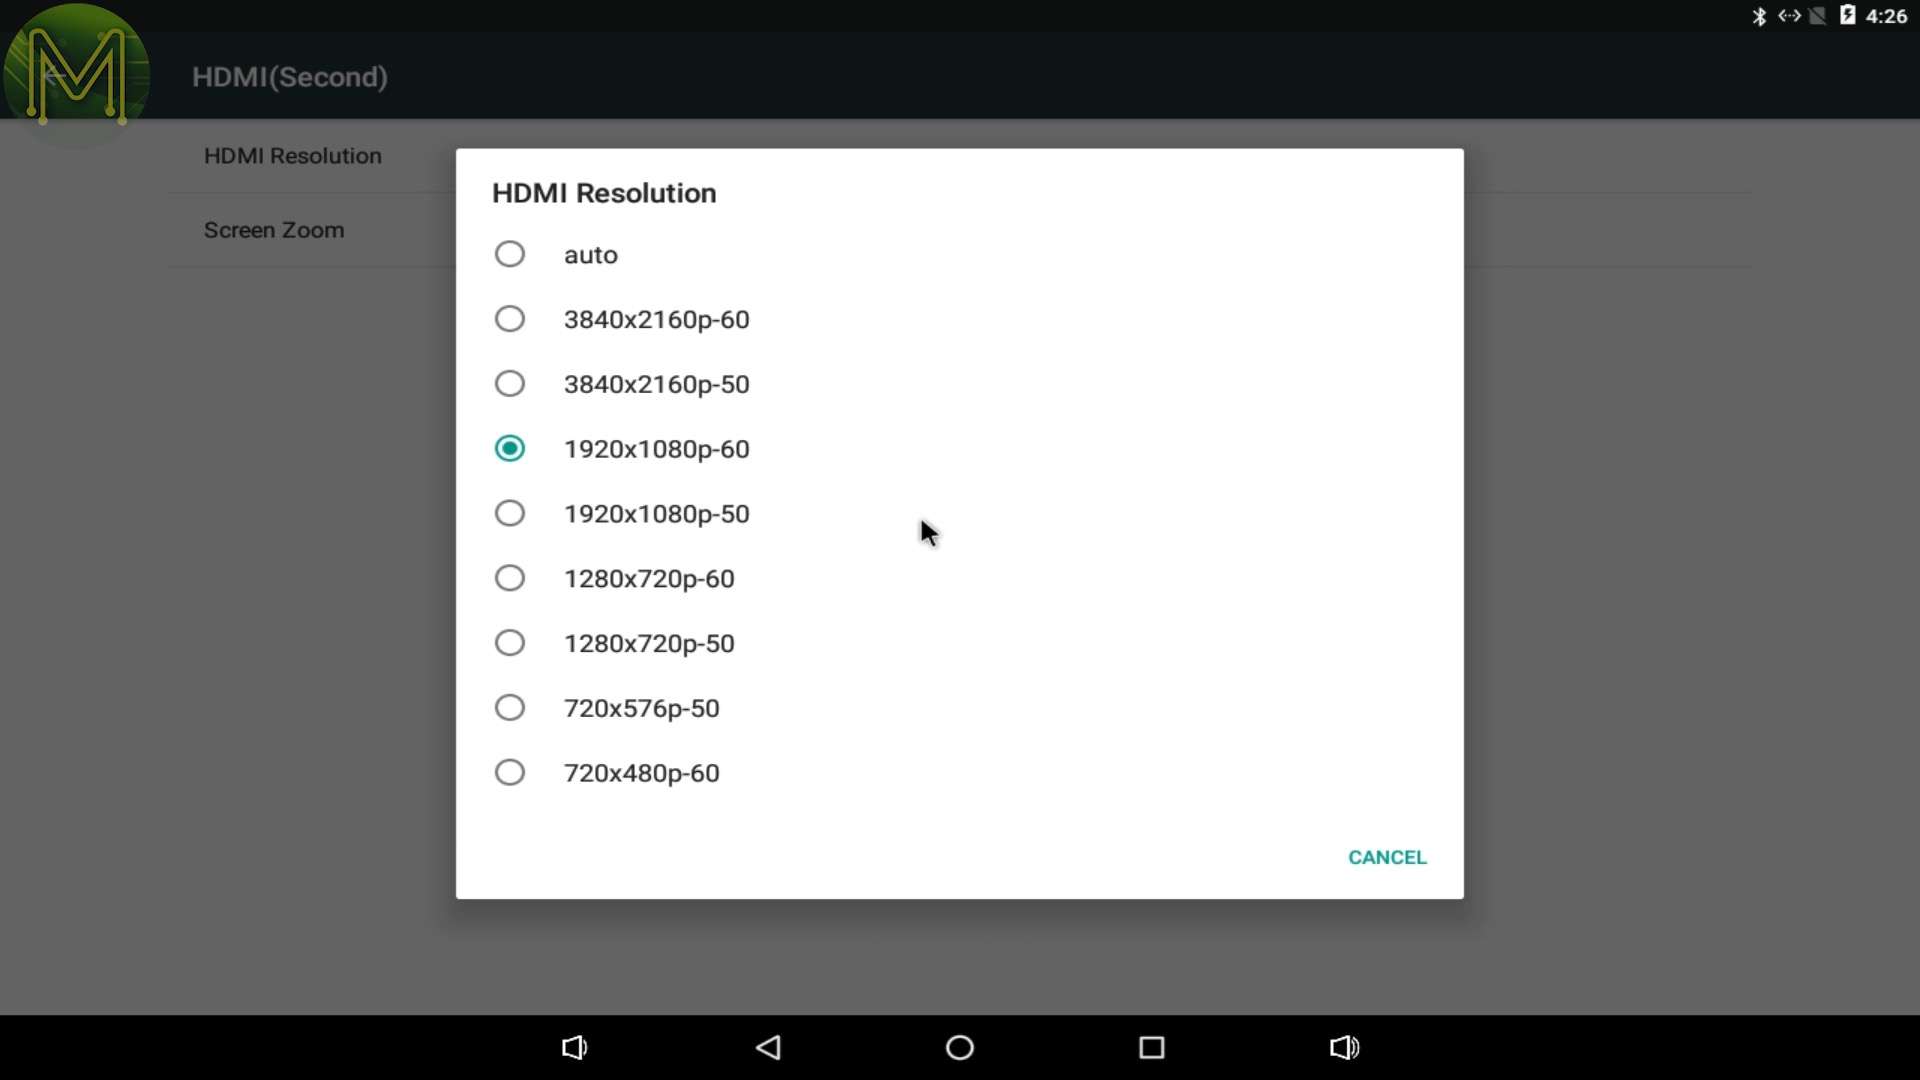
And since I needed to keep things properly cool I used my Uber heat-sink during my performance tests.Booting into Android was quick enough and I was greeted with a friendly reminder to contact my manufacturer because there was an internal problem… somewhere…Everything seemed OK. I could see WiFi access points, managed to get an IP address via Ethernet, I was running on 1080p at 60Hz, and could see the battery stats and internal memory.It was running a pretty old Android with kernel 4.4, but alas no Google Play store installed.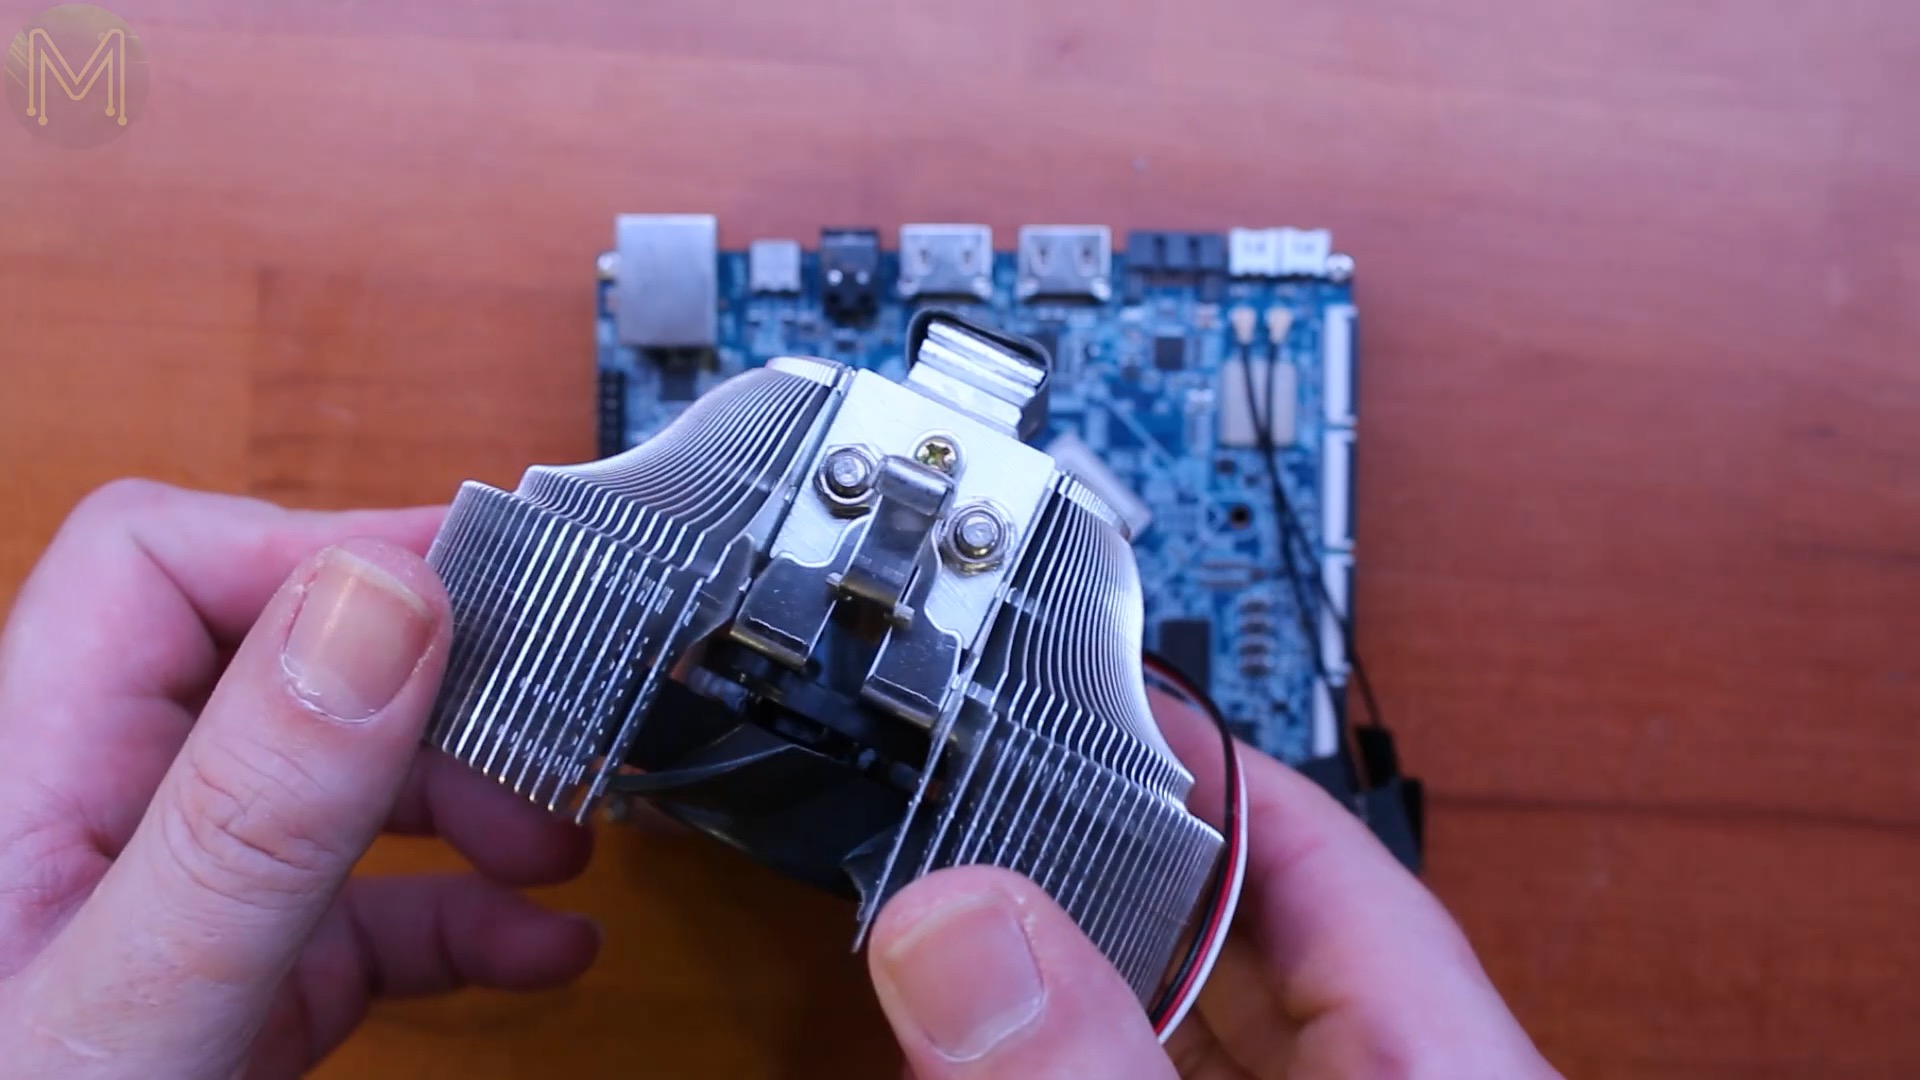
I thought I’d dive straight into testing out the HDMI input to see if it’d work, but…
Yeah OK… It just didn’t want to play ball.So what about video playback speeds?Er OK.and 4K video tests had the same issue. It wasn’t looking good.WiFi access had a very similar issue… It seemed to find all my access points, but I never could connect to any of them. Hopeless.Ethernet seems to be having issues as well and would constantly hang, which is probably the reason for the YouTube video tests failing.Orange Pi, have provided a mechanism to install APKs onto Android. So, I downloaded Google Play onto a USB flash drive and tried to install.

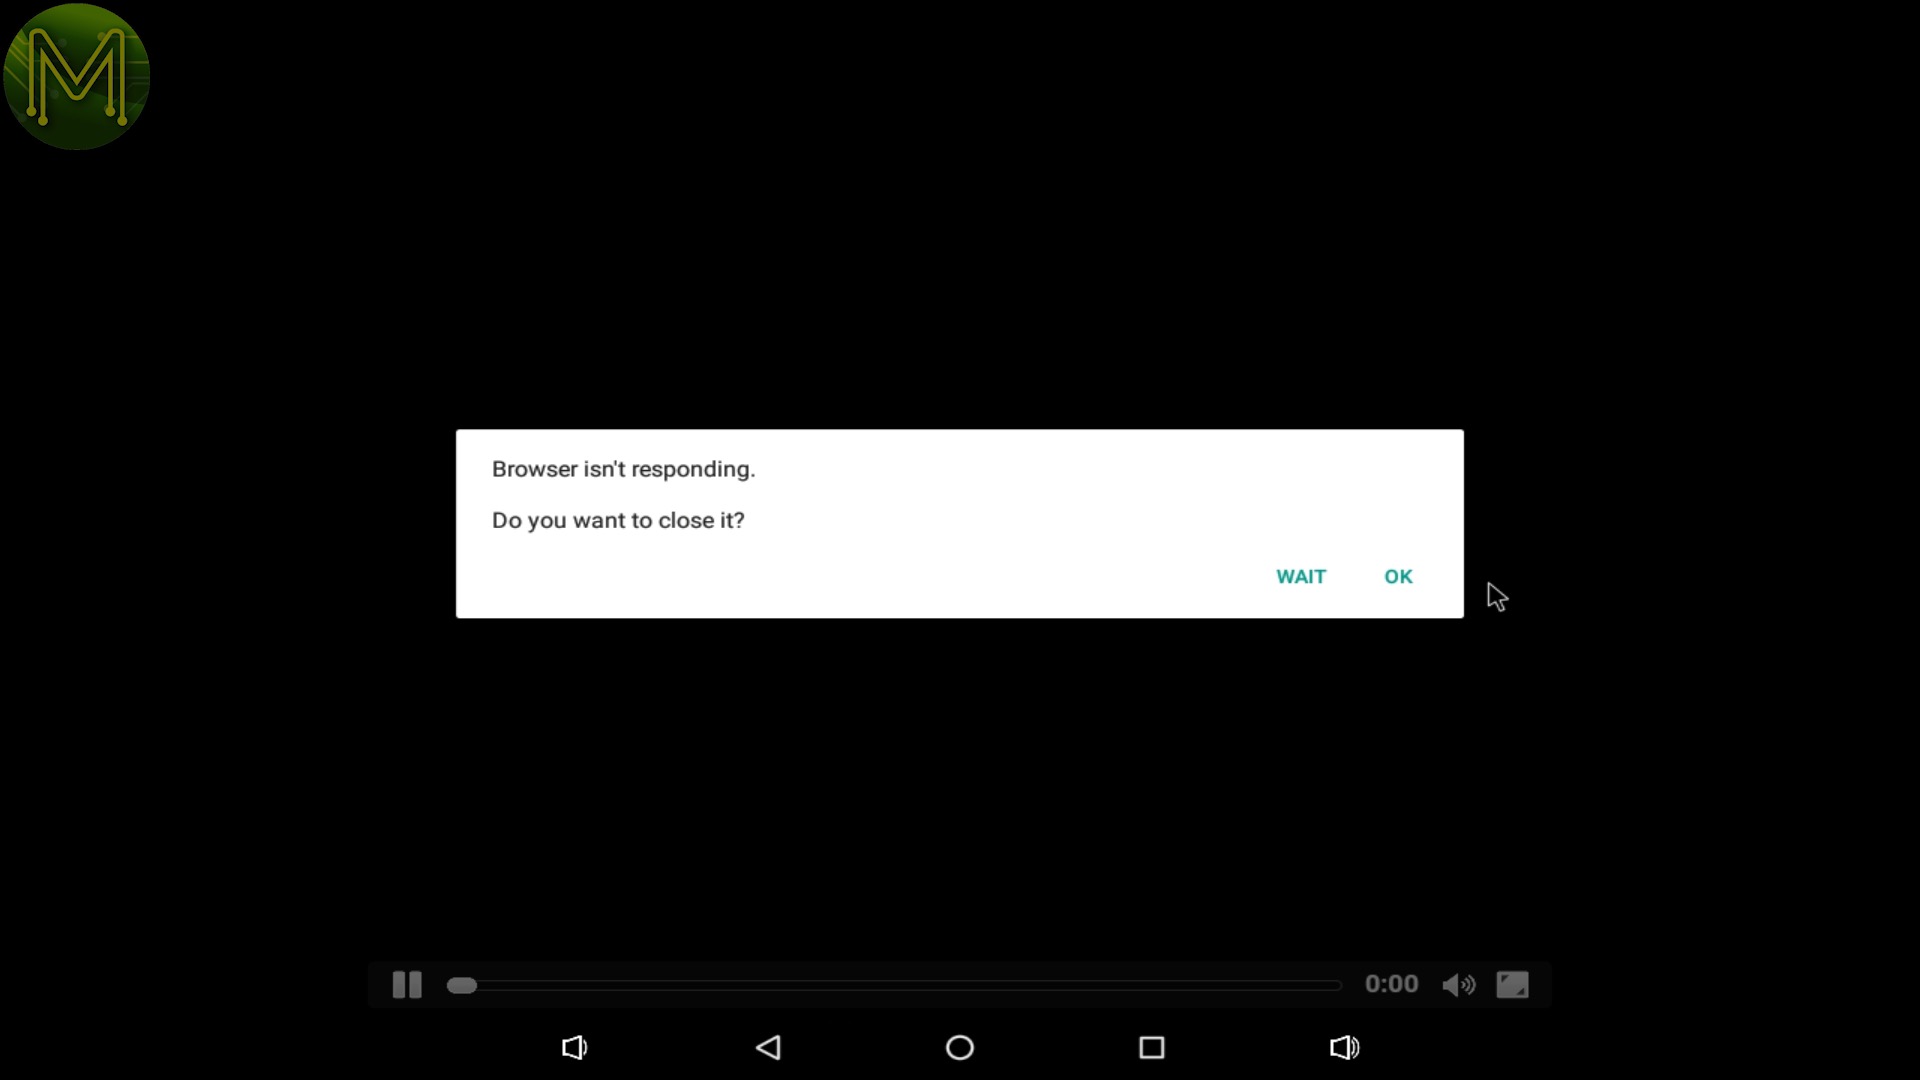


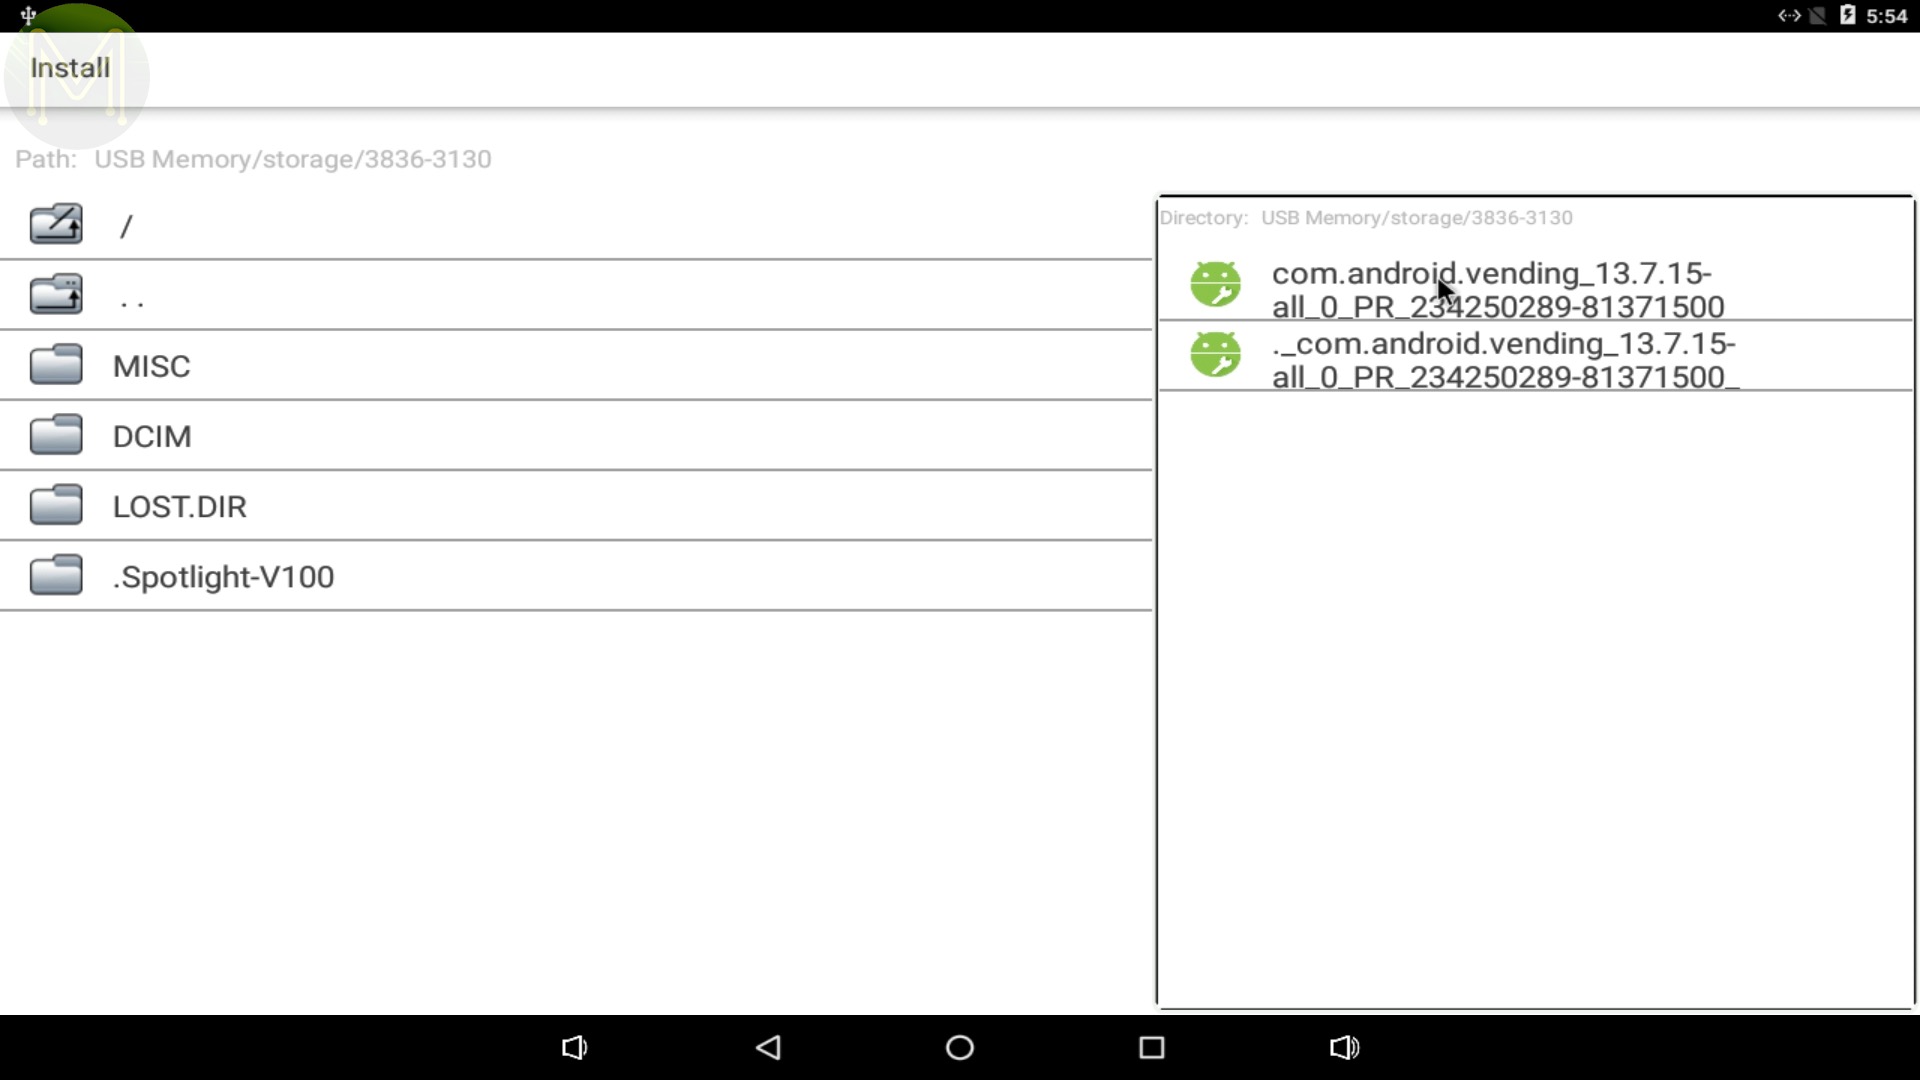
It was looking good for a while, but then…
Yeah righto.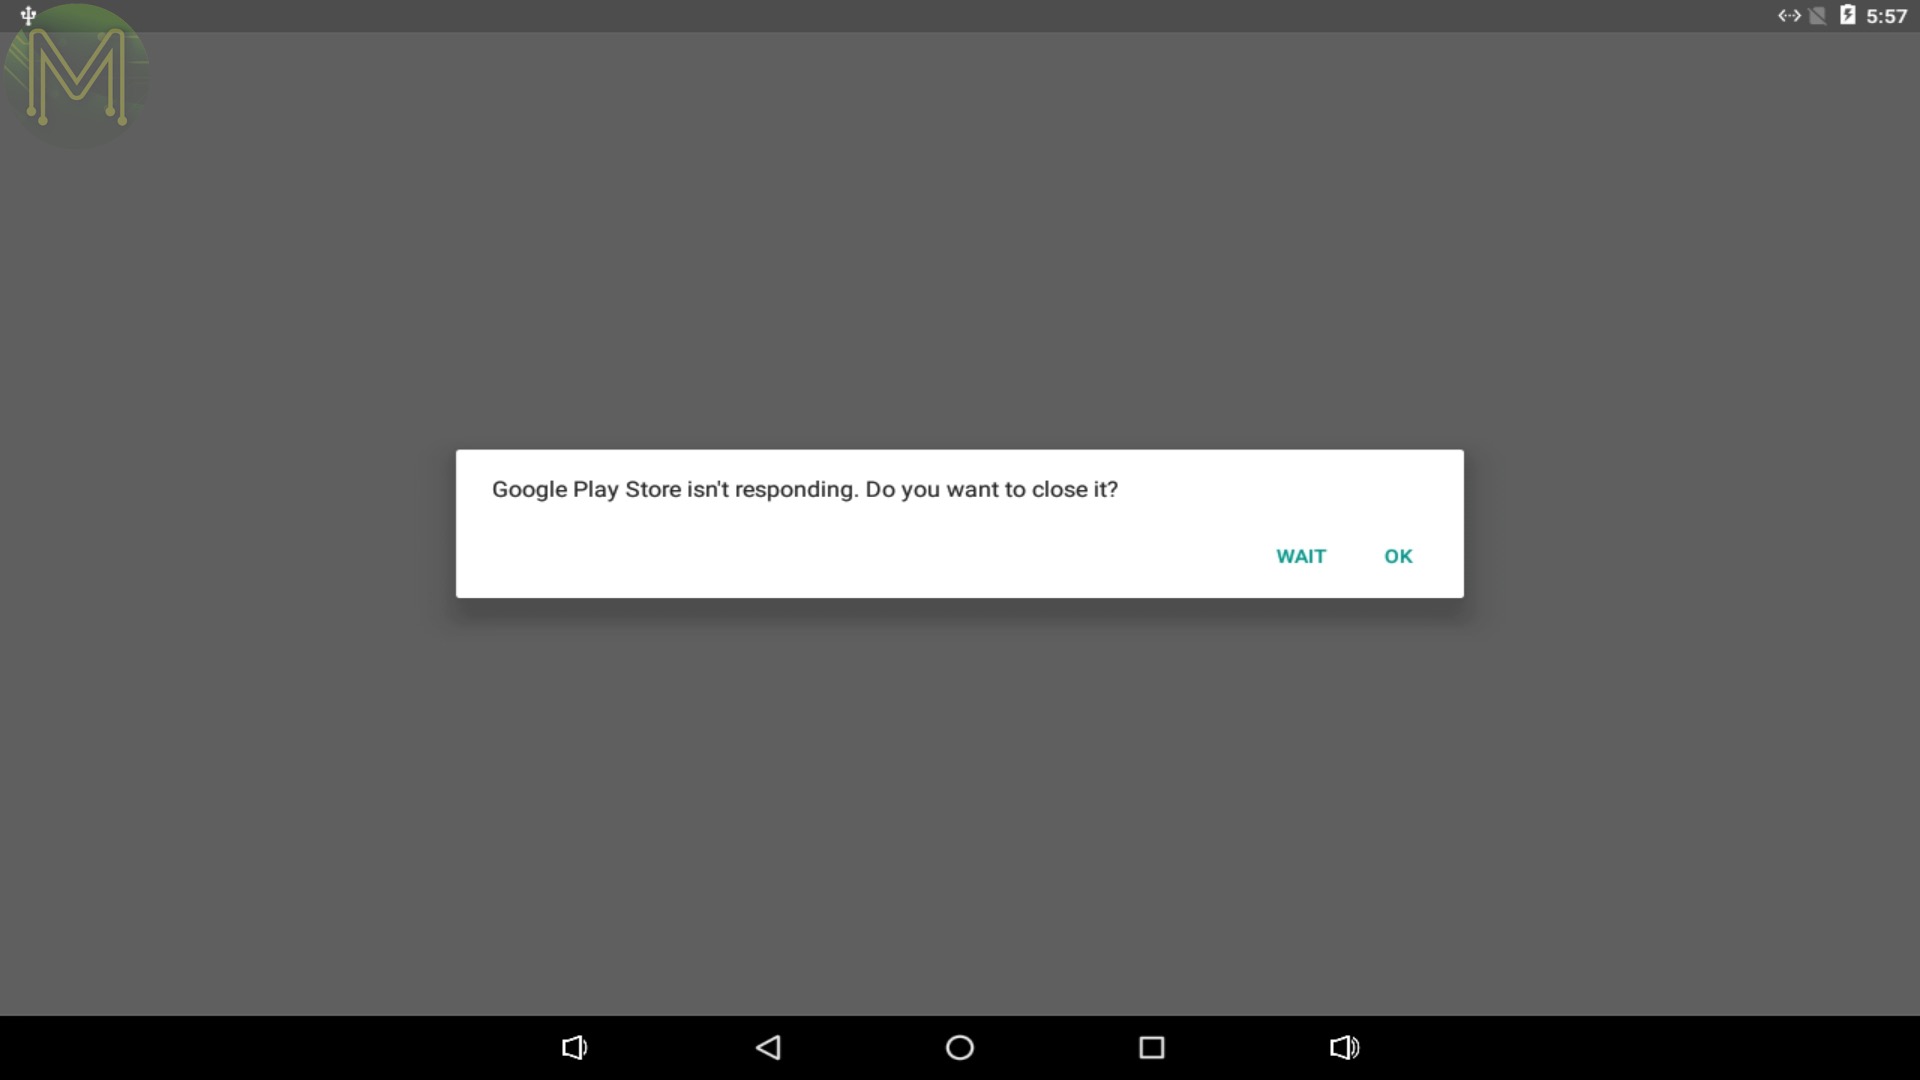
OK, let’s move on to Linux tests.
Installing Linux
Installing Linux is easy enough. It’s identical to all the other RK3399 based SBCs around.
Download the Linux upgrade tool and the Orange Pi Debian image.
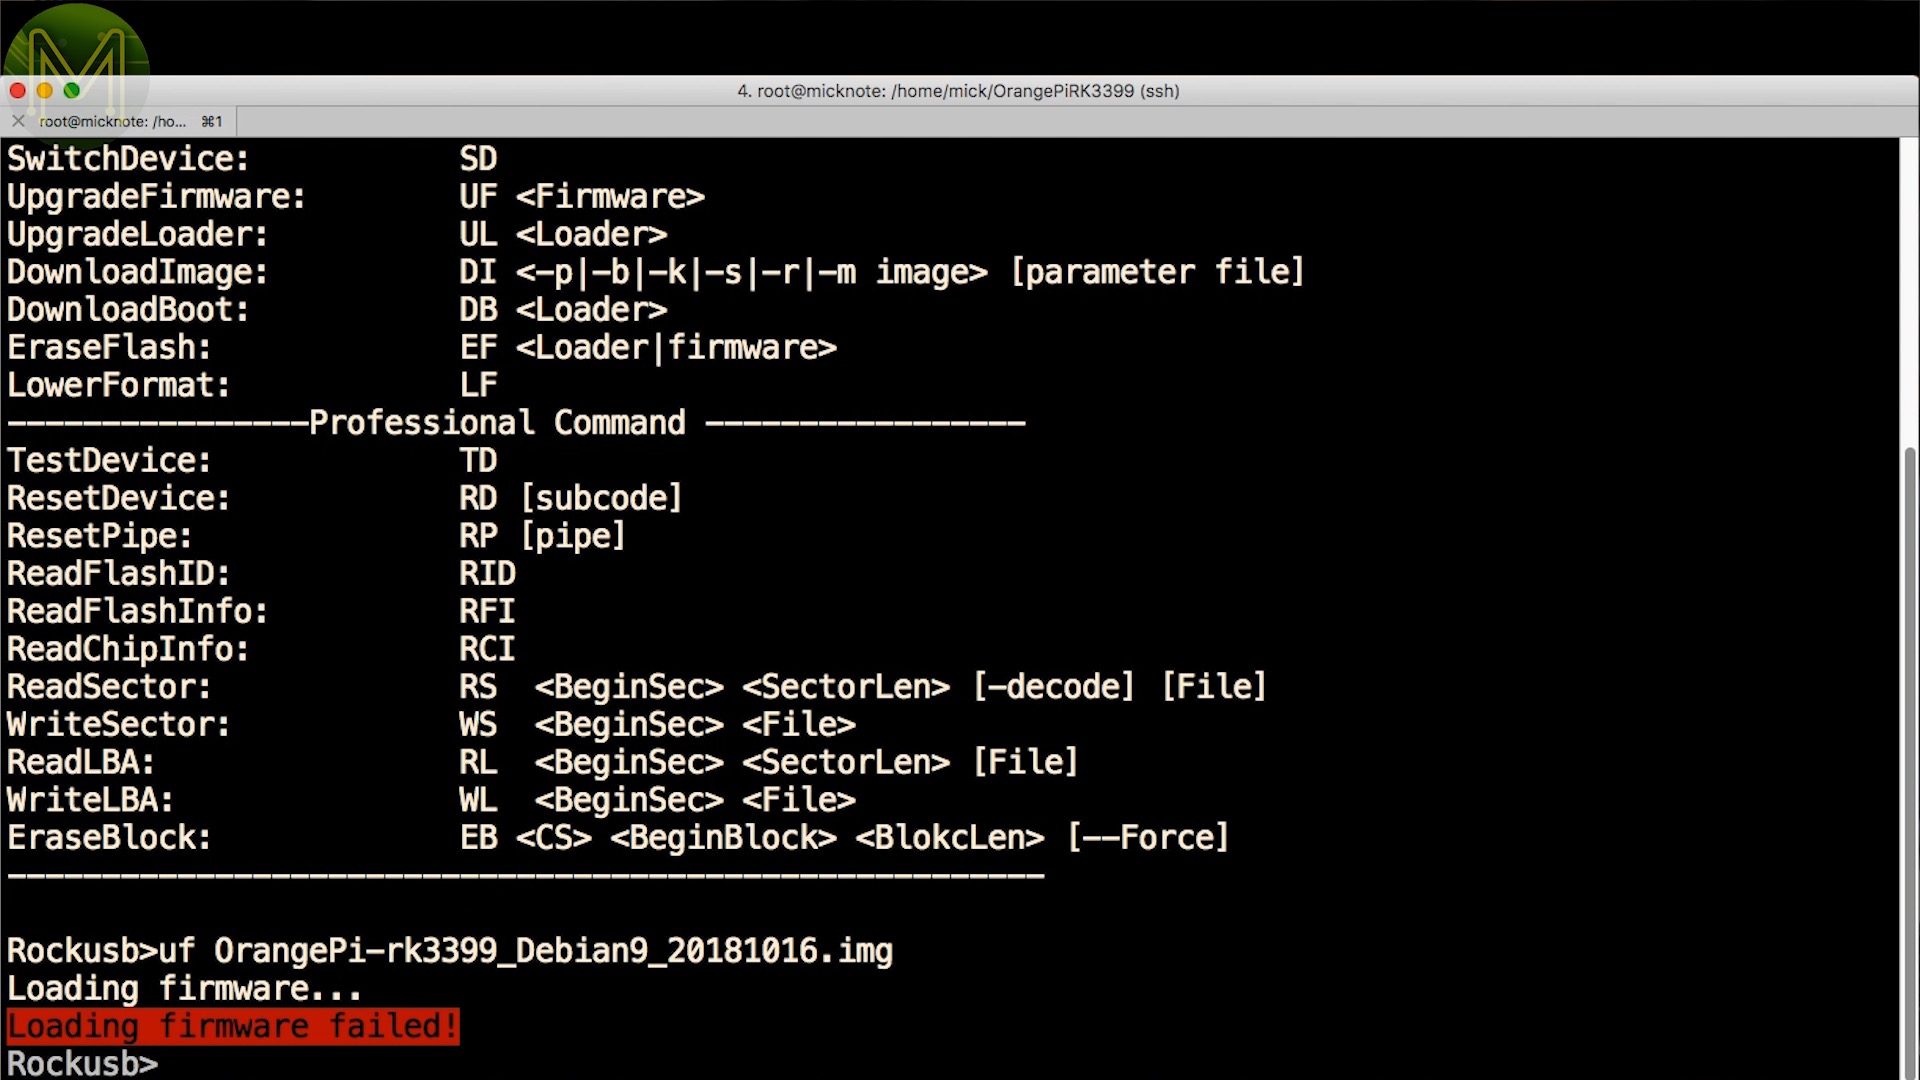
If you get errors like this, then you’ll need to install the 32bit library versions on your 64bit O/S.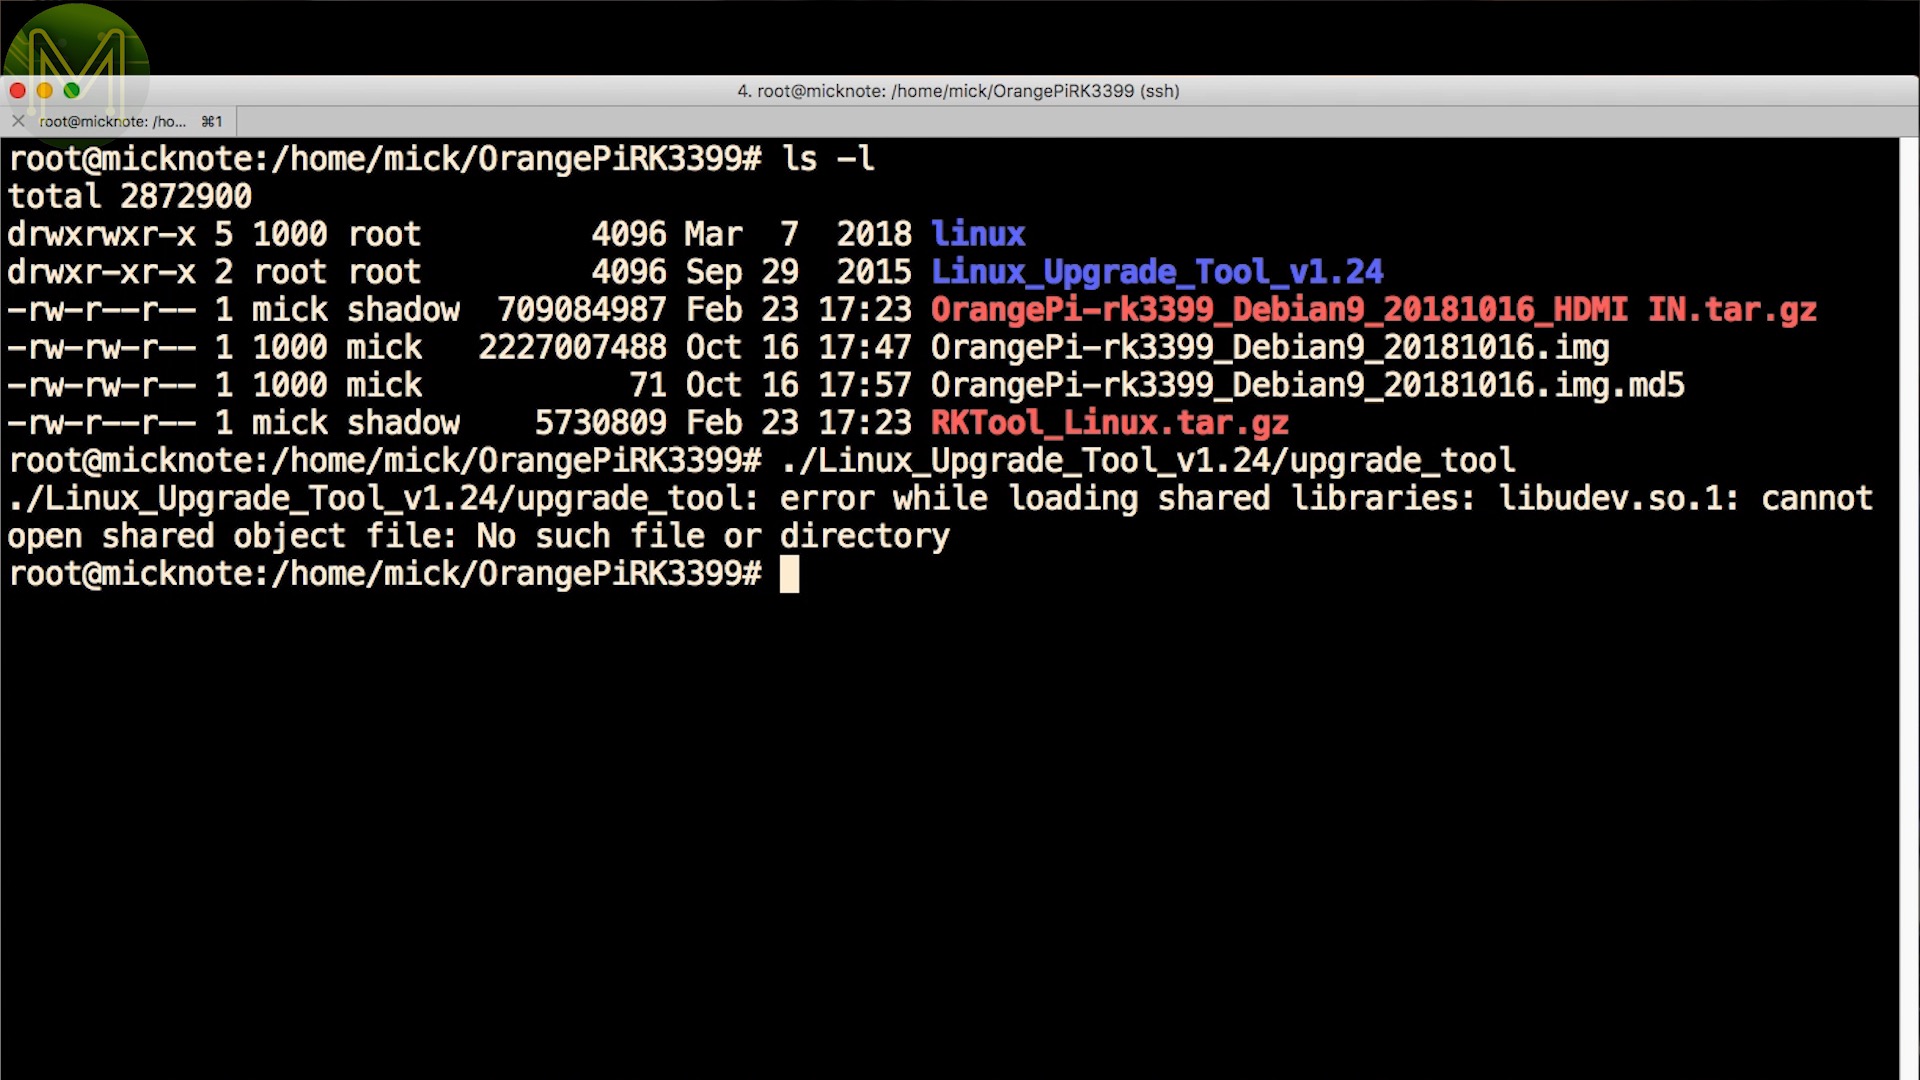
That’s all par for the course.
Then start the upgrade tool.Press and hold the recovery button while you power up the board via the USB Type C.Re-scan to detect the board.And upload the firmware image that you… oh… OK.Another way of booting a different O/S is to burn that same image to SD card.Then you’ll need to connect two test pads together, (which you can do using some tweezers), and then power up the board from the DC jack. Leave the tweezers there for a random amount of time and then release.You should then be booting up into a Linux desktop from the SD card. So simple!


HDMI Recording
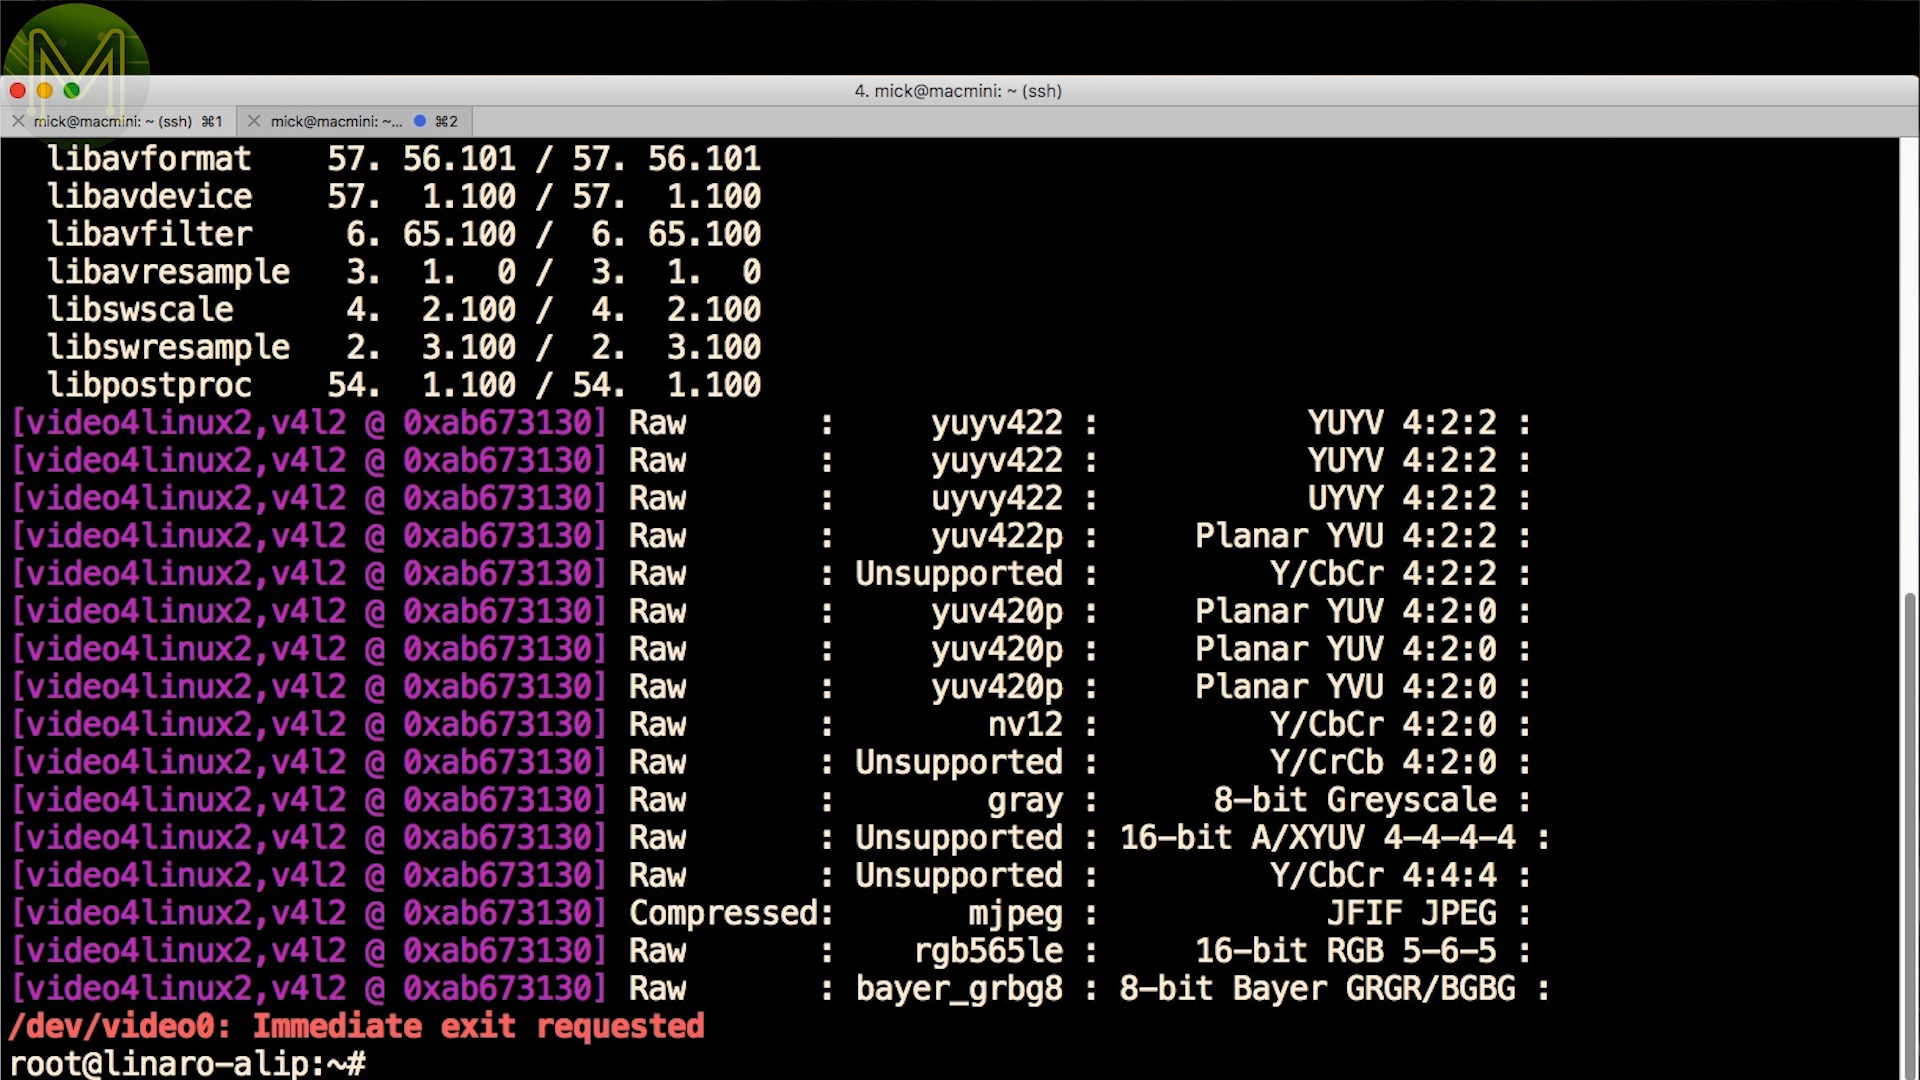
Since the HDMI recording failed dismally, I need to see if it does actually work under Linux. I used this Linux image for HDMI recording.
It has four video interfaces… Looking good.and using ffmpeg /dev/video0 and /dev/video2 supported video recording. Nice.But, strangely there were some aspects missing from the driver.So, I plugged in my notebook HDMI out to the Orange Pi HDMI input and played a random video I found somewhere on YouTube.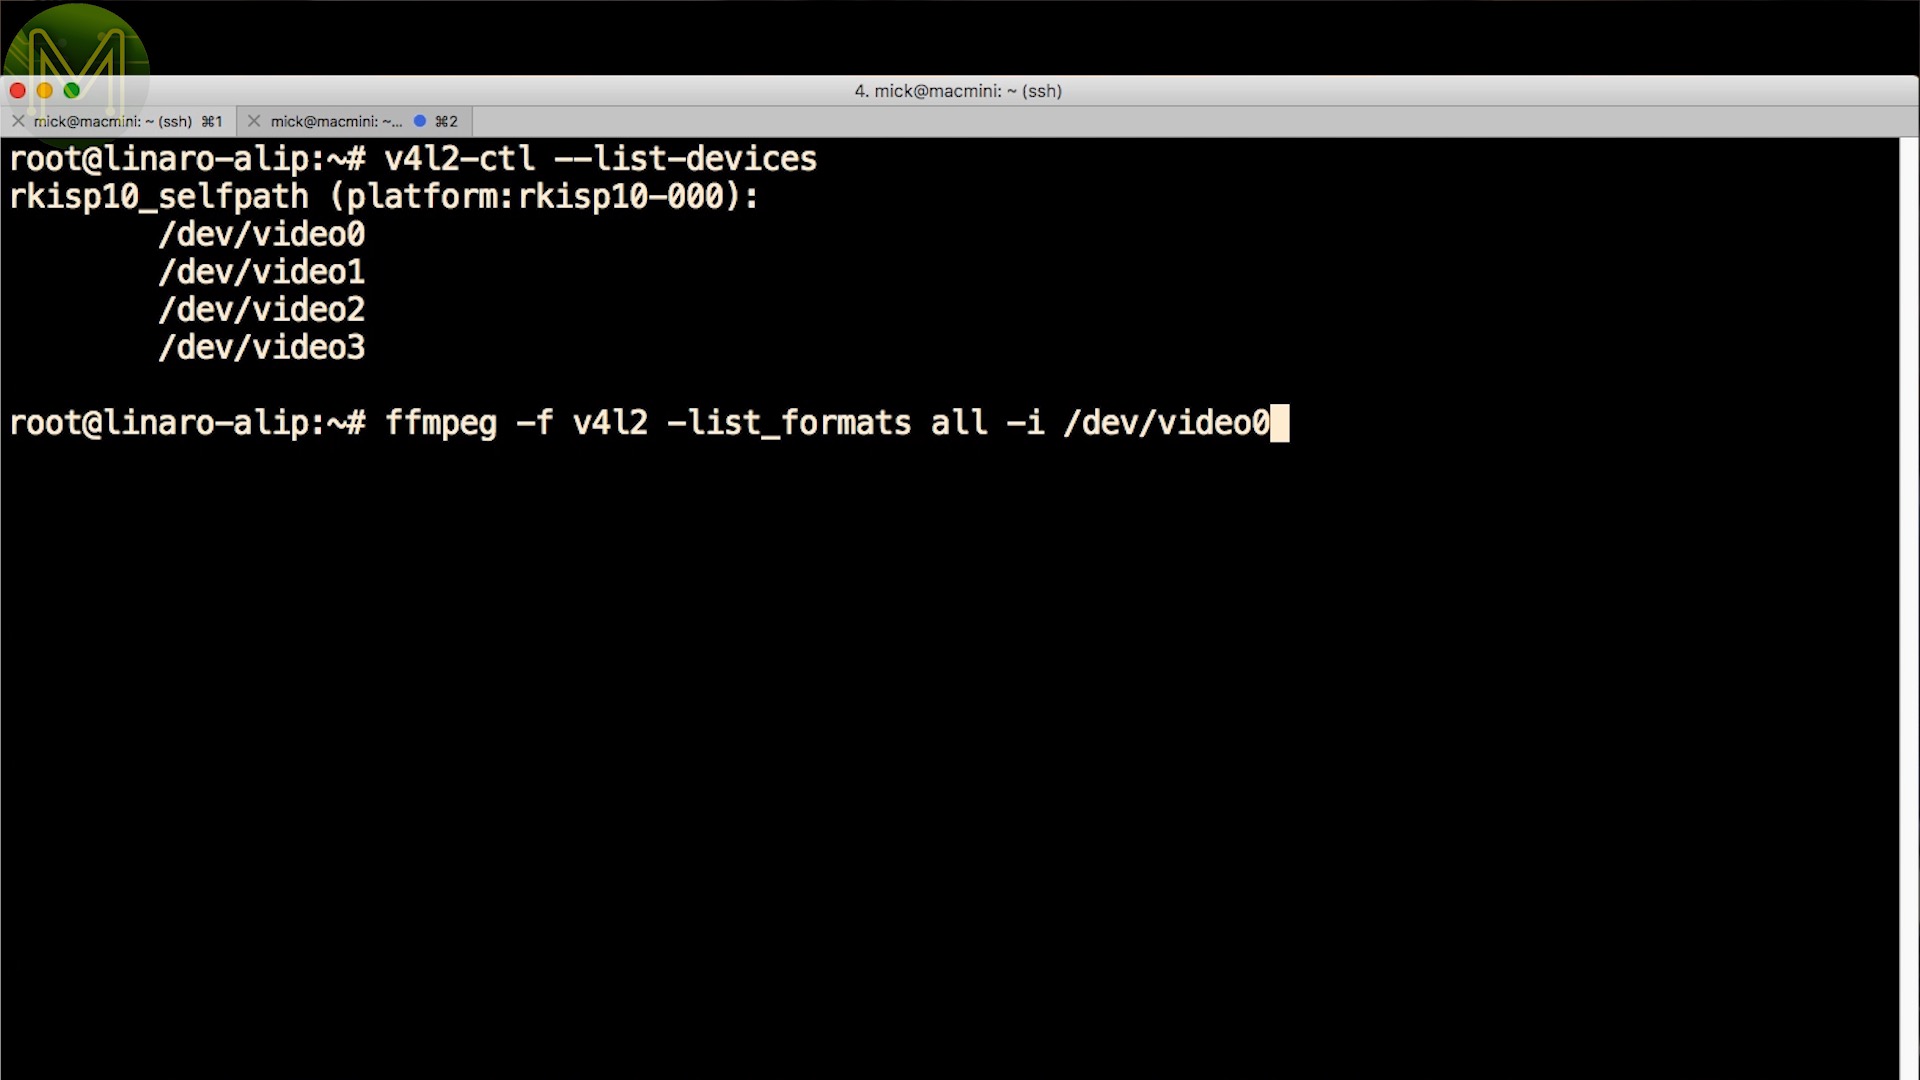
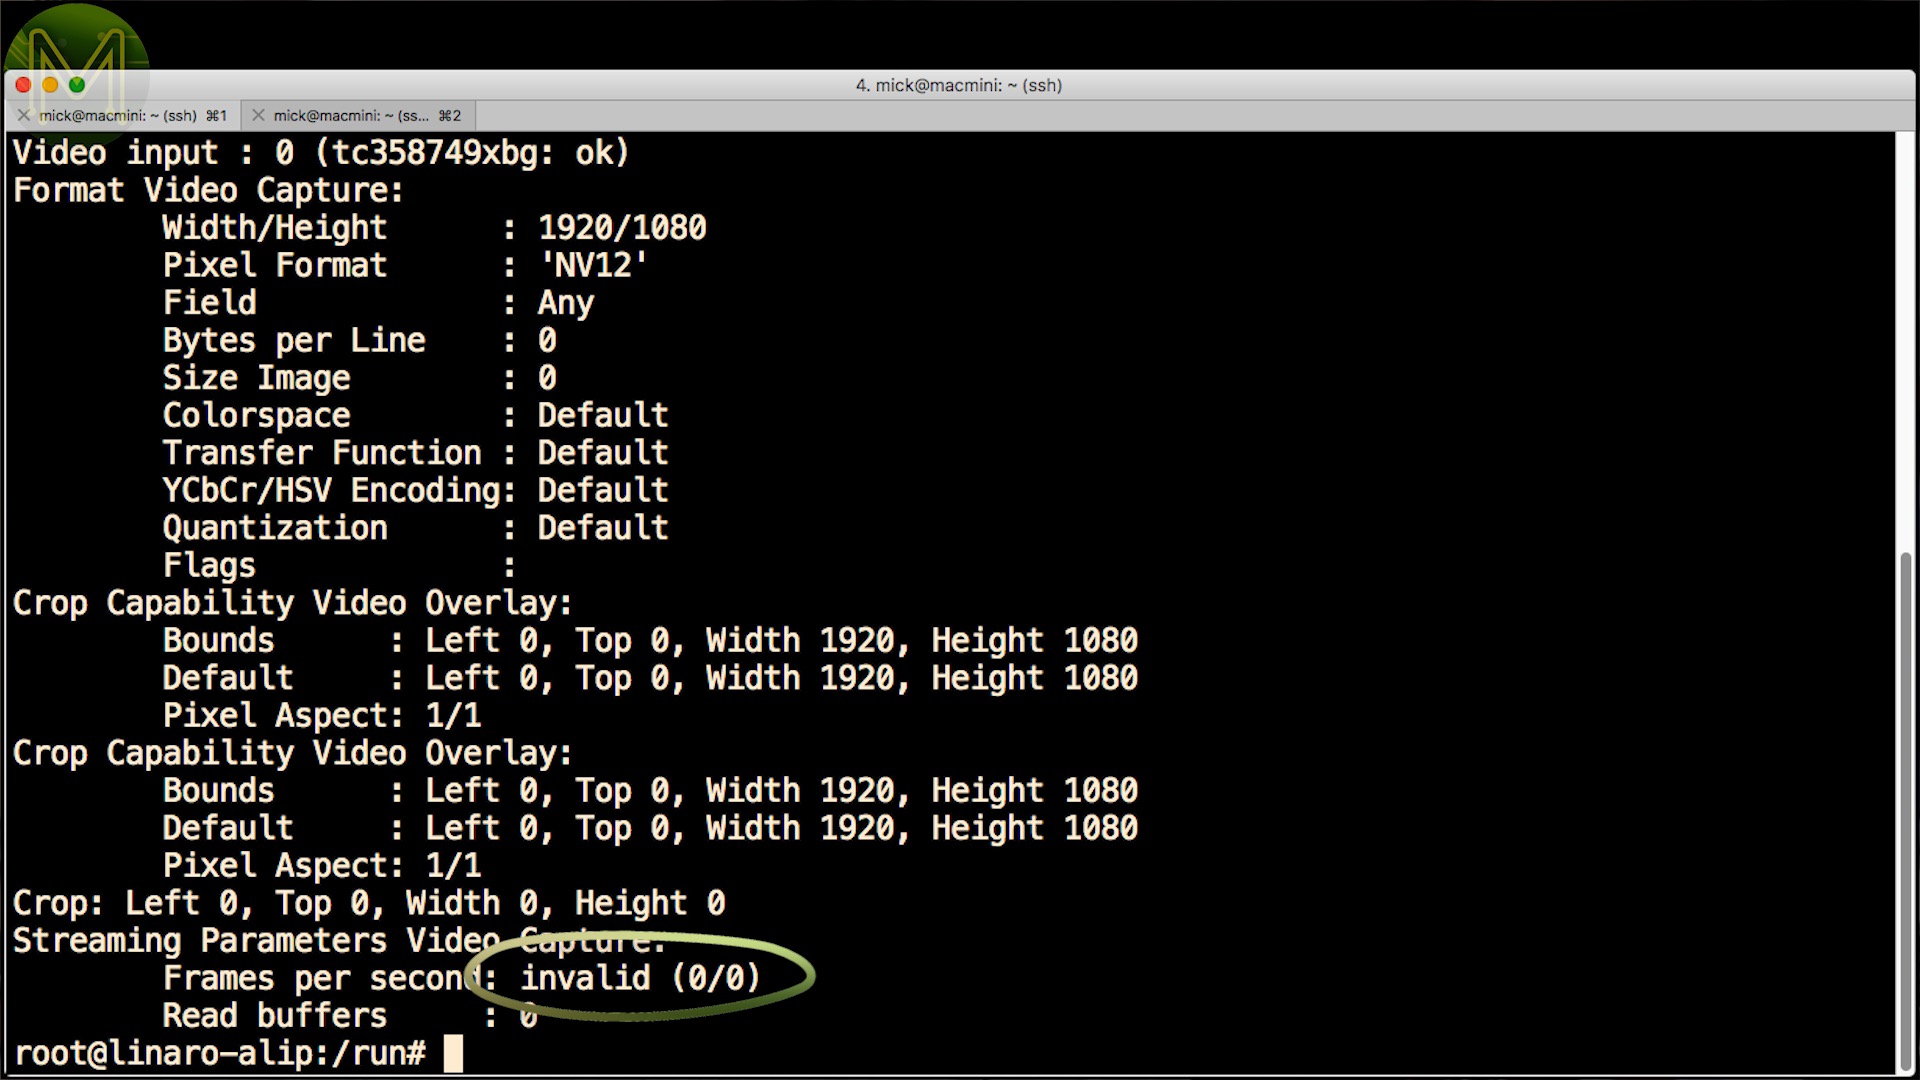
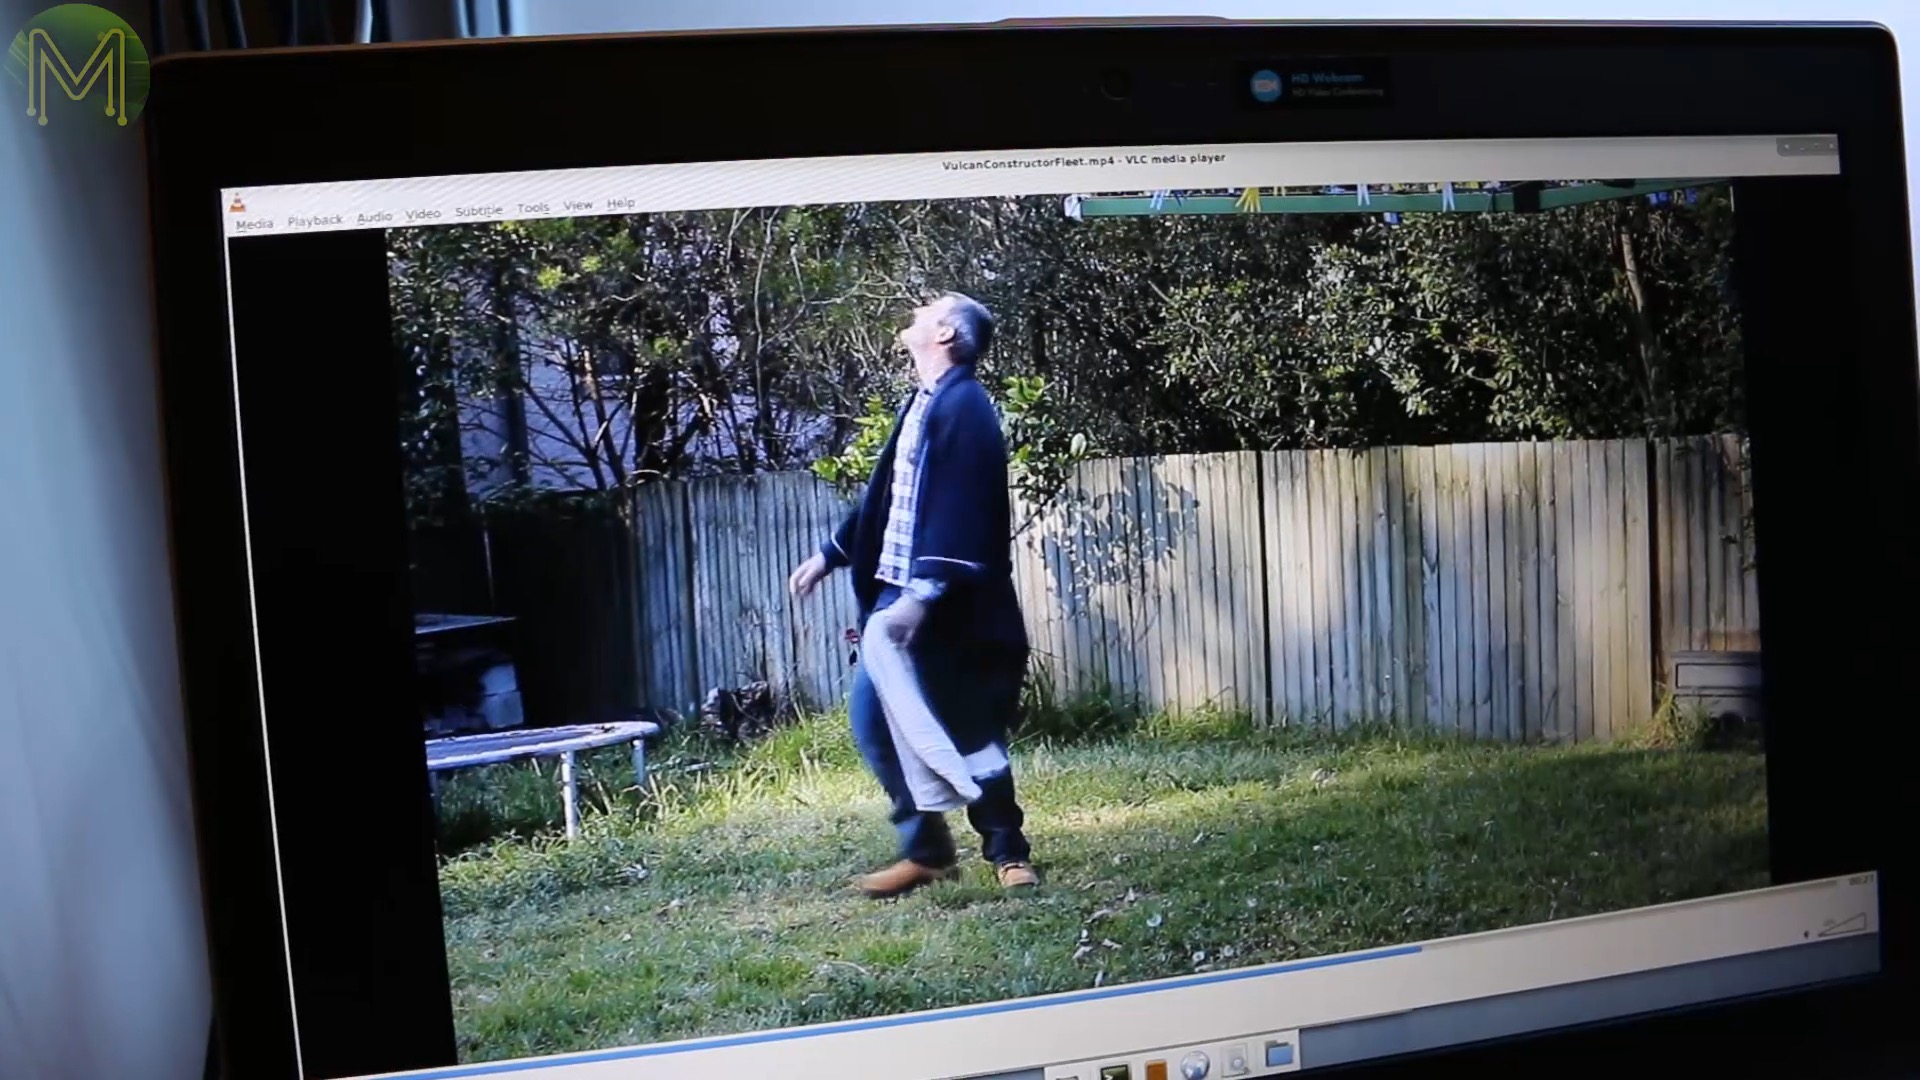
I first tried to record using gstreamer and had some mixed results.
Doing real-time AVI encoding at 60FPS
gst-launch-1.0 v4l2src device=/dev/video0 io-mode=4 ! video/x-raw,format=NV12,width=1920,height=1080,framerate=60/1 ! jpegenc ! queue ! avimux name=mux ! filesink location=output1-60fps-RTencoding.avi
and then at 30FPS
gst-launch-1.0 v4l2src device=/dev/video0 io-mode=4 ! video/x-raw,format=NV12,width=1920,height=1080,framerate=30/1 ! jpegenc ! queue ! avimux name=mux ! filesink location=output1-30fps-RTencoding.avi

gst-launch-1.0 v4l2src device=/dev/video0 io-mode=4 ! video/x-raw,format=NV12,width=1920,height=1080,framerate=60/1 ! filesink location=output1-60fps-Raw.raw

ffmpeg -f rawvideo -pix_fmt nv12 -video_size 1920x1080 -framerate 60 -i output9.raw ~/output9.mp4
So, then I switched over to using ffmpeg with hardware encoding.
ffmpeg -hwaccel vaapi -f v4l2 -pix_fmt nv12 -video_size 1920x1080 -framerate 60 -s 1920x1080 -r 60 -i /dev/video0 ffmpeg-60fps-vaapi.mpg

ffmpeg -hwaccel vaapi -f v4l2 -pix_fmt nv12 -video_size 1920x1080 -framerate 60 -s 1920x1080 -r 60 -i /dev/video0 -c:v mjpeg -q:v 3 -an ffmpeg-60fps-vaapi-HQ.mov

ffmpeg -hwaccel vaapi -f v4l2 -pix_fmt nv12 -video_size 1920x1080 -framerate 60 -s 1920x1080 -r 60 -i /dev/video0 -c:v mjpeg -q:v 3 -framerate 60 -r 60 -an ffmpeg-60fps-vaapi-HQ2.mov

ffmpeg -hwaccel vaapi -f v4l2 -pix_fmt nv12 -video_size 1920x1080 -framerate 30 -s 1920x1080 -r 30 -i /dev/video0 -c:v mjpeg -q:v 3 -r 30 -an ffmpeg-30fps-vaapi-HQ.mov

ffmpeg -hwaccel vaapi -f v4l2 -pix_fmt nv12 -s 1920x1080 -r 30 -i /dev/video0 -c:v mjpeg -q:v 3 -an ffmpeg-30fps-vaapi-HQ2.mov

ffmpeg -vsync 2 -hwaccel vaapi -f v4l2 -pix_fmt nv12 -s 1920x1080 -r 60 -i /dev/video0 -c:v mjpeg -q:v 3 -an -y -frames 900 ffmpeg-60fps-vaapi-HQ4.mov
And ended up with this being the best results so far, but even then. It was a little stuttery at times.
ffmpeg -hwaccel vaapi -f v4l2 -pix_fmt nv12 -s 1920x1080 -r 30 -i /dev/video0 -c:v mjpeg -q:v 10 -an -y -frames 900 -vsync 2 ffmpeg-30fps-vaapi-HQ42.mov

GPIO Tests
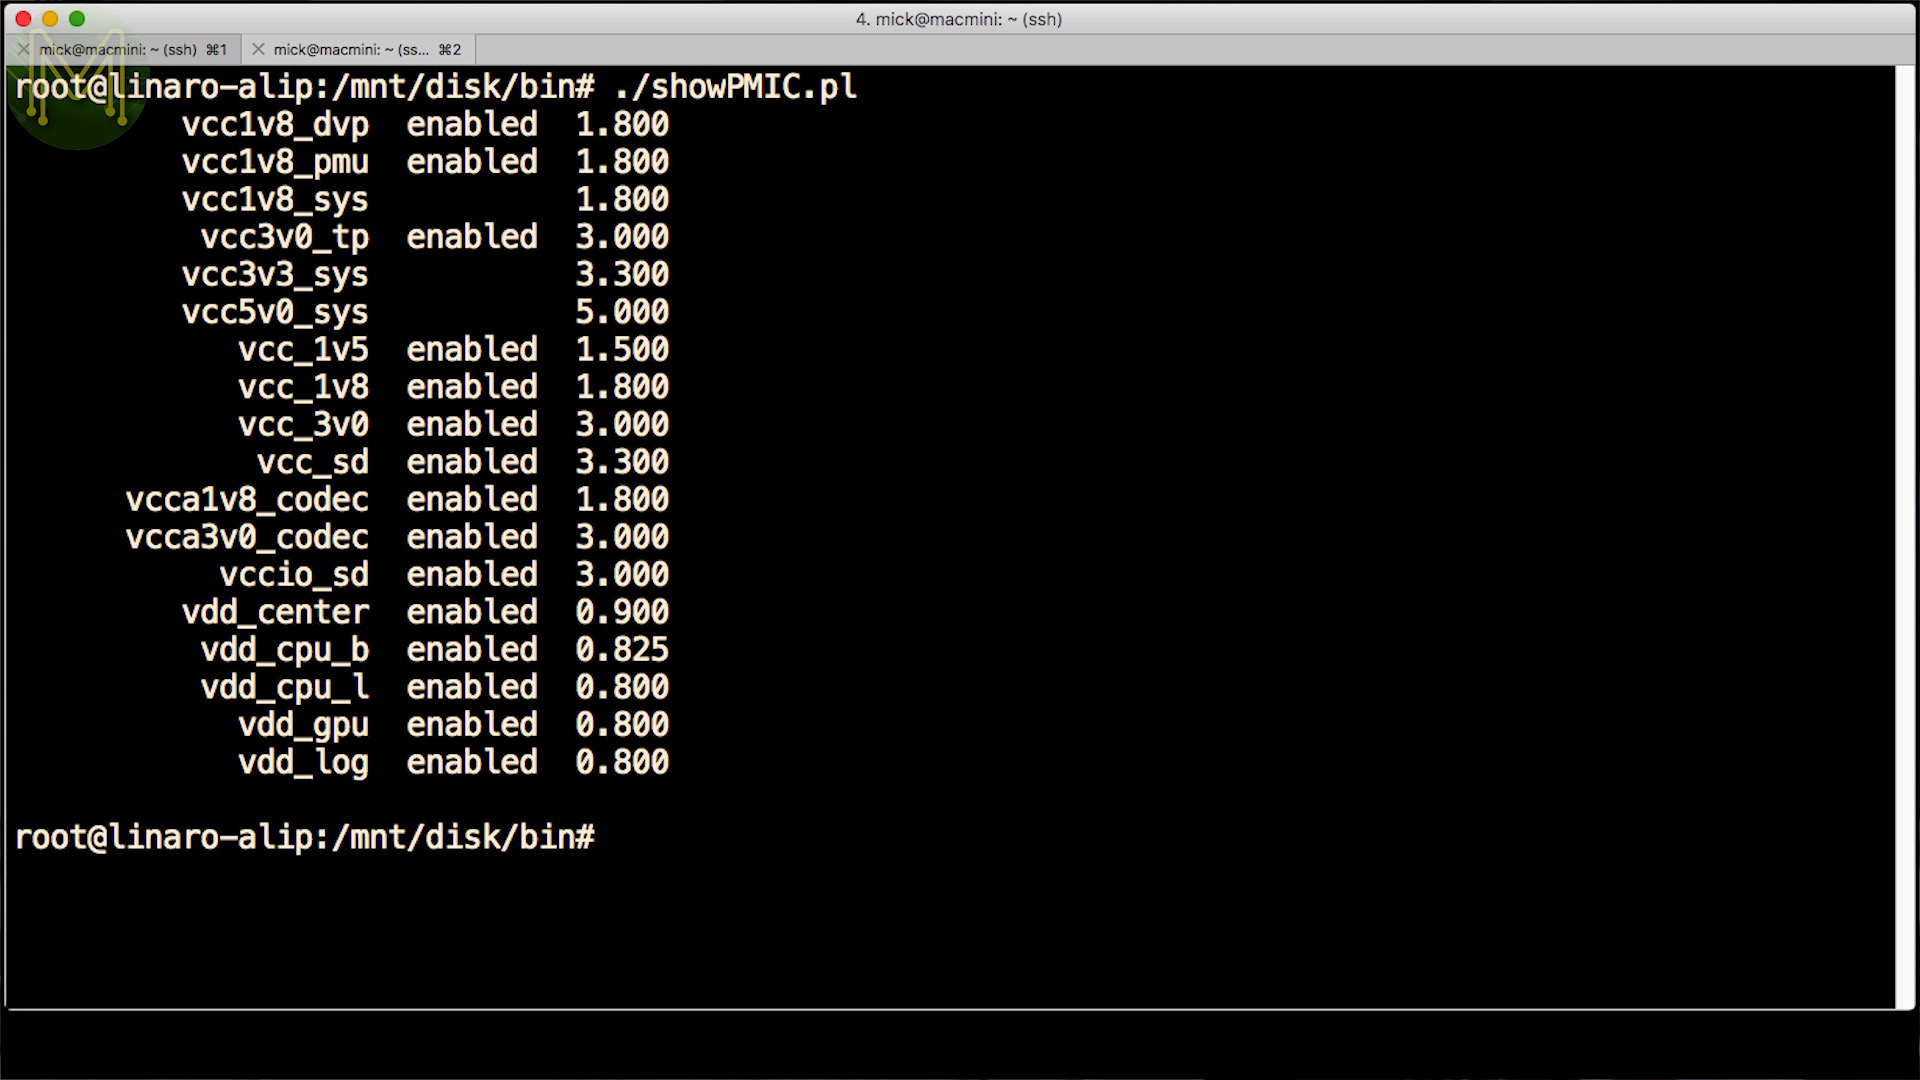
So before I move on to Armbian tests, I thought I’d check out what GPIOs the Orange guys had enabled.
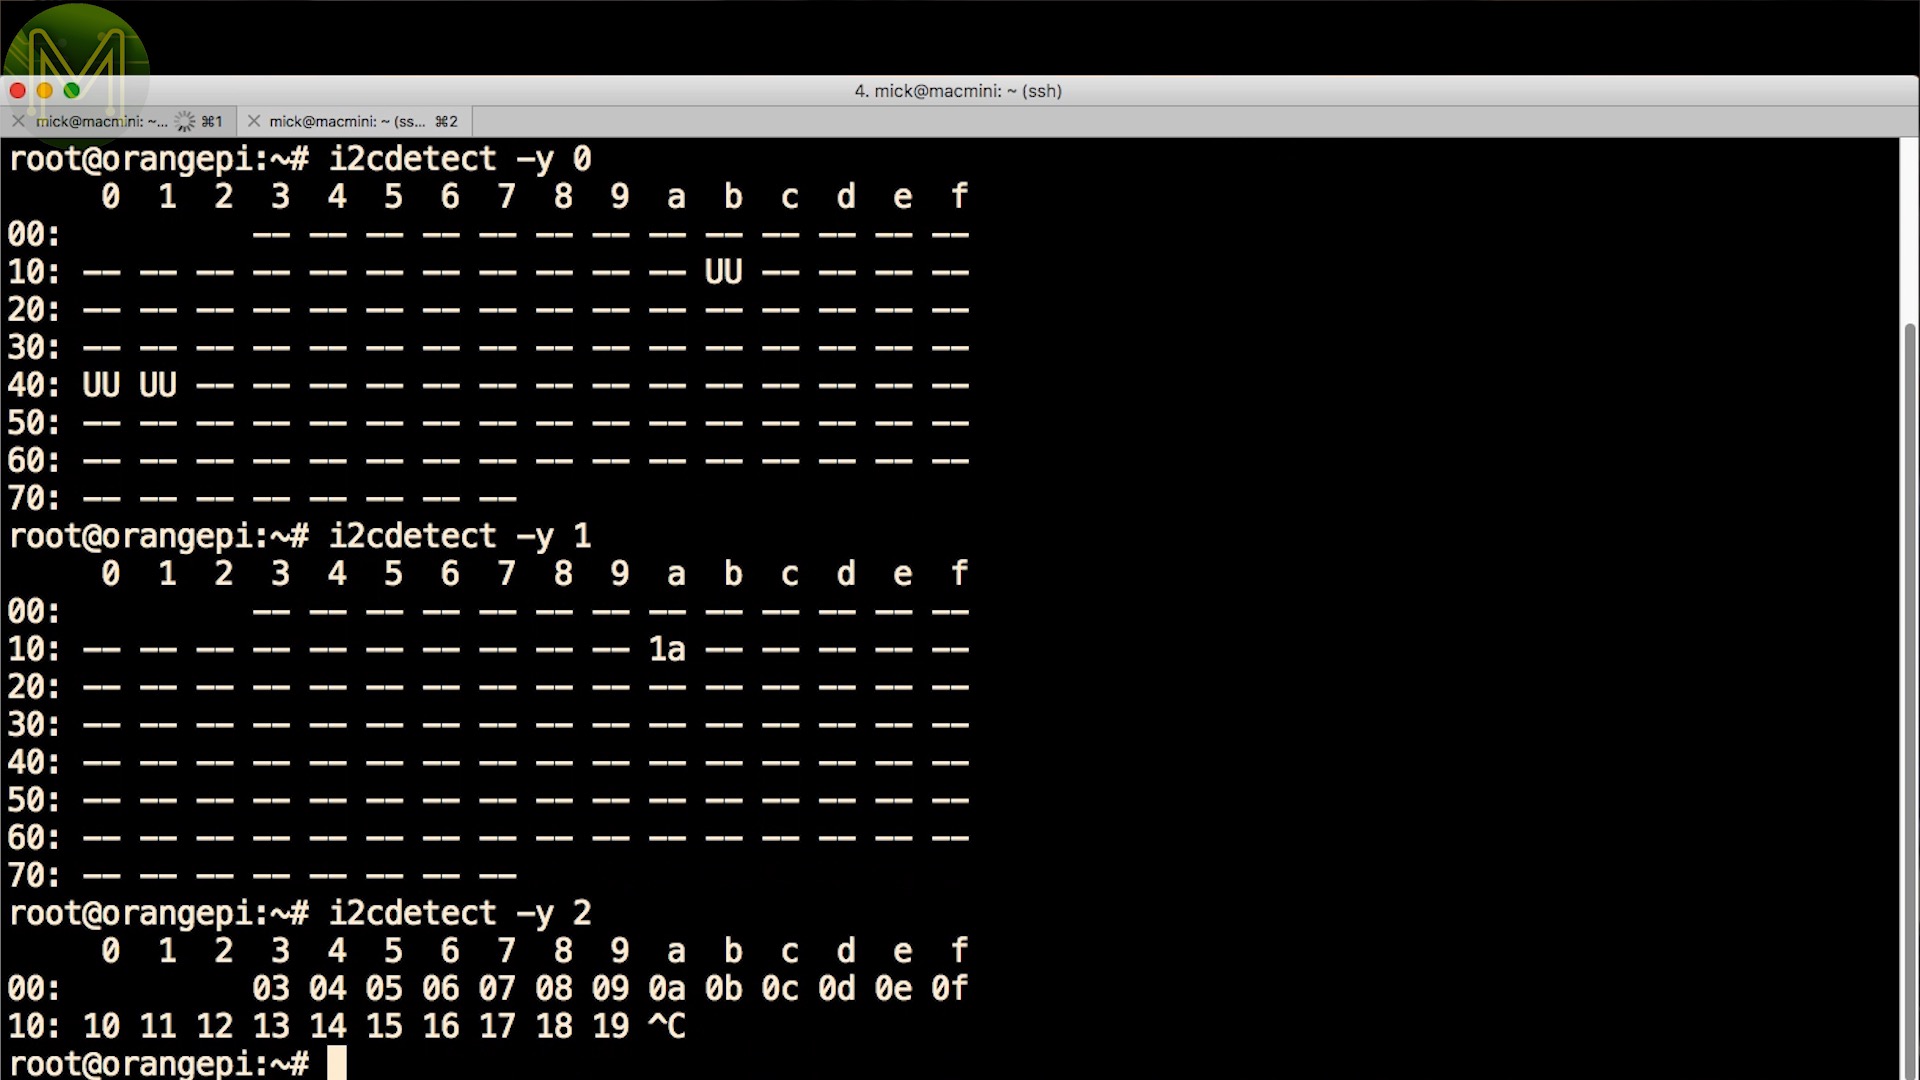
There’s four I2C buses enabled out of the 8. With a bunch of devices visible on each of them.

Unfortunately, the schematics were wrong and the actual I2C addresses were way off. So, here’s an adjusted I2C scan for you.
I2C bus 0
- /sys/devices/platform/ff3c0000.i2c/i2c-0/i2c-dev/i2c-0/name rk3x-i2c
- /sys/devices/platform/ff3c0000.i2c/i2c-0/name rk3x-i2c
**RK808 - 0x1B **
PMIC, voltage regulators and RTC.
- /sys/devices/platform/ff3c0000.i2c/i2c-0/0-001b/name rk808
- /sys/devices/platform/ff3c0000.i2c/i2c-0/0-001b/regulator/regulator.11/name vdd_center
- /sys/devices/platform/ff3c0000.i2c/i2c-0/0-001b/regulator/regulator.12/name vdd_cpu_l
- /sys/devices/platform/ff3c0000.i2c/i2c-0/0-001b/regulator/regulator.13/name vcc_ddr
- /sys/devices/platform/ff3c0000.i2c/i2c-0/0-001b/regulator/regulator.14/name vcc_1v8
- /sys/devices/platform/ff3c0000.i2c/i2c-0/0-001b/regulator/regulator.15/name vcc1v8_dvp
- /sys/devices/platform/ff3c0000.i2c/i2c-0/0-001b/regulator/regulator.16/name vcc3v0_tp
- /sys/devices/platform/ff3c0000.i2c/i2c-0/0-001b/regulator/regulator.17/name vcc1v8_pmu
- /sys/devices/platform/ff3c0000.i2c/i2c-0/0-001b/regulator/regulator.18/name vccio_sd
- /sys/devices/platform/ff3c0000.i2c/i2c-0/0-001b/regulator/regulator.19/name vcca3v0_codec
- /sys/devices/platform/ff3c0000.i2c/i2c-0/0-001b/regulator/regulator.20/name vcc_1v5
- /sys/devices/platform/ff3c0000.i2c/i2c-0/0-001b/regulator/regulator.21/name vcca1v8_codec
- /sys/devices/platform/ff3c0000.i2c/i2c-0/0-001b/regulator/regulator.22/name vcc_3v0
- /sys/devices/platform/ff3c0000.i2c/i2c-0/0-001b/regulator/regulator.23/name vcc3v3_s3
- /sys/devices/platform/ff3c0000.i2c/i2c-0/0-001b/regulator/regulator.24/name vcc3v3_s0
- /sys/devices/platform/ff3c0000.i2c/i2c-0/0-001b/rk808-rtc/rtc/rtc0/name rk808-rtc syr827 - 0x40
Synchronous step down regulator for the CPU.
- /sys/devices/platform/ff3c0000.i2c/i2c-0/0-0040/name syr827
- /sys/devices/platform/ff3c0000.i2c/i2c-0/0-0040/regulator/regulator.9/name vdd_cpu_b syr828 - 0x41
Synchronous step down regulator for the GPU.
- /sys/devices/platform/ff3c0000.i2c/i2c-0/0-0041/name syr828
- /sys/devices/platform/ff3c0000.i2c/i2c-0/0-0041/regulator/regulator.10/name vdd_gpu
I2C bus 1
- /sys/devices/platform/ff110000.i2c/i2c-1/i2c-dev/i2c-1/name rk3x-i2c
- /sys/devices/platform/ff110000.i2c/i2c-1/name rk3x-i2c TC358749XBG - 0x0F
HDMI to MIPI-CSI for HDMI recording.
- /sys/devices/platform/ff110000.i2c/i2c-1/1-000f/name tc358749xbg-v4l2-i2 ALC5651 - 0x1A
Audio CODEC
- /sys/devices/platform/ff110000.i2c/i2c-1/1-001a/name rt5651
I2C bus 4
- /sys/devices/platform/ff3d0000.i2c/i2c-4/name rk3x-i2c
- /sys/devices/platform/ff3d0000.i2c/i2c-4/i2c-dev/i2c-4/name rk3x-i2c AK09911 - 0x0C
Compass 3DOF
- /sys/devices/platform/ff3d0000.i2c/i2c-4/4-000c/name ak09911
- /sys/devices/platform/ff3d0000.i2c/i2c-4/4-000c/input/input3/name compass CM32181 - 0x10
Ambient Light Sensor
- /sys/devices/platform/ff3d0000.i2c/i2c-4/4-0010/name cm32181
- /sys/devices/platform/ff3d0000.i2c/i2c-4/4-0010/iio:device1/name cm32181 FUSB302 - 0x22
Programmable USB Type C controller
- /sys/devices/platform/ff3d0000.i2c/i2c-4/4-0022/name fusb302
- /sys/devices/platform/ff3d0000.i2c/i2c-4/4-0022/extcon/extcon1/name 4-0022
- /sys/devices/platform/ff3d0000.i2c/i2c-4/4-0022/extcon/extcon1/cable.0/name USB
- /sys/devices/platform/ff3d0000.i2c/i2c-4/4-0022/extcon/extcon1/cable.1/name USB_HOST
- /sys/devices/platform/ff3d0000.i2c/i2c-4/4-0022/extcon/extcon1/cable.2/name USB_VBUS_EN
- /sys/devices/platform/ff3d0000.i2c/i2c-4/4-0022/extcon/extcon1/cable.3/name SDP
- /sys/devices/platform/ff3d0000.i2c/i2c-4/4-0022/extcon/extcon1/cable.4/name CDP
- /sys/devices/platform/ff3d0000.i2c/i2c-4/4-0022/extcon/extcon1/cable.5/name DCP
- /sys/devices/platform/ff3d0000.i2c/i2c-4/4-0022/extcon/extcon1/cable.6/name SLOW-CHARGER
- /sys/devices/platform/ff3d0000.i2c/i2c-4/4-0022/extcon/extcon1/cable.7/name FAST-CHARGER
- /sys/devices/platform/ff3d0000.i2c/i2c-4/4-0022/extcon/extcon1/cable.8/name DP CW2015 - 0x62
Battery fuel gauge ASM1153E
USB 3.0 and SATA MPU6500 - 0x68
Gyro/Accel 6DOF
- /sys/devices/platform/ff3d0000.i2c/i2c-4/4-0068/name mpu6500 LSM6DS3 - 0x6A
6DOF Gyro/Accel
- /sys/devices/platform/ff3d0000.i2c/i2c-4/4-006a/name lsm6ds3_gyro
- /sys/devices/platform/ff3d0000.i2c/i2c-4/4-006a/input/input4/name gyro LIS3MDL - 0x1C | 0x1E
3DOF compass
I2C bus 9
HDMI out
- /sys/devices/platform/ff940000.hdmi/i2c-9/name DesignWare HDMI
- /sys/devices/platform/ff940000.hdmi/i2c-9/i2c-dev/i2c-9/name DesignWare HDMIAlas, no SPI. That’s really to be expected, but we do have frequency scaling control and access to the PMIC and voltage regulators.
Armbian Booting
OK, so moving on. Time for the latest Armbian nightly build.
Which doesn’t seem to have any HDMI output, but looking on the Armbian forums it seems that that part hasn’t been sorted out yet.
However it does connect to the network and you can login in the usual way.The Armbian guys have created a really nice tool that allows you to copy the running root filesystem over to either eMMC or SD card, depending on which one you didn’t boot from.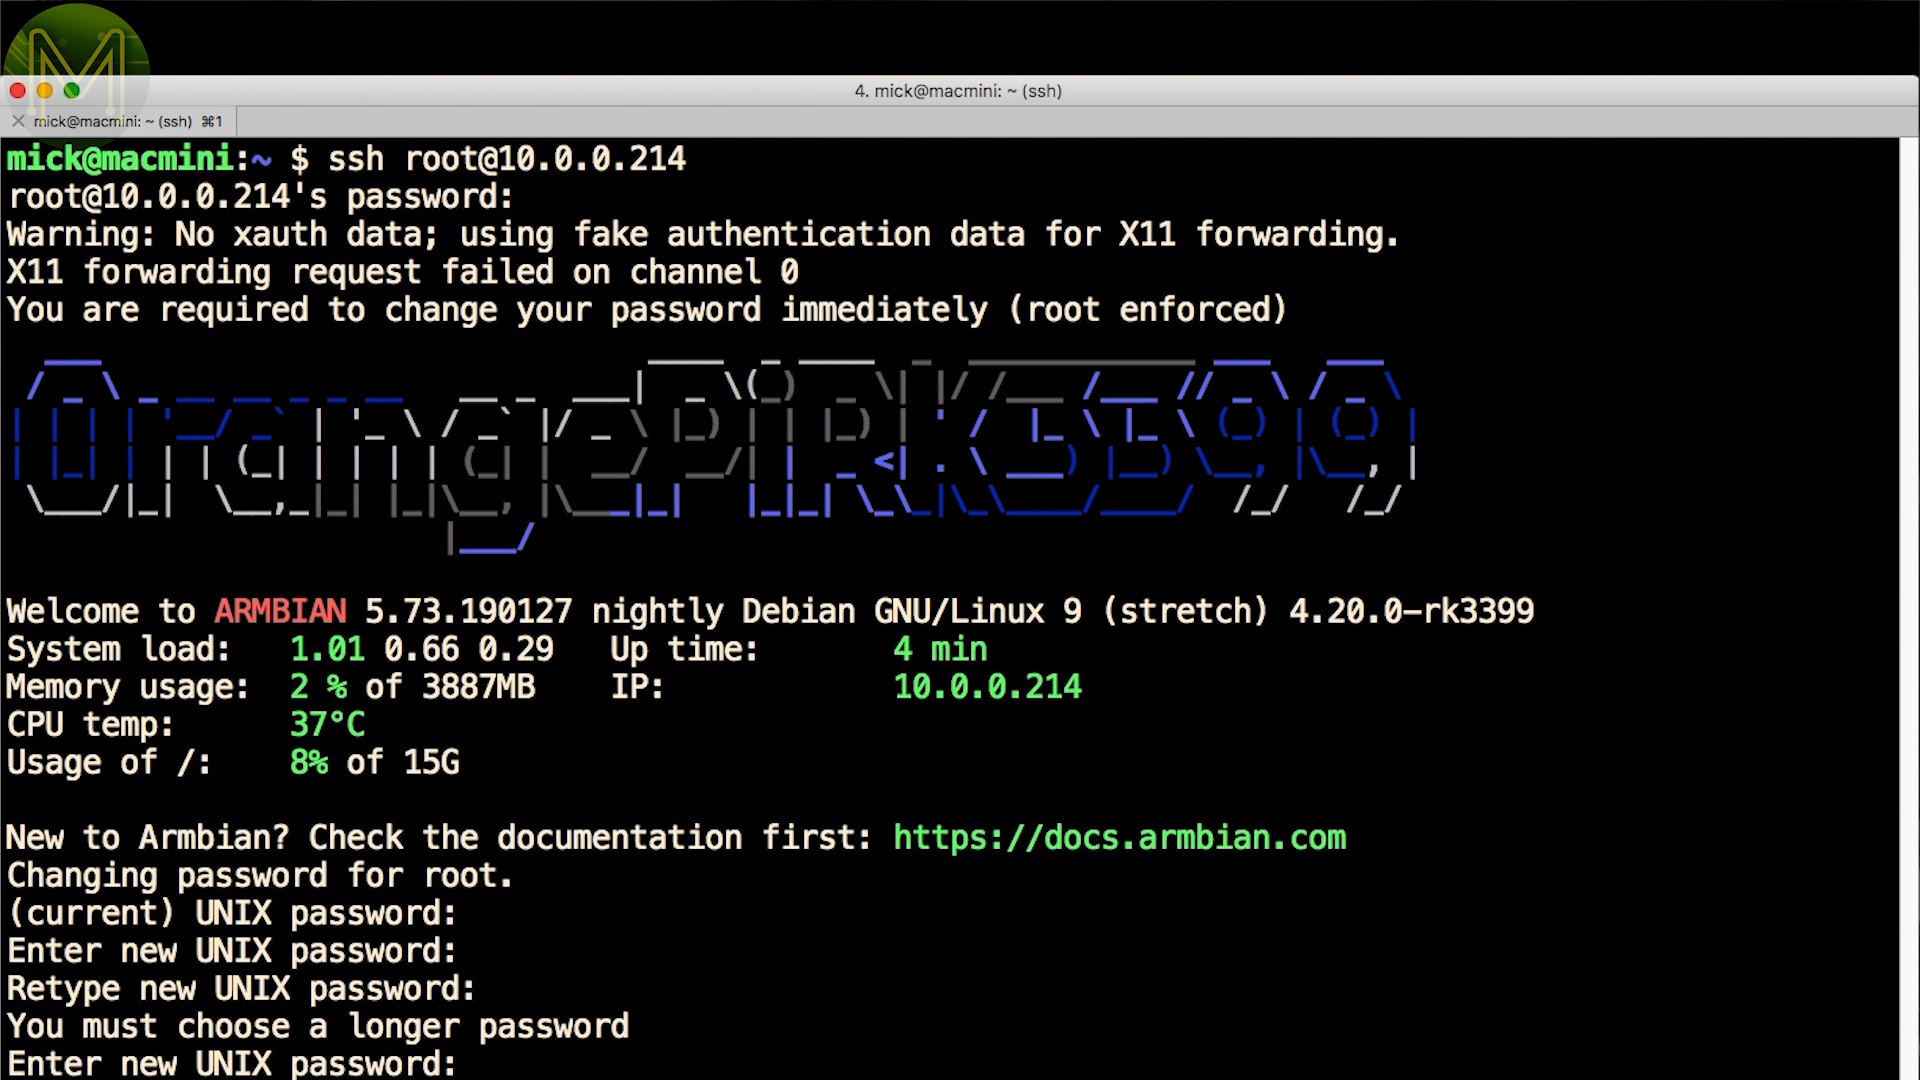

This is actually really handy and saves a lot of fiddling around with tweezers and jumpers.
Armbian GPIO
So what about GPIOs from Armbian?
We have 5 I2C buses enabled out of the 8 with a similar lineup to the Linaro O/S.Bus 1 saw the HDMI to MIPI-CSI IC vanish. So I don’t expect HDMI in to be working. Bus 2 isn’t really an I2C bus and so doesn’t have any pull-ups. So it didn’t scan properly.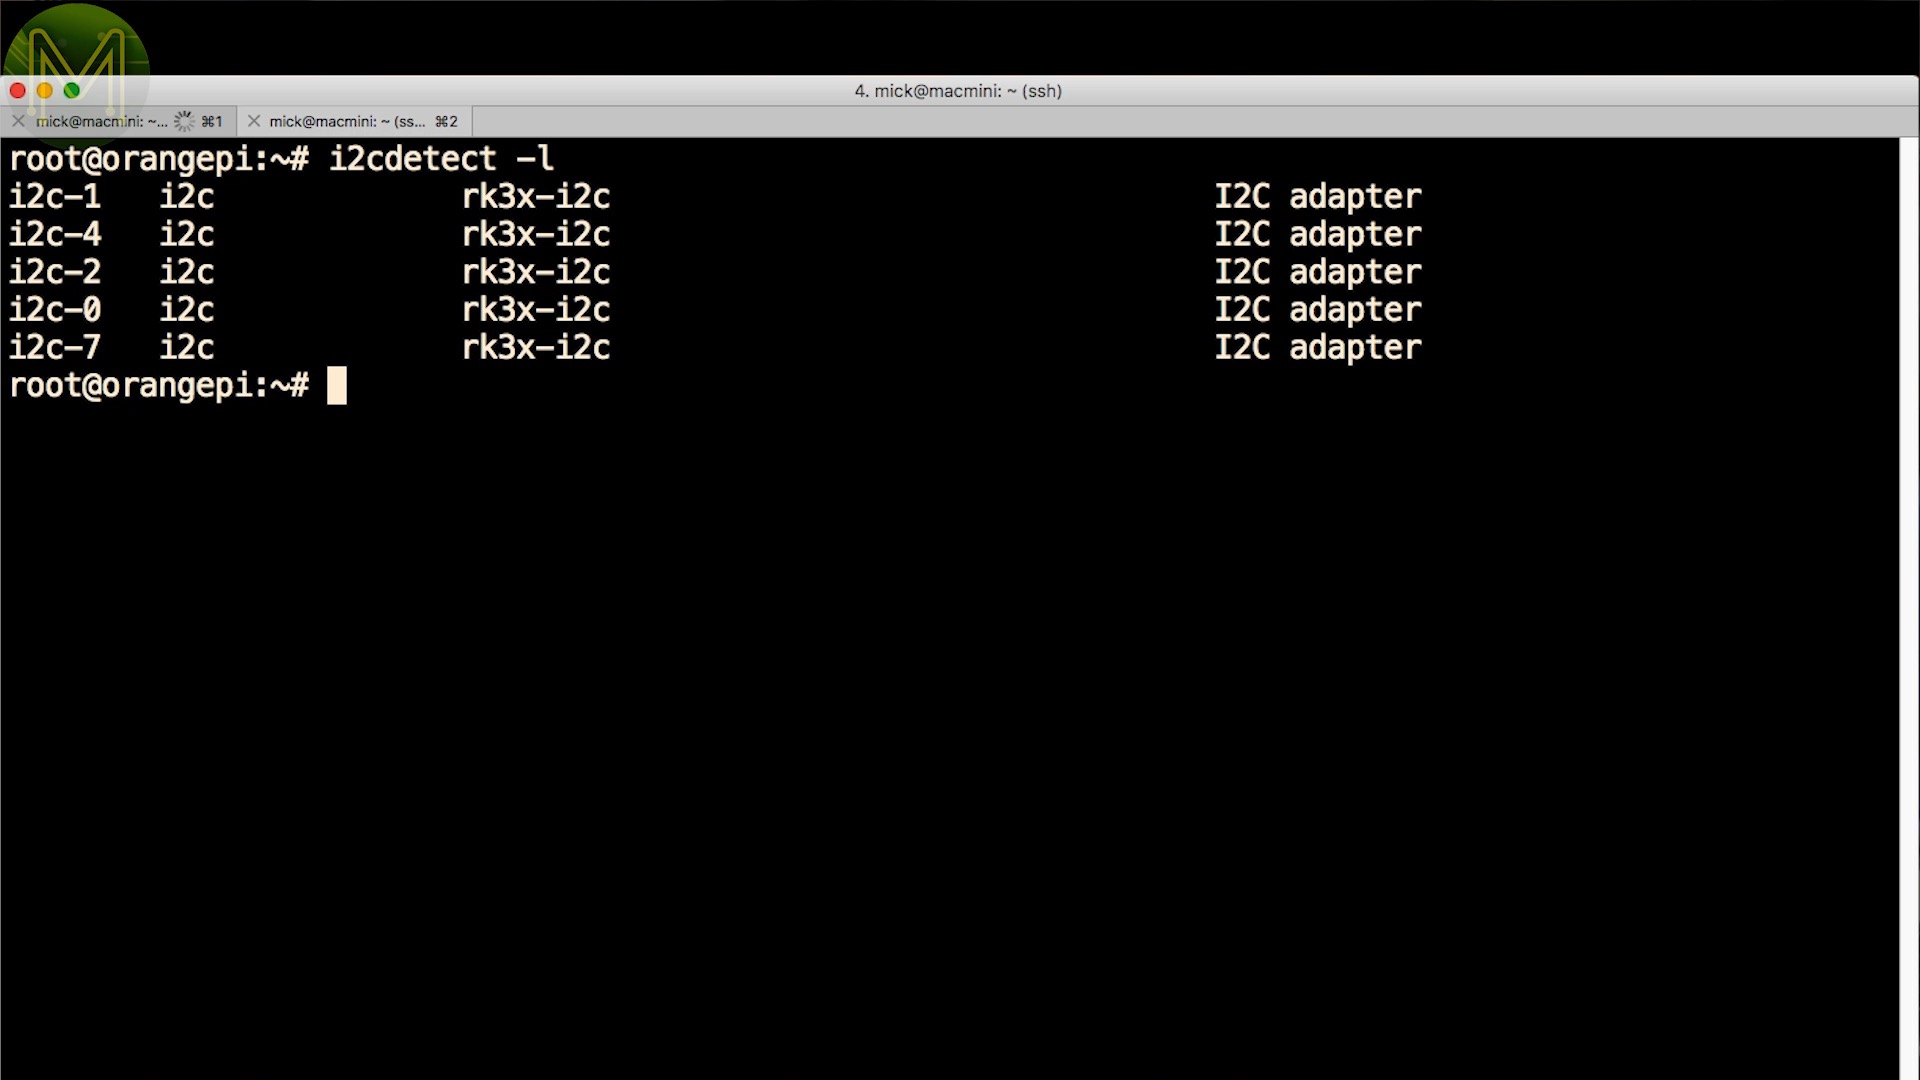
The rest of the buses remained the same.
I was hoping my MIPI-CSI camera would be working, but unfortunately I couldn’t see it on any of the I2C buses.
And yup, SPI is a no show again.
Running the Armbian 7zip benchmark came up with a result similar to everyone else on the Armbian forums.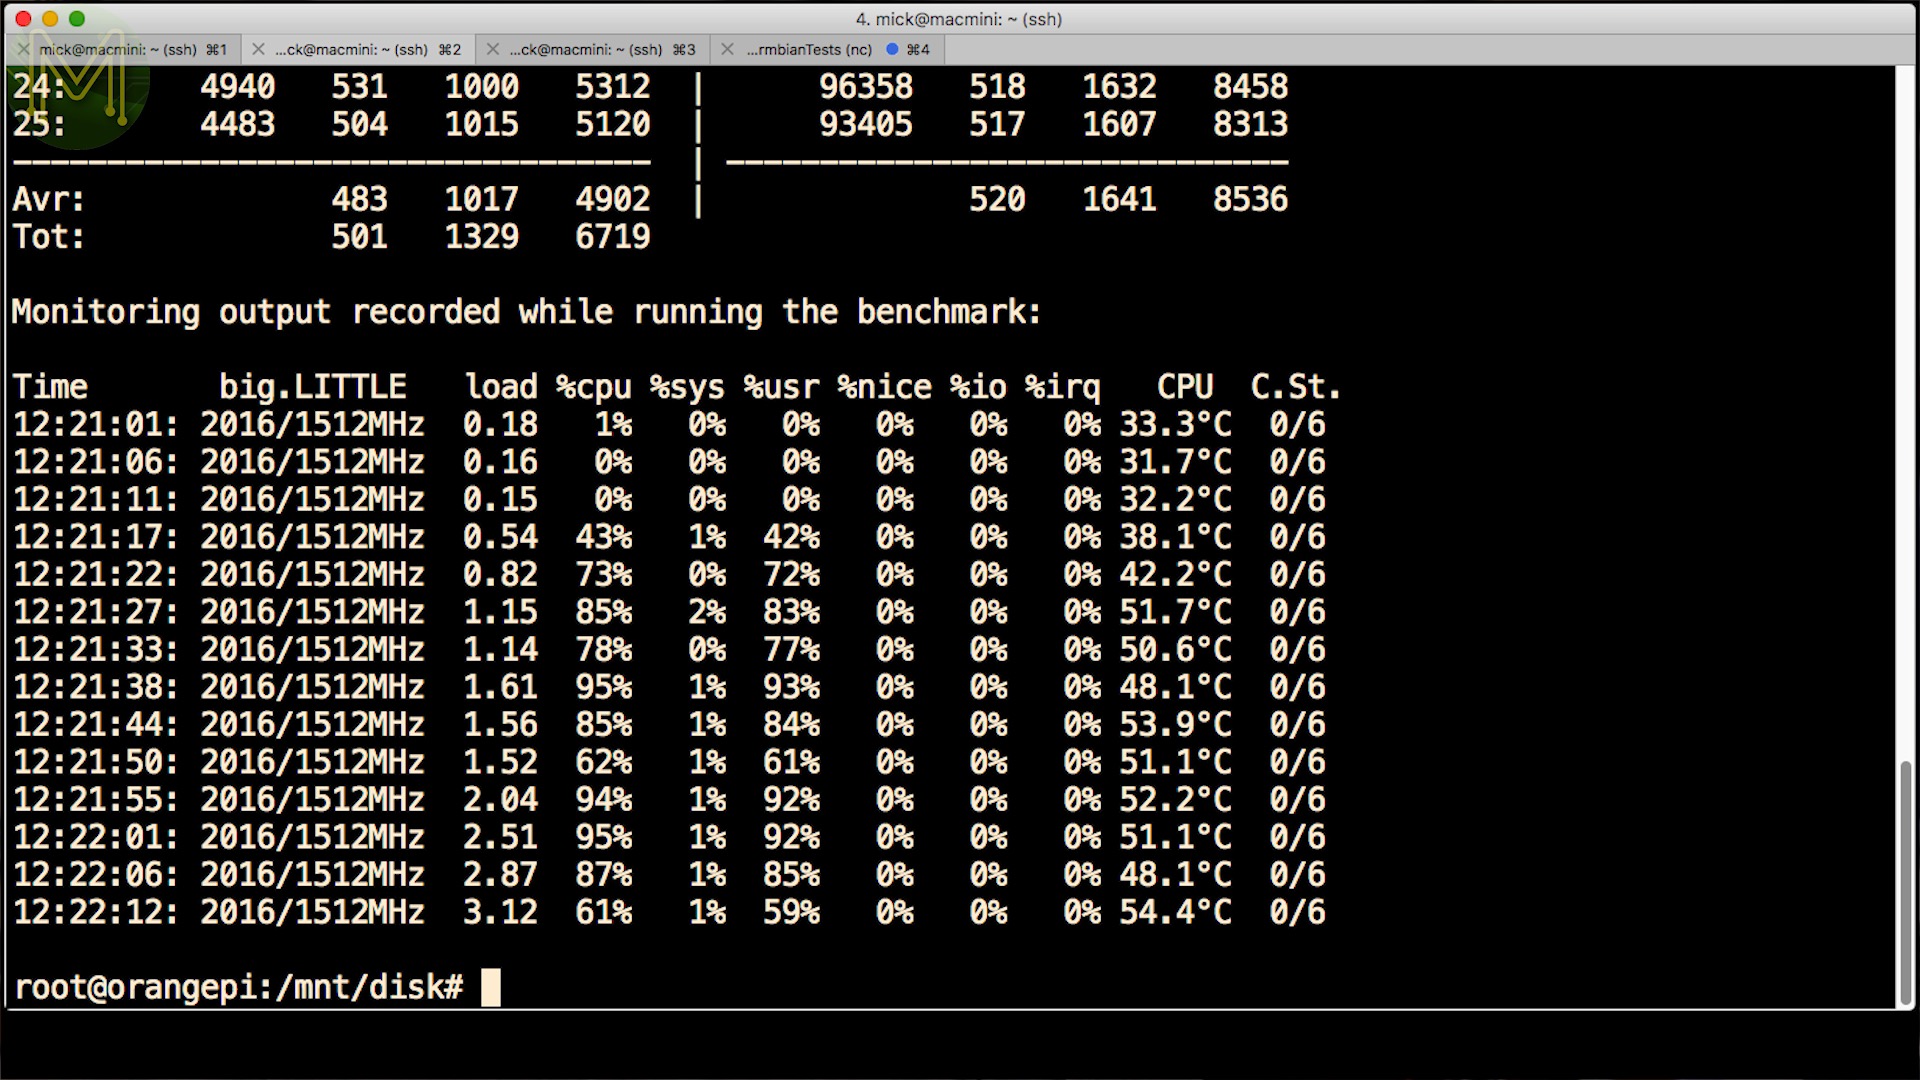
One of the really annoying things was the GbE driver. I saw problems with all three O/S and even when dropping down to 100Mbit half duplex, I’d still see the NIC drop off the network entirely.
Armbian SATA
So, on to SATA testing. This will be good.
I used a fairly recent but bog standard 1TB SATA disk, (WD10JPVX). Note that the SATA interface is NOT hot swap. So you’ll have to power off and on again to see the disk.
I ran a bunch of iozone tests for a couple of hours using Phoronix. Since the hard disk is attached to a plain USB 3.0 to SATA bridge, the results were as expected.
Click here to see all the results and here for a comparison against other SBCs.
The Orange Pi sat around the Rock64, NanoPC-T4, Tinkerboard and Pi3 for 64kb block read performance.With write performance matching the EspressoBin, but really this is all dependent the type of disk used. So, is only a rough idea of performance.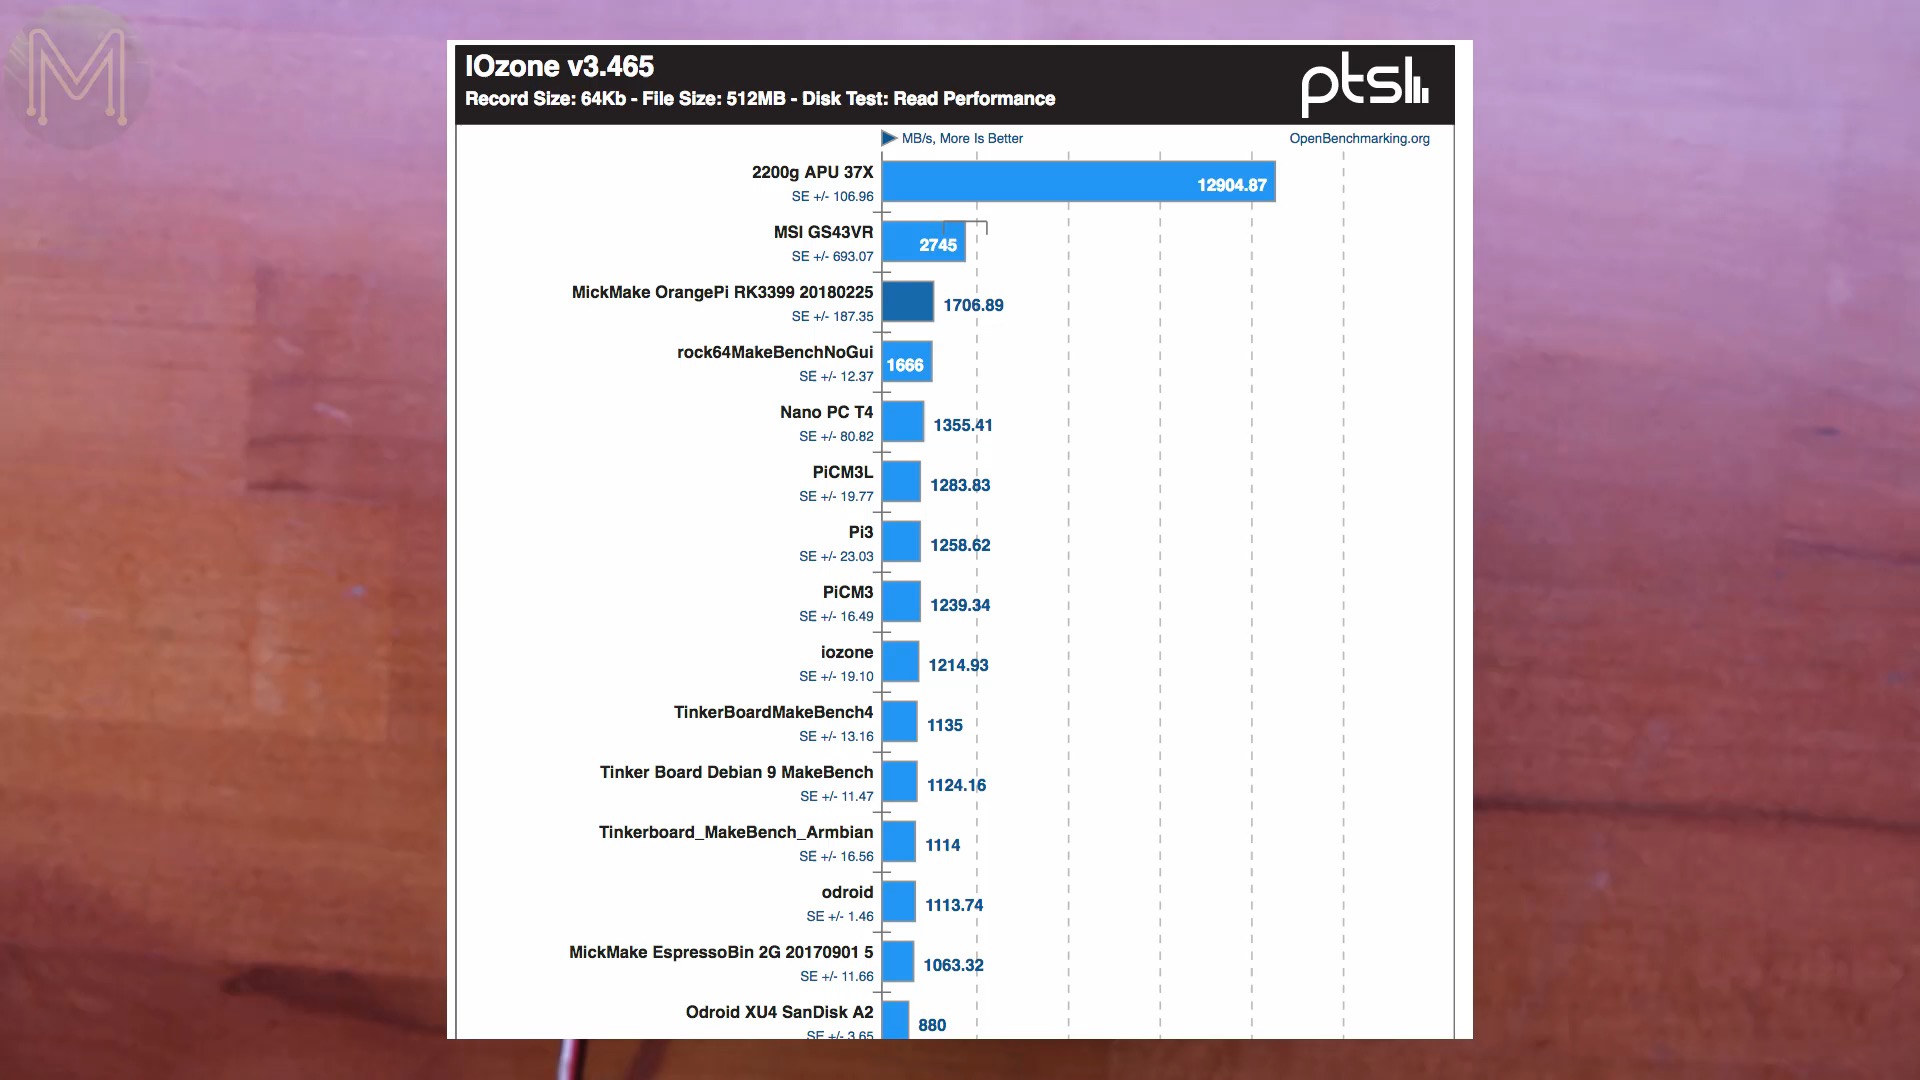

I’m thinking of running a comparison video across all SBCs that are SATA capable. So leave a comment below if you’d like to see it.
Power Consumption
Unfortunately, my power logger seemed to stop recording current draw for some reason. So, I can’t really see what the current draw was like, but while running Armbian and sitting idle, I saw the SoC temperature sit around 31C.
- Max: 34.4
- Average: 31
- Min: 30.6
During the Phoronix tests I saw a max of 52 with an average of 32C.
- Max: 52.2
- Average: 32
- Min: 30
This is all pretty similar to other RK3399 based SBCs I have reviewed. So no surprises there.
Summary
So, what do I think of the Orange Pi RK3399? Cons:
- Well, it’s not as polished as some of the other RockChip based SBCs, like the NanoPi NEO4 for example.
- Even though it’s a fairly stock standard design, the software side is quite flakey. Not having a workable Android O/S is a bit of an issue.
- Documentation is fairly complete, but there are a lot of errors. So trying to track down components takes a while. On the plus side:
- You can actually record from HDMI. This makes it the only SBC on the market capable of doing so. The video does occasionally stutter even with hardware encoding, but I can see this only improving over time.
- The HDMI input on the SBC doesn’t support HDCP but the Toshiba device does allow for it. I’m gathering that this would cost a fair amount to implement as licensing costs would go through the roof for the Orange guys and make this board a whole lot more expensive.
- It’s one of the only SBCs to push out a lot of the RockChip GPIOs. A lot more than other SBCs.
- And we’ve got battery management, but I haven’t tested this yet.
So, a bit of a mixed bag. Definitely not an SBC for a beginner, possibly workable for a novice, so it’s really a board for hackers at the moment.
